VMworld – Day 2

So we are now into day 2. My feet hurt.

Its been an interesting day. Firstly the EMC takeover by Dell has overshadowed much of the conversations. I’m not really sure what to make of it and how it will affect VMware.

I took it easy on the drinks at the vExpert party so it wasn’t too bad to get up and into the center. Transport to and from the conference center is easy enough for me so, the journey being only 5 minutes door to door.

Session: Keynote.

Speaker: Various

Nobody really expected Pat Gelsinger to make an appearance as it was very clear he was still working on the EMC deal. There was a video from Micheal Dell which tried to sooth VMware’s customer fears. The big take away for me was a drive to containers, and cloud. Project Photon got a mention as did the new buzz term, “Cloud Native Apps”

A few people complained about the keynote not really having anything revolutionary. Well that is to be expected between major releases. Last year saw the announcement of vsphere 6.0 and a few other projects. This year felt more about encouraging customers to explore those and see if they would be a fit for their business.Keynote

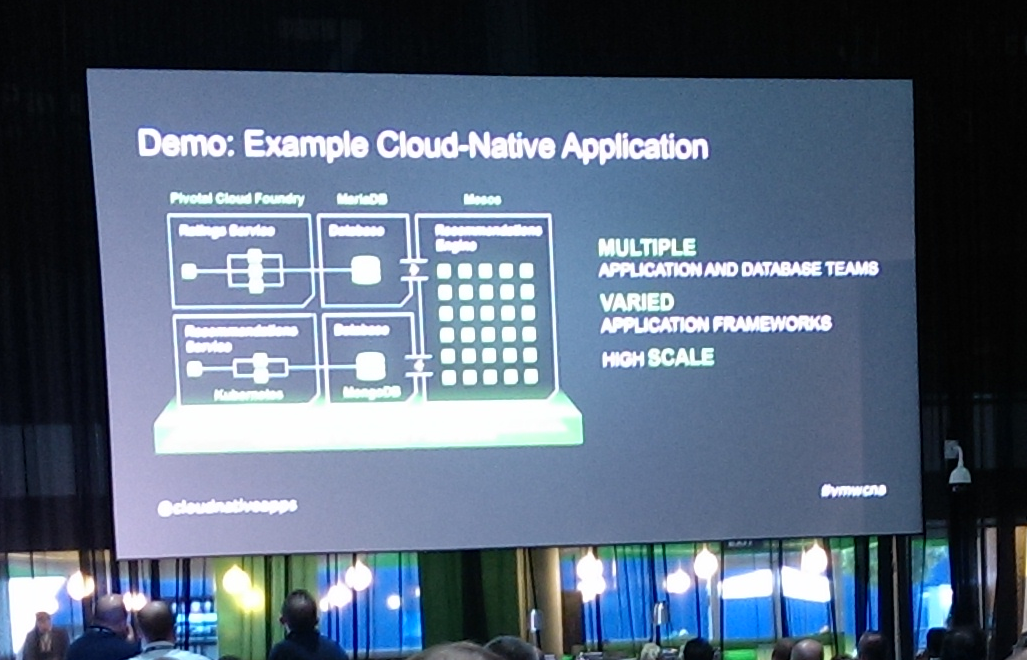
Session: The New vRealize Converged Blueprints.

Speakers: Kal De and Raghavendra Rachamadugu

This was interesting for me. Kal and Rag are very obviously knowledgable about their vRealize and gave a killer demo. unfortunately some speaker prompts were missed in the demo and there were a few silences while the mouse whizzed around the screen without an explanation. Still a successful presentation and, for me, showcased the power of blueprints.Session1

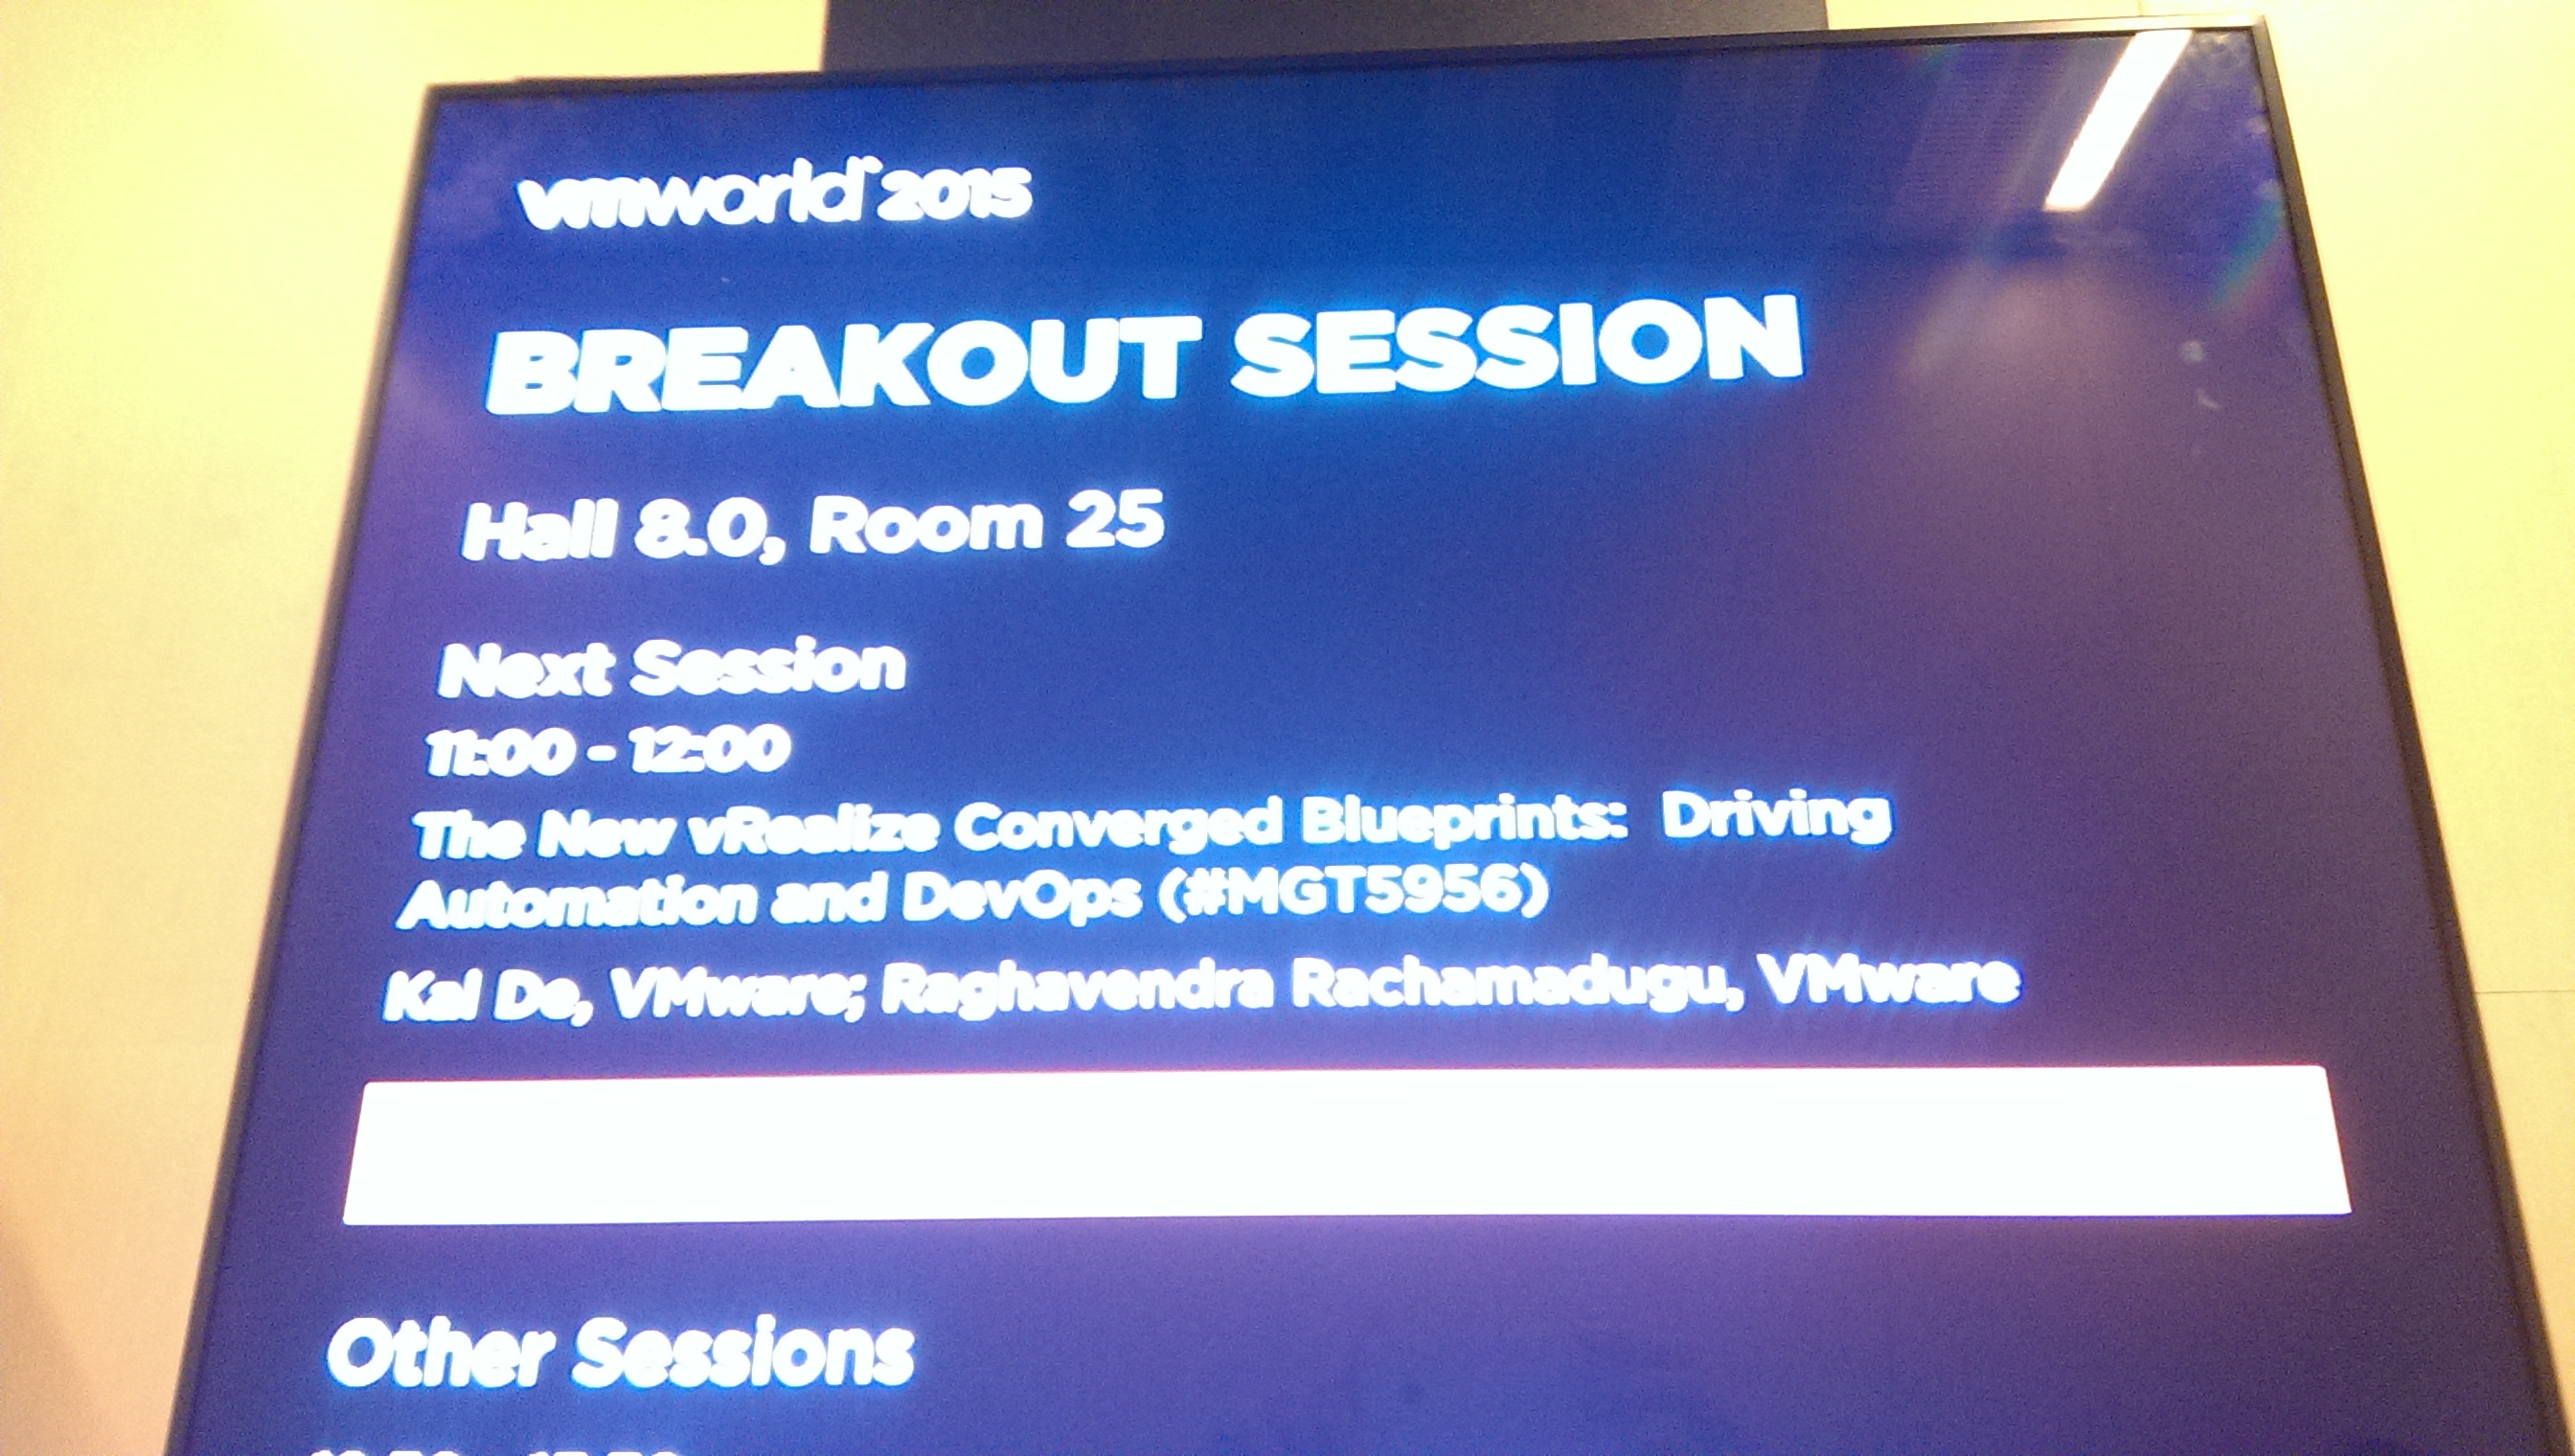
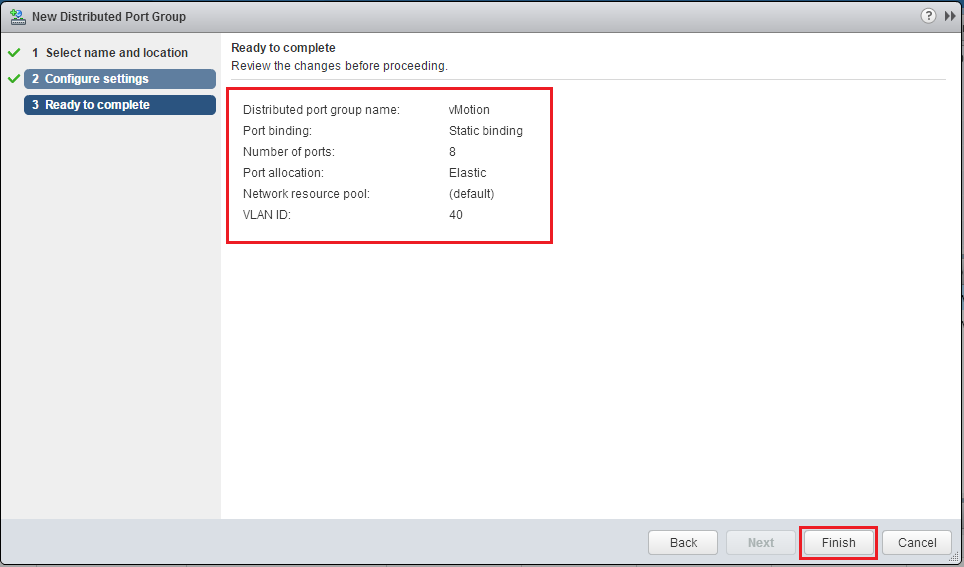
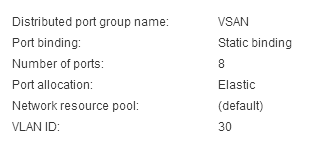
Session: VSAN Pioneer Summit

Speakers: Parag Patel, Christian Dickmann

Very interesting discussions about the future of VSAN and some great comments from other VSAN customers.

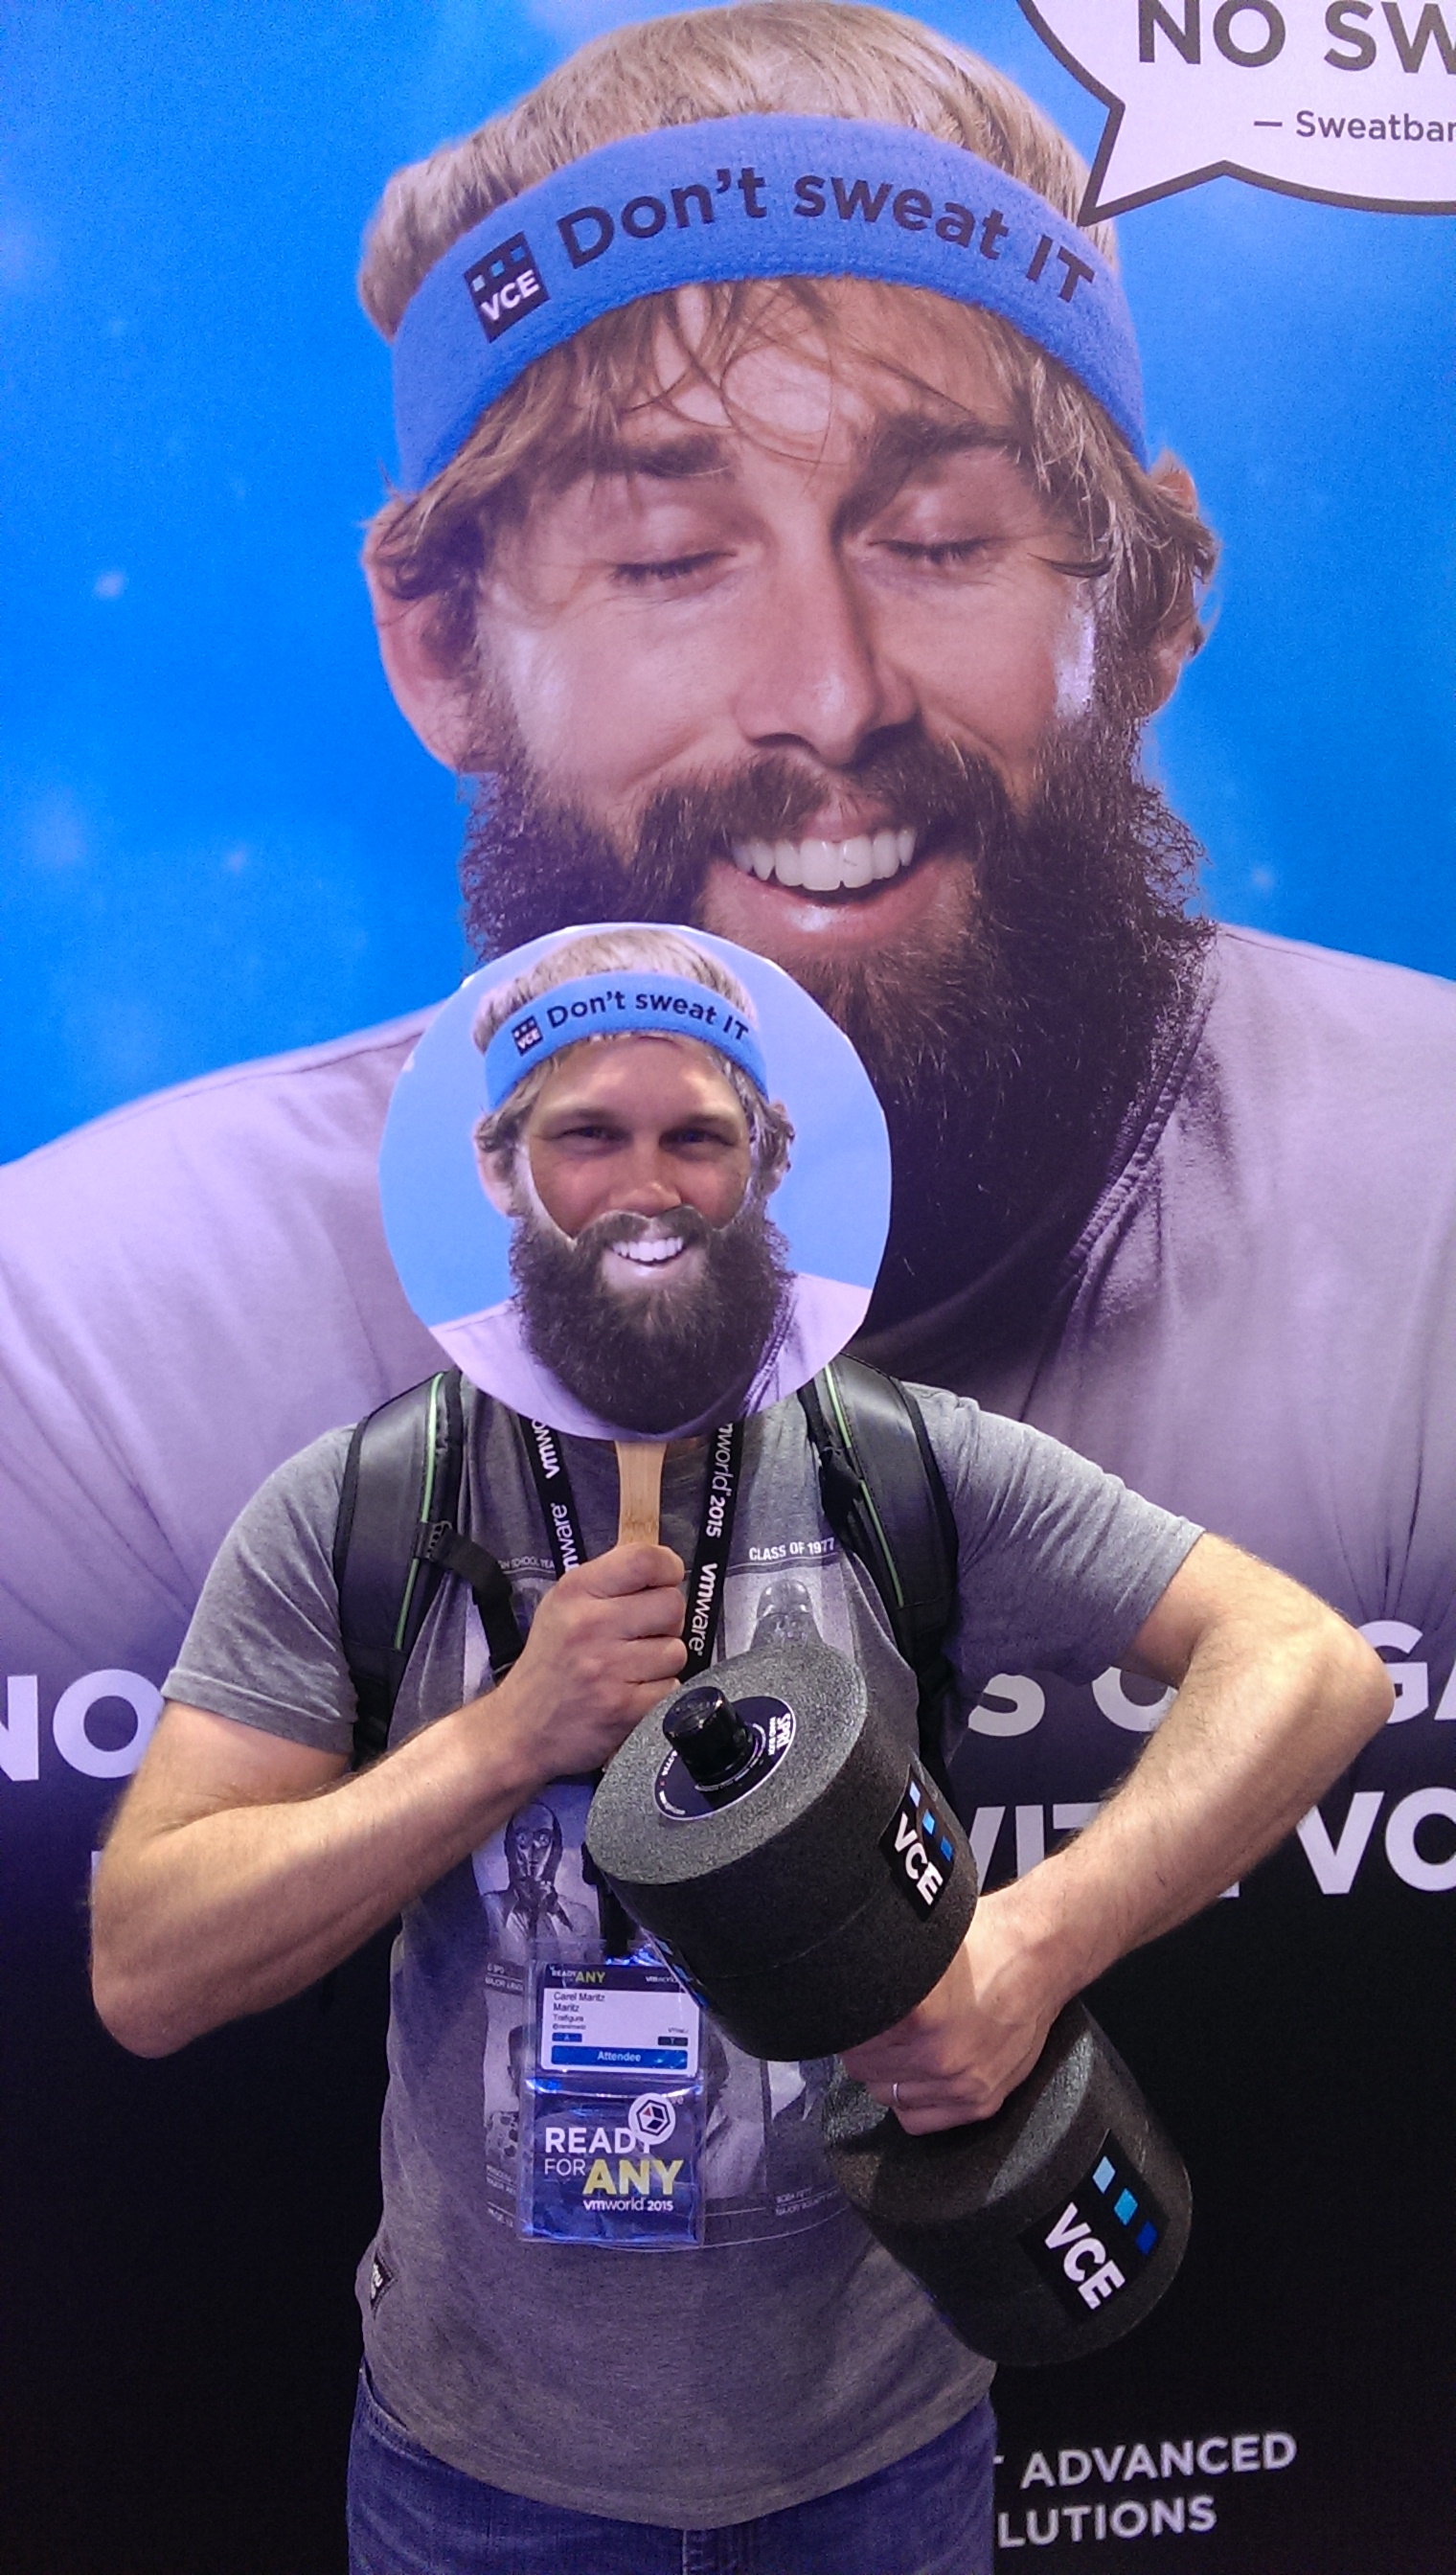
Time: Exploring the partner exchange

Lots of different vendors, old and new. EMC, Dell, Fijutsu, Netapp very large players as usual. Also some of the smaller ones too, HGST, SUSE. I got my vExpert hoodie, Thanks Simplivity.

2015-10-13 14.09.43

In the evening I met up with Dimos and headed to the Europe customer party at bestial. Beautiful venue.

2015-10-14 07.16.21

VSAN is fast becoming a passion of mine and its a big focus for me at the conference this time. I thing that this is has the potential to be the most disruptive tech in the last few years, bigger than NSX IMHO. I’ll also be looking into vRealize and View while I’m here.

My feet still hurt.


VMworld – the first 24 hours (Day1)

Its been much busier for me this year than previous years. From vRockstar to vExpert.

After arriving yesterday, dropping my bags at my sister-in-laws, I headed out to the vRockstar party at the hardrock Cafe. It was a lot of fun. I ran into Eric sloop of ntpro.nl fame. Really nice friendly guy, actually that’s one thing I can say about the VMware community leaders, all really friendly and easy to talk to. Also caught up with Chris Dearden and the ever charismatic Mike Laverick. I manged to get out of there at about 23:30.

2015-10-11 23.25.35 vRockstar1


Waking up the next morning was a bit of a challenge. I did manage to make it to the conference center for 08:30 though to get a couple of labs in before the TAM day started. The Labs were top-notch as always. A slight lag, but it was a good experience over all. Word of advice though, best bring your own laptop if you can as it got filled to capacity very, quickly.2015-10-12 09.56.00

I manged to get two sessions in and one meet the vexperts today:

Session: Ask the Experts Lunch

This was quite a lot of fun. There were about 18 tables, each with a subject matter expert. This allowed you to hop tables and speak to the various experts about almost anything. Managed to talk about storage, cloud aware apps, EVO:RAIL and a couple of others. One thing that stood out was the enthusiasm of the experts for their technology.

Session: Streamlining Data Center Operations, Real World Experience.

Speaker: Colin Fernandes.

This session got off to a bit of a slow start in my opinion but was very useful. The speaker undoubtably knows his stuff. There was a big focus on Log insight. All but one of the real world example were very relevant, the one that stood out was the German health care provider who has a setup on the smaller side with about 250 VM’s but support 1000’s of mobile devices which has enabled them to make their doctors more productive. The session really showed the need for effective monitoring and log analysis.

The question asked was what is Operations really? Colin broke it down to Health/Risk/Consumption/Capacity.

Session: Workplace Transformation Through EUC Transformation.

Speaker: Brian Gammage.

The session was called as a quick talk and dealt mostly with strategy. Look at where you are and where you want to be. When putting together with a strategic vision you need to put in place flexibility. The landscape is constantly shifting and your vision needs to move with that. He gave the example of how long the different generation spend in their jobs. I have been in my current position for 7 years. This is considered a long time for my generation. Will my children even have the concept of a permanent job?

Evening Event: vExpert Reception

And finally the day was finished off with the vExpert reception at the Elephant restaurant and bar. Met some really interesting people: Zlatko Mitev and Thomas Findelkind to name a couple.

I also visited the vGiveback stand with my work college Dimos.

vGiveback

So that’s the first 24 hours. Tuesday looks to be a busy day indeed.


Nested Home Lab – Part 13 – Creating VMkernel Ports

For all of this to work we need to get a couple of VMkernel network interfaces created per ESX host. This will give us vMotions and for VSAN connectivity. To delve more into VSAN I would highly recommend that you pick up a copy of Essential Virtual SAN by Duncan Epping and Cormac Hogan.

  1. Log in using an account that has permission to configure the environment.Lic-1
  2. Select Home and Hosts and ClustersAH-1
  3. Click on networking icon, right click  the Distributed Switch, Click Add and Manage Hosts…H_Sw_01
  4. Select Add Hosts, Select  Next.H_Sw_02
  5. Click New Hosts…H_Sw_03
  6. Select the Hosts you want to add to the Distributed Switch, Select OK,  and select Next.H_Sw_04
  7. Make sure Manage physical adapters and Manage VMkernel adapters are selected. Click Next.H_Sw_05
  8. Select the first vmnic you want to add to the dswitch and click Assign uplink.
    H_Sw_06
  9. Select Uplink 1. Click OK. Repeat for all remaining vmnics.H_Sw_07
  10.  Once you have added all your vmnic to their uplinks it should look similar to the below picture. Click Next.H_Sw_08
  11. The next following steps will be about adding in the vmkernel network adapters and will show you how to add in one adapter. You will need to go through and add two adapters to each host; 1 for vMotion and one for VSAN. Click New Adapter.H_Sw_09
  12. Click Browse.H_Sw_10
  13. We’ll be adding a vMotion port group, so select vMotion and click, OK.H_Sw_11
  14. Select Next.H_Sw_12
  15. Select vMotion Traffic. Leave the rest as defaults and click Next.
    H_Sw_13
  16. Select Use Static IPv4 Settings and enter in the network details. Select Next.
  17. check all the details are correct and select finish.H_Sw_15
  18. Go back to step 11 and add vMotion vmknics and VSAN vmknics to all your hosts. If you’ve been following the previous posts/docs, once you’ve finished it should look like the below.H_Sw_16
  19. Select Next.H_Sw_17
  20. Check the details and Select Next.H_Sw_18
    vSphere will go off and add your hosts the the dswitch and create vmknics for VSAN and vMotion.
    So where are we now? We have one more step to go before enabling VSAN.

Nested Home Lab – Part 12 – Distributed Virtual Switch

As we discussed in Part 2, for our basic lab, we wanted to separate out the networking  in to three parts:

Use Example IP Range
VM and Management 192.168.0.0
VSAN (vlan 30) 192.168.100.0
vMotion (vlan 40) 192.168.110.0

We have already set-up our physical host’s network in preparation to create our distributed switch.

So what we are looking to do here is create our distributed switch, create the port groups (tag them), and add our VMkernel interfaces. Easy Right?

Creating a Distributed Switch

  1. Log in using an account that has permission to configure the environment.Lic-1
  2. Select Home and Hosts and Clusters.AH-1
  3. Click on networking icon, right click on your Datacenter, Select Distributed Switch, Click New Distributed Switch.
    DS-2
  4. Enter in a name for your new switch. Click Next.DS-3
  5. Select Distributed Switch: 6.0.0.  Click Next.
    DS-4
  6. Set the number of uplinks to 2 and un-tick create a default port group. Select Next.DS-5
  7. Check that our setting are correct and select FinishDS-6

And thats the switch created.

Adding your port groups

We’re going to be creating two port groups, vMotion with a VLAN tag of 40, and VSAN with a VLAN tag of 30.

  1. Right click on the Distributed Switch. Select Distributed Port Group. Select New Distributed Group…
    DS-7
  2. Give the port group a name. In this case vMotion. Select Next.DS-8
  3. Set VLAN type to VLAN and the VLAN ID to 40. Leave all the other options as defaults.
    DS-9
  4. Double check the settings you specified are correct and click Next.DS-10
  5. Go back and create a Virtual SAN VLAN, but with a VLAN tag of 30.DS-11
  6. You should now have a vSwitch that looks like this:DS-12

For a basic lab, as we are creating, the networking is quite simple. However virtual networking has come a very long way and with the introduction of NSX it is now effecting the whole data centre. I would recommend you read Networking for VMware Administrators by Chris Wahl and Steven Pantol. While the book doesn’t cover NSX (understandable as its a whole discipline in itself) it is very good and I would highly recommend it. 

Nested Home Lab – Part 11 – Clusters and hosts

Short post today.
In this post we will create a new cluster. Once that’s done you can add the hosts using the steps outlined in Part 7.

1. Log in using an account that has permission to configure the environment.

2. Select Home and Hosts and Clusters.

3. Right click the datacenter we created in Part 7 and select New Cluster.

4. Give the cluster a name. In this case I have user Site1. Leave the other settings off or on Default and click OK.

5. You should now have a new Cluster called Site1.

You can now follow the same steps from Part 7 that we used to add our primary host.

Nexenta – File Services for VSAN

Where I work we are heavily invested in NetApp and 3PAR. Software vendors that also make the hardware for their software to run on. For a large organisation its attractive, one number to dial when SHTF. However with the rise of software defined everything, we are seeing a shift away from that. VMware, clearly one of the market leaders in the software defined space brought out VSAN, and I really, really, like it. Its evolving very fast to meet customer requirements. Support for all flash, stretched clustering, and ROBO set-ups (which I’m really interested in) to name a few. However missing in this mix of awesomeness is file sharing. If Software defined storage is really to take on the big players it needs to really offer more than a place to put virtual disks. Sure you can run a file server VM but that adds an extra layer of complexity. Where’s the integration?

nexenta_logoIn comes Nexenta with NexentaConnect for VMware Virtual SAN.  Now Nexenta has been on the edges of my radar for a while. I knew they were heavily focused on storage, software defined storage to be exact, but I’d never really looked any deeper. My big focus for the last year has been to push VSAN into the company I work for. I could see the cost savings, the ease of use. In the end, after a successful POC, it was a combination of the two that sold it. During the next two to three years it could save the company a huge amount of money.

Back to Nexenta: NexentaConnect has me very interested. Time to get it in the home Lab.

So having worked with it over the weekend, I have made the following (preliminary) observations:

  1. It does what is says on the tin.
  2. Its very strict with its requirements (I tried to cheat and it failed).
  3. Installing the plugin is a manual task, which some Admins might not like.
  4. The whole process of deploying the first OVA’s to having my first shared volume took just less than an hour.

Once you need the minimum requirements, its quite easy to get going with NexentaConnect and its also easy to pull out if you no longer require it.

There are three main components: The vCenter plugin, the connect manager, and the IO engine. The vCenter plugin is very well integrated and fronts the connect manager, which in turn controls the IO engine. The IO engine is a Virtual Storage Appliance (VSA) that gets deployed into your VSAN cluster..

When you create you first share, whether it be NFS or SMB, an IO engine is deployed to the VSAN datastore. I found deployment of the IO engine to be very fast in my LAB. You can also apply different pre-created VSAN storage policies to each share. Once the IO engine was deployed adding additional share was even faster.

As I don’t currently have a full physical lab, I couldn’t in good conscience do any real performance testing, but it was very quick even in a nested virtual environment.

This product will really shine in smaller shops, which are often overlooked, or ROBO offices. VSAN coupled with a product like this could help a smaller business through the awkward period of transitioning from a small to medium business and at that stage why take it out? That’s not to say that larger organisations shouldn’t take a look and implement if it fits their strategy.

The product as a whole is very interesting and I really do like it. There have been several write ups and youtube videos from several big bloggers detailing various bits of the set-up. Cormac Hogan did a great write-up here and so has Rawlinson Rivera of Punching Clouds.

Its great to see real innovation like this coming from the industry and I highly recommend heading over to Nexenta’s website and take a look.

Nested Home Lab – Part 10 – Initial Host Network Config

In today’s post we’ll look at configuring the first networking for your host.  
1.      Open up a console to your first nested ESXi Host and press F2 to start the login
2.       Login with username root and the password you defined when you were installing the host.
3.       Scroll down to Configure Management Network and press enter

4.       Scroll down to IPv4 Configuration and press enter.
5.       Enter in the IP address details that you have assigned for this host and press enter.
6.       Scroll down to DNS Configuration and press enter.
7.       Enter in the DNS details that you have assigned and enter in the FQDN and press enter.
8.       Back on the Configure Management Network page press Esc to accept the changes
9.       Press Y to accept the changes.
10.   It’ll take a few seconds but once its reconfigured you should be able to ping the host.

Now you need to configure the other two hosts.

vExpert 2015

vExpert-2015-Badge

This morning I woke up to find out that I have been awarded the vExpert Status for 2015. I did come across this information at 6 am and had to double check to make sure.

For me its a really great honour and something I’ve wanted for a while.

Before i sign off I want to say thank you to the vExpert team for assigning this award to me and congratulations to all the new vExperts out there.

I guess the next thing is to make sure I keep it in the 2016 nominations.

Brief interlude… VCAP5-DCD

Its been  about a month since I last posted here, I’ve been busy studying for the VCAP5-DCD and been on holiday.
About four months ago I decided to give it another go. Having tried the 5.1 DCD exam previously and failed, i had a clear idea of the amount of work involved. I didn’t really want to wait for the VCIX exams to be released as I wanted the option of going for the VCDX5 in early 2016.
The first thing I did was go to Google and read all the reviews of the exam I could find. A common theme amongst all the posts was make the blueprint your bible, and it’s true. In there you will find exactly what you need to know. Read it from cover to cover, then read it again.
Its a tough exam. Really tough. I’m not going to rehash what other (more capable) bloggers have covered about the exam suffice to say that I finished with about 20 minutes to spare, took a couple of deep breaths and went through the questions again. This was a huge help as I tweaked one of my designs and saw a glaring error in one of the drag-and-drop questions.

Resources I used:

Tips for the Exam:

  • Read the questions twice. Everything you need to complete the required task will be in the question.
  • Eat and drink before the exam. I get cranky when I’m hungry. Be aware that if you need to go to the toilet the exam timer doesn’t stop.
  • If something is taking a long time, flag it for review and move on.
  • Make sure you understand the below (it is a design exam after all).
    • Requirements (both functional and non-functional)
    • Risks
    • Constraints
    • Assumptions
  • Make sure you know the differences between conceptual, logical, and physical designs.
  • Get to the test centre a few minutes early and try to relax, difficult I know but try.
Passing is a great feeling. Don’t worry if you don’t get it on your first try, its annoying and expensive, but treat it as a learning experience.
Oh and remember, organise your time, both for study and during the exam.

Nested Home Lab – Part 9 – Deploying a Nested ESXi Host

Carrying on with our VSAN enabled nested environment, we’ll be deploying our new hosts using the VCSA and the web client and not the C# client. Reason? Well we will be setting specific parameters for the vCPU to pass through the virtualization extensions. otherwise we will need to do this by editing the VMX file.
 
Now that we have the networking in place that we configured in the previous post we’ll go on to deploy three ESXi VM’s.
 
Each host should have the following spec:
  • 2 X CPU or cores (Min requirement for ESXi)
  • 6GB Ram (Min requirement for VSAN)
  • 2 X Nics on the VM Network
  • 2 X Nics of the LAN Network
  • 1 X 10g HDD disk (ESXi install)
  • 1 X SSD disk for the caching tier.
  • 1 X HDD for data Tier.


The VSAN disk configuration of my nested ESXi servers is:
 
  • 1 X 40GB SSD
  • 1 X 100GB HDD
This configuration worked for me ask I was able to run a couple of smaller VM’s in my nested environment. I was also able to add a second 100GB HDD to continue to test VSAN functionality, such as striping and disk policies.
 

Installing a nested ESXi host.

1.   Log in using an account that has permission to configure the environment.
 

 2.  Select Home and the Hosts and Clusters

 
3.   Select the Hosts and Clusters icon and then select your primary host, right click and Select New Virtual Machine and New Virtual Machine.

4.   Select the Create New Virtual Machine and Click Next.

5.   Give the Virtual Machine a name and select the Datacenter we created in Part 7 and Click Next.

6. Select your physical host for the Compute Resource and Click Next.

6. Select the disk you want to run the ESXi host on and Click Next. If you have both a SSD and a HDD look to put the primary disk on the HDD. Once ESXi boots it runs mostly in memory.

7. Select Compatable With: ESXi 6.0 and later and Click Next.


7. Guest OS Family set to Other and Guest OS Version: Version ESXi 6.x and Click Next.

8. Ok so a fair bit to do here:
8.1. Set the VM to have two cores and one CPU. This will save on licensing if you have a VMUG advantage subscription. In addition you need to tick the Hardware Virtualization check box to pass through the additional virtualization features of the CPU. If you don’t you’ll get an error during install.
8.2. 6 GB Ram as the minimum supported with VSAN enabled nodes.
8.3. Your first HDD reduce to 10GB
8.4. Add three additional Nic’s. Set them in this order. NIC 1 and NIC2 on the VM Network, NIC 3 and NIC4 on the LAN Network. Ensure that you set you NIC type to VMXNET3.
8.5. Add two disks. One SSD and One HDD. The SSD can be small,10GB, if required. and the HDD should be at least 50GB. If you don’t have an SSD, have a look at the end of this post and I’ll include a link to instructions which will show you how to “fool” ESXi into thinking you have a SSD when you don’t.
8.6. Add the ESXi ISO to the new CD/DVD Drive, check the Connect Check box.
8.6. Click Next,

9. Review your changes and click Next.


A brief pause here to look at what we’ve built. One ESXi VM with the components necessary for to to be a part of a VSAN cluster. 

10. Power on the VM. Right Click the VM and select Power On.

11. Open a console to the VM. (Click Launch Remote Console).

12. Boot Strapping and kernel goodness loading

11. More goodness

12. Press Enter

13. Press F11

14. Select the small 10GB disk (not the SSD).

15. Choose your keyboard type and press Enter.

16. Enter in your root password and confirm.

17. Scanning

18.1 This error will appear if you have not set the Hardware Virtualization Flag in the CPU settings of the VM and you’ll need to go back and set it.

 18.2 Example of the Settings.

19. Press F11.

20. Installing.


21. Press Enter 

22. VM rebooting.

There we go one working ESXi VM. Now we are going to need another two of these to make up the three minimum required for VSAN.
To mark a disk as SSD; This is one way to do it and this is another I’ve tried both methods and they work. I personally prefer William Lam’s method.