So you’ve done your POC, your solution has passed all the tests required by the company, you’ve put together your final design document (a hearty 95 pages) and managed to navigate the frustrating world of board level approval.
Now what? Well you begin to work with the other engineers, from other disciplines, and build, build, build. They’ve read your design document and are eager to get to work. The only problem is that this isn’t the only project they are working on, every time they need to do something they need to dip into your 95 pages of awesome design, or bring it up in the next project meeting. Infact maybe its just easier to just call you… right when you are in the middle of figuring out why the output from the powercli script you have been working on all day is showing a sea of red.
This happens to every VMware engineer.
What I have found helps is to create cheat sheets for the technical members of the project. It’s very visual and contains most of the info that they will need. It’s important to note that this isn’t the design document but should be supplementary to any project documentation.
- Ex. Page 1 – Summary
- Brief overview of what going in.
- Physical Dependancies
- Ex. Page 2 – Hypervizor details
- Hardware config
- Firmware revisions
- Host Configuration
- OS + version, License, NTP, DNS, basic networking, Cluster config
- Virtual Infrastructure Config
- VM Standards (hardware version, pvSCSI, vmxnet3, etc,etc
- VCSA – Size, version, location
- PSC – Size, version, location
- VUM – OS, Version, ;location, Database type
- Database for VUM – OS, DB type, verison, name, location
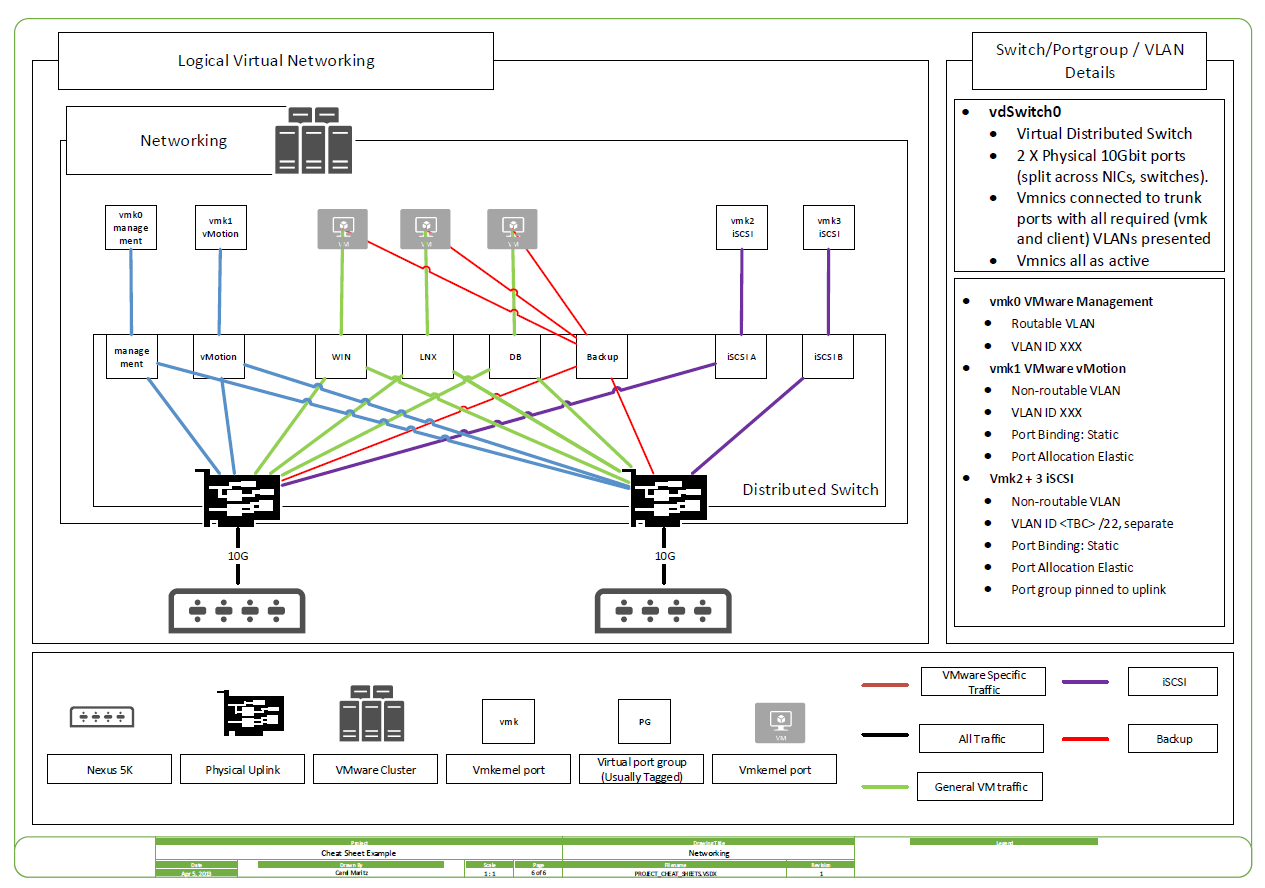
- Ex. Page 3 – Core Virtual Networking
- Diagram – How it all fits together
The 3 examples I have given below are from different projects but will show you what I usually put in.
Example Page 1 – Summary.
This page is your summary. It has some light technical bits that can quickly be referenced. The overview pane is what’s being put in. You could possibly add a sub section about the OS. No real need to put version numbers in here.

Example Page 2 – VMware Specific
This page is hold details for Ops and the VMware team. With this information you could reasonably expect an engineer or OPs to build out your cluster at the basest level.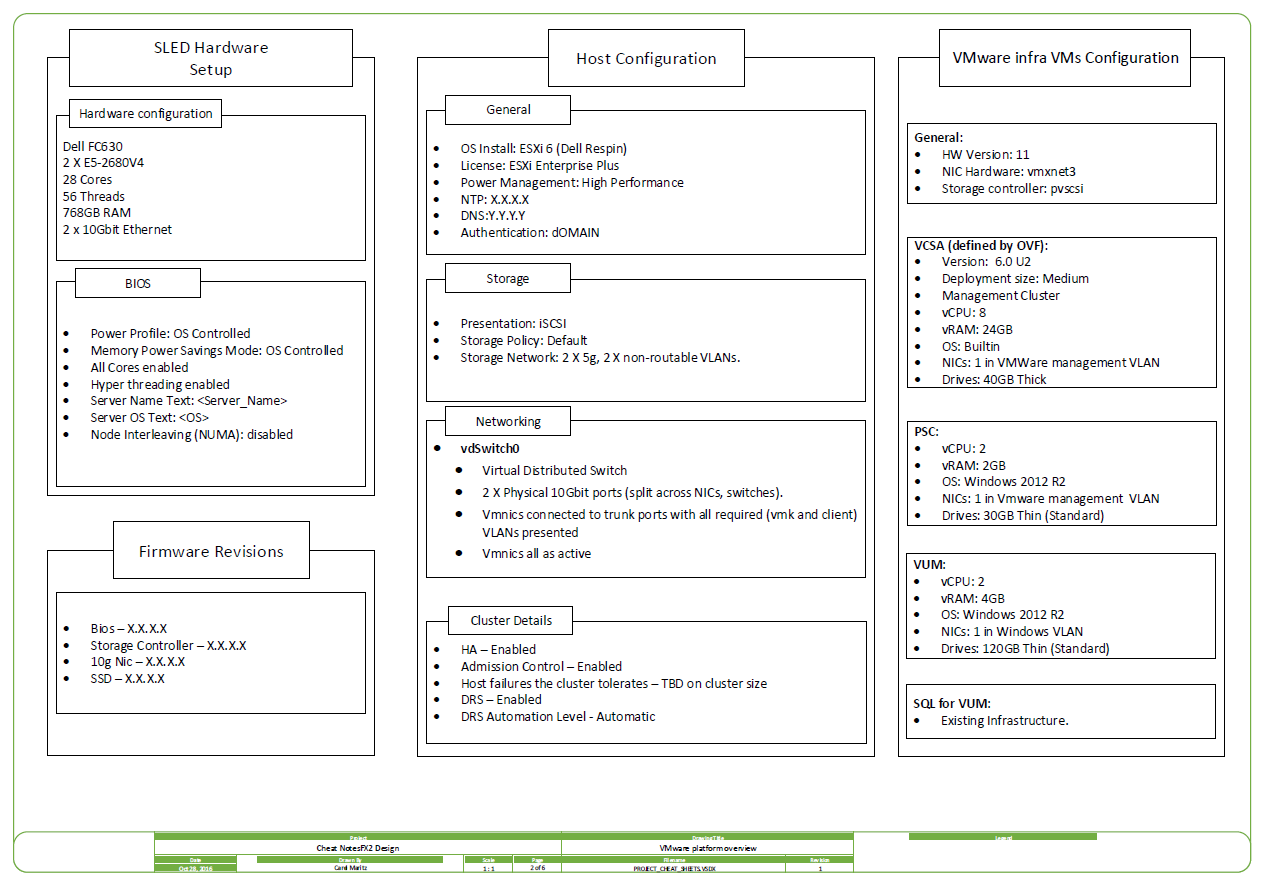
Page 3 – Virtual Networking
Very visual. So here, which I haven’t done, you could supply additional info about active and standby paths, any additional info for any NOIC specific settings you have chosen.
The above examples should give you an idea of how they could look and are by no means an exhaustive list. You could add a rack diagram, storage config, etc,etc.
The point is for these documents is to be quick reference pages highlighting the decisions made. I hope the idea helps you, its certainly a help to me.