UKVMUG USER/CON 2019 – Space the final frontier.

This is an event I look forward to all year and once again it didn’t disappoint.
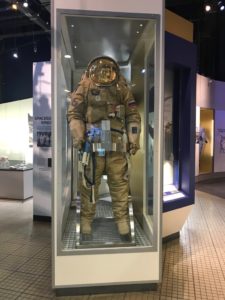
This was the second year at the National Space Centre in Leicester, which saw me getting up at 5:30 am to take a couple of trains, and one bus to arrive there on time. Totally worth the journey. This year the UK VMUG was a couple of weeks earlier than last year.

This venue is about the right size for this event and the whole space theme lends a bit of novelty to the proceedings. I’m still surprised after all these years that this event is free.
As is becoming tradition Joe Baguley gave the opening keynote. He went into a fair bit of detail about AI and the various misconceptions between (what is commonly thought of as AI), machine learning, deep learning, and data analytics which was very interesting. The closing keynote was given by Dr Anu Ojha, but more about that later.

There was a great collection of vendors there. Lots of very interesting tech on show, including some old favourites like Veeam, Zenoss, HP, and Google Cloud. (to name a few).

My Favourite Sessions, in no particular order.

There is always a good selection of sessions and the first one I attended was given by Ed Gummett of Veeam. I’m a big fan of Veeam Backup and Replication and was looking forward to finding out whats new. The discussion revolved around cloud and how Veeam has grown its products to take advantage of that. Of particular interest was the new features coming in version 10.

From there I went across to “VMware: What’s new in VMware End User Computing” presented by Darren Hirons. Much of the talk was about the new features in Workspace One, Horizon Cloud, and a bit about App Volumes 4. If you are into EUC take a look over at VMware’s EUC Blog here. After the lecture I went up to present Darren with a bunch of questions i had about the upcoming App Volumes 4.0.

After lunch and walk around the centre, I attended “VMware: NSX-T Container Level Networking & Security” by Joshua Coulling. This talk actually surprised me quite a bit. I though it would be quite dry but in actual fact I found it interesting how NSX and containers can work together as well as gaining a better understanding of kubernetes as a whole. Joshua clearly know his stuff and was happy to answer my “no-so-bright” questions when I went up to meet him after the talk.

Closing Keynote.

This was so unexpected and absolutely fascinating. The closing keynote was given by Professor Anu Ojha. He took us through current space exploration, the benefits of investing in space technology and research (which provides quite a good financial return) and its practical applications. There is a push to invest more, including returning to the moon in 2024 and further out, a manned mission to mars. the talk was about 45 minutes long and I just sat there in completely mesmerised at how incredible “space science” really is.

And that wrapped up another really great UK VMUG.

As always I came away with a bunch of new information, both from vendors and VMware itself. It can be nicer to be in these smaller venues as I find it easier to approach the speakers after the talks and take up a bit of their time with questions.

If you haven’t been before, what are you waiting for?
How to setup Dynamic Environment Manager – Setting up the config share

The first step we need to take on the road to DEM domination is to get the share setup. This will hold the configuration files that the agent will read to apply to the desktop. Once the share is setup you install the DEM manager and point it at the share, at which point it will create the initial directory structure, if it isn’t already there.OK

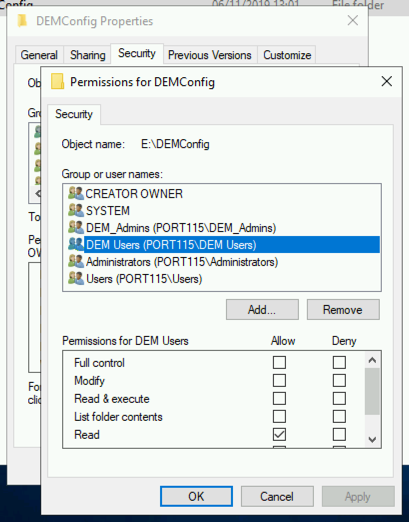
There are two types of permissions we need to address. Share permissions and security permissions. Thankfully in this case we’ll set the same for both. The DEM admins will need full control and DEM users will need read only. I’d consider it best practice to create separate AD groups called DEM admins and DEM Users.

Creating and configuring the DEM Share.

  1. Connect to your file server. When testing this out in my lab I just created a share on my DC, but in a prod environment you’ll want to get this setup on a dedicated file server.
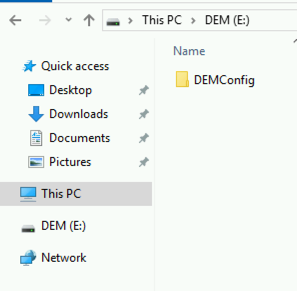
  2. Create a folder. In my case I called it DEMConfig.
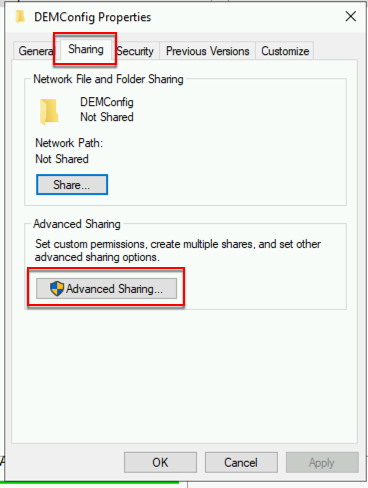
  3. Right click on the folder and select properties. Select the tab labeled Sharing and click Advanced Sharing.
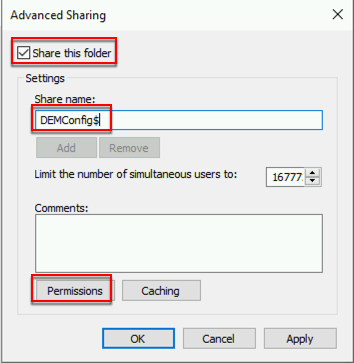
  4. In the Advnced Sharing window check “Share this folder”. If you add a $ sign to the end of your folder name it becomes hidden from casual browsing. Click Permissions.
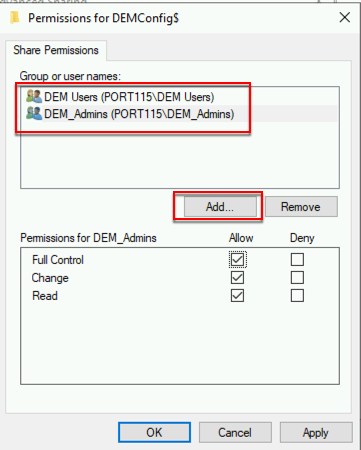
  5. Select Everybody and click Remove. Click Add and add your DEM user and Admin groups. The DEM Users should only have read and the DEM Admins should have full control. Click OK. Click OK.
  6. Back in the Properties windows select the Security tab and click Edit. Add the DEM user and administrators.  The DEM Users should only have read and the DEM Admins should have full control. Click OK. Click OK.

Now we’ve created the share it’s on to installing the management console and putting together the first XML file for noAD mode.


How to setup Dynamic Environment Manager – Intro

[Edit – 31/10/19 – Updated for Dynamic Environment Manager]

In the next few posts wel’ll look at setting up Dynamic Environt Manager. User Environment Manager or Dynamic Envirnment Manager as its now called is a very powerful tool for EUC. It gives admins a very flexable way to configure desktops without needing to work the base image. VMware are pushing it as a replacement for Persona Manager, which makes sense as then they do not need to support two products. Persona manager can be configured to use physical as well as virtual desktops.

DEM can have its initial config delivered through GPO or, in the case of noAD mode, an XML file. Infact all configuration is pickedup via XML files. The management dashboard is a local install of a few hundred MB which you point at the file share, and really only makes sure the formatiing is correct. All the hardwork is done via the agent. There is an argument to be had about whether or not to have some of the desired config baked into your parent images. I prefer to have as much of the the config delivered via DEM as possible to prevent any more recomposes than nessesary.

I particuarily like the fact that this product does not need a server backend and can run without the need for active directory GPO’s. Infact to get up and running there are only 4 things to setup.

  1. File share and correct permissions
  2. The Managment interface
  3. The various customisations you’d like
  4. And (obviously) the agent on the parent image (or physical machines

The next post will look at getting the file share setup.


Horizon View – How to add a second Connection server (Replica server)

Looking at the design from the previous post we want to have a degree of redundancy and to do that we’ll need a second Connection server also known as a replica server.

We’ve already built our first connection server here and done some configuration here and some certificate stuff here.

Continuing on I’ll be using Horizon View 7.7, it is the latest and greatest (at the time of writing). I did redeploy my lab with 7.7, and the previous posts are still relevant if you’d like to back and inst all your own lab.

Before we begin make sure you have a Windows 2018 or 2019 server ready to go with a certificate installed.

Installing the 2nd Horizon View Connection server (Replica Server).

  1. Connect to the server you will be using as your Replica server.
  2. Copy across the installer and double click to run.
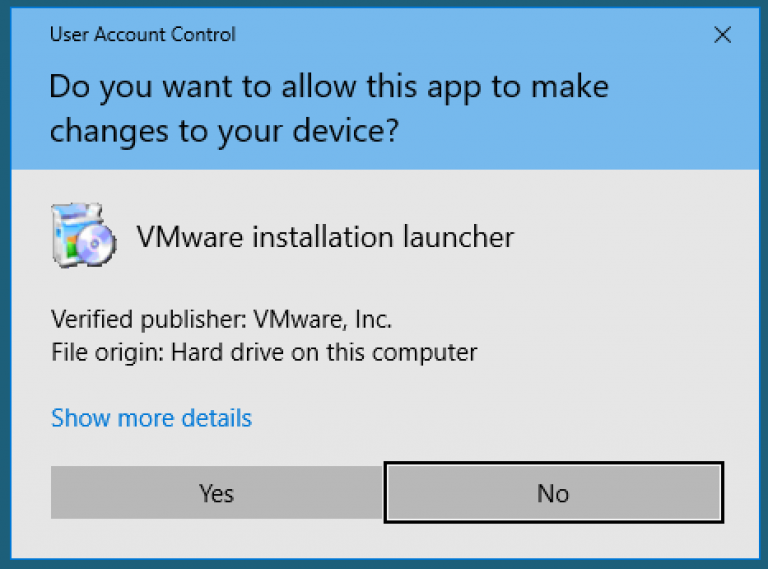
  3. Click Yes. To accept the UAC warning.
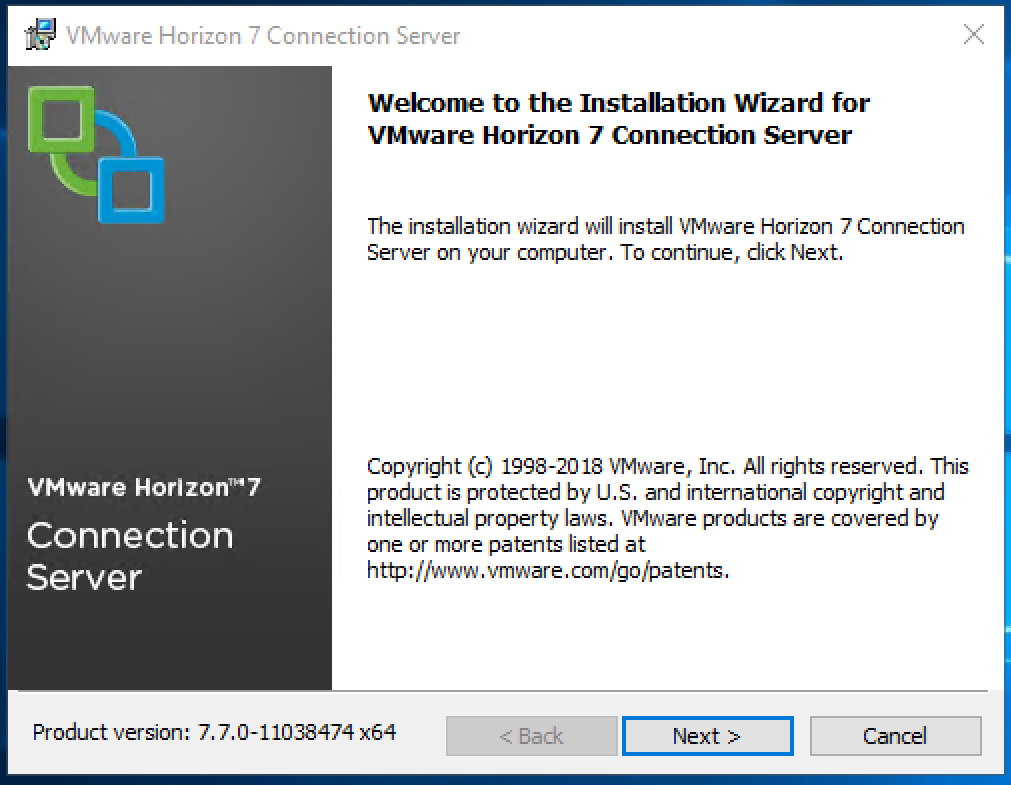
  4. Click Next.
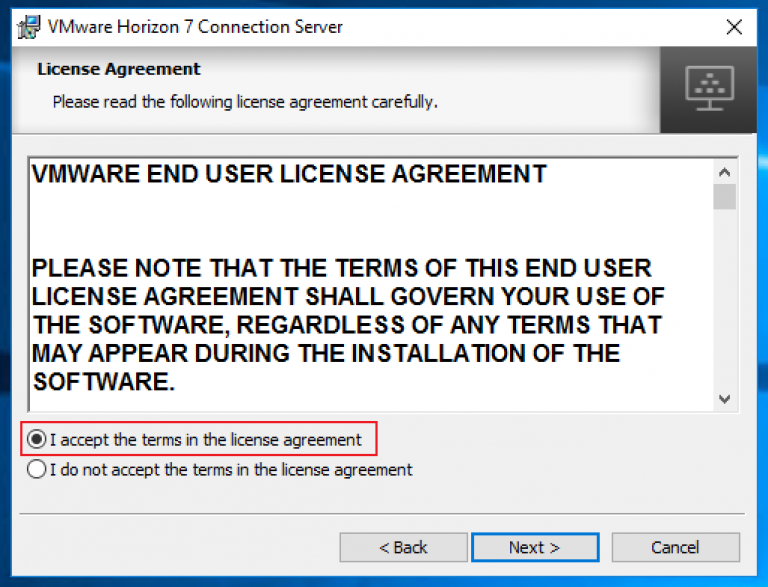
  5. Select “I accept the terms in the license agreement” and click Next.
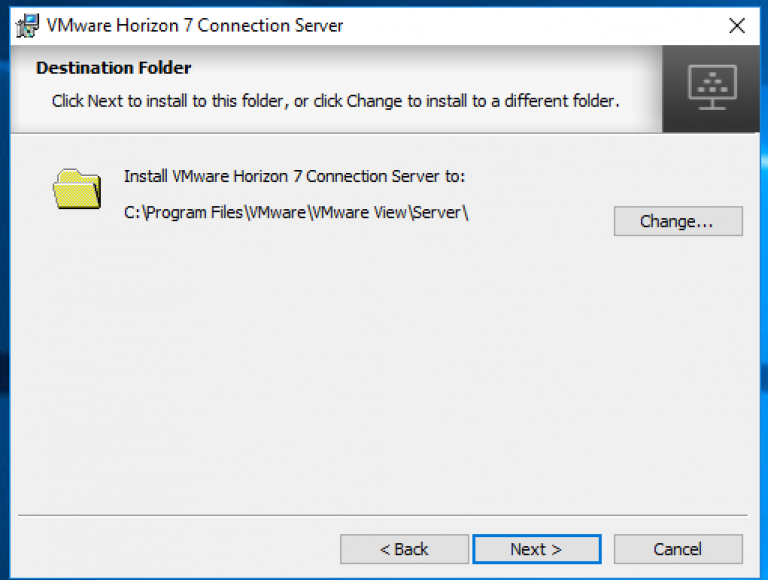
  6. Here you can change the installation location if you prefer. Click Next.
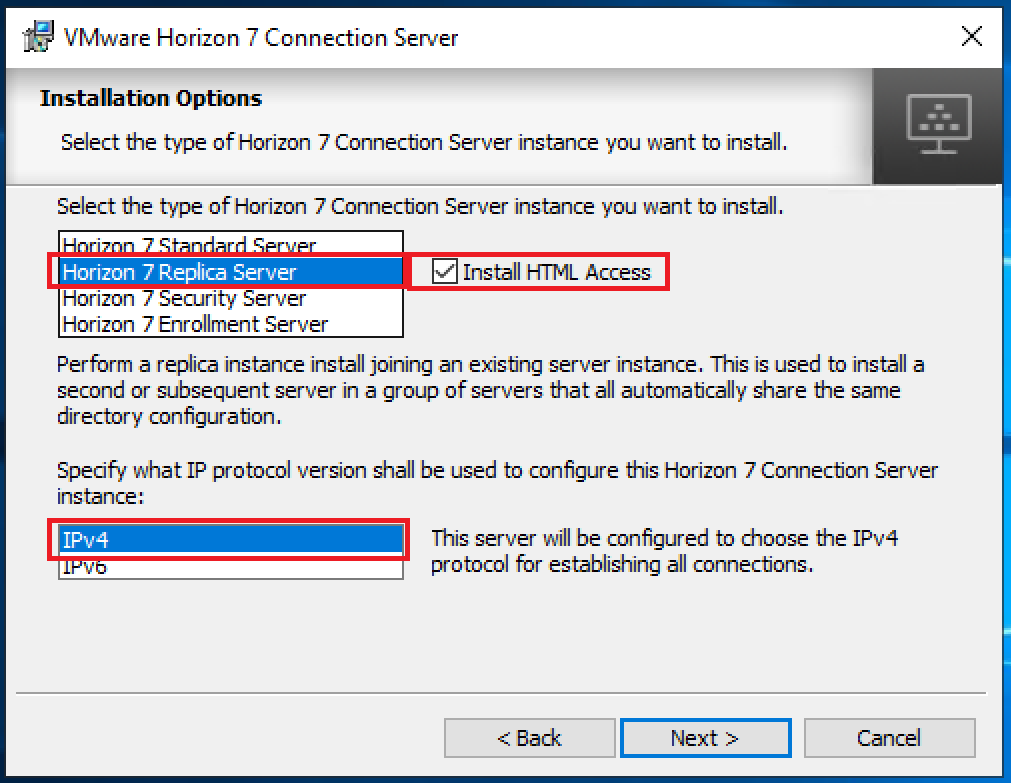
  7. On the Installation Options window:
  8. Select Horizon 7 Replica Server as the install.
  9. Select  “Install HTML Access”, this is technically not necessary but I would recommend it, especially if you have enabled it on the first server.
  10. Select the IP protocol you use. IPv4 would be the most common I expect
  11. Click Next.
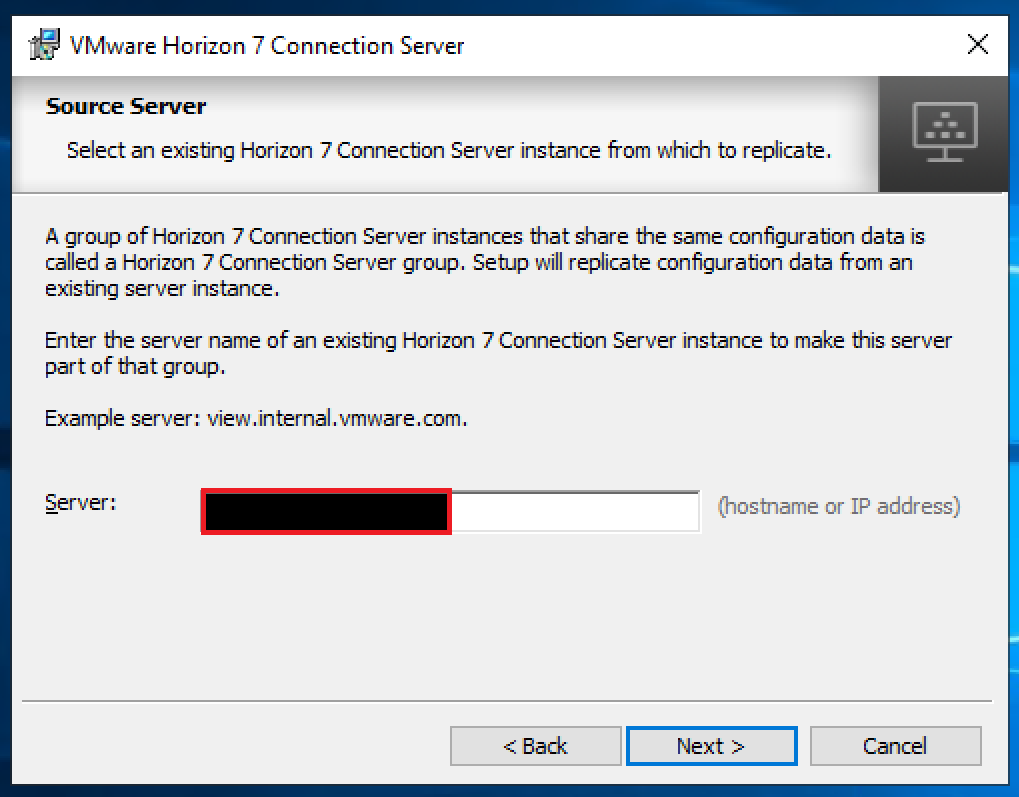
  12. Enter in the name of the first installed Horizon View server. Click Next.
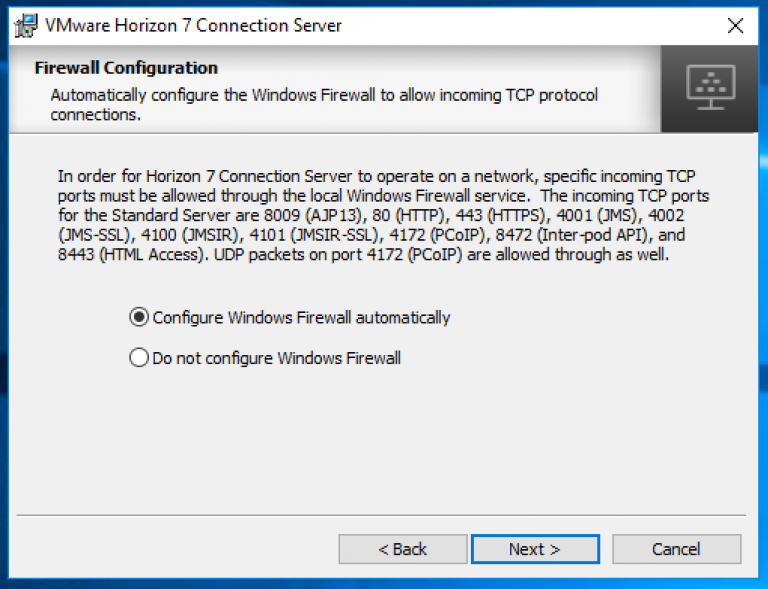
  13. Select whichever is appropriate for your environment, bearing in mind that most companies will have the servers firewall controlled via GPO. So check with your Windows and Security guys. In this case I want the firewall of this server to be configured automatically. Click Next.
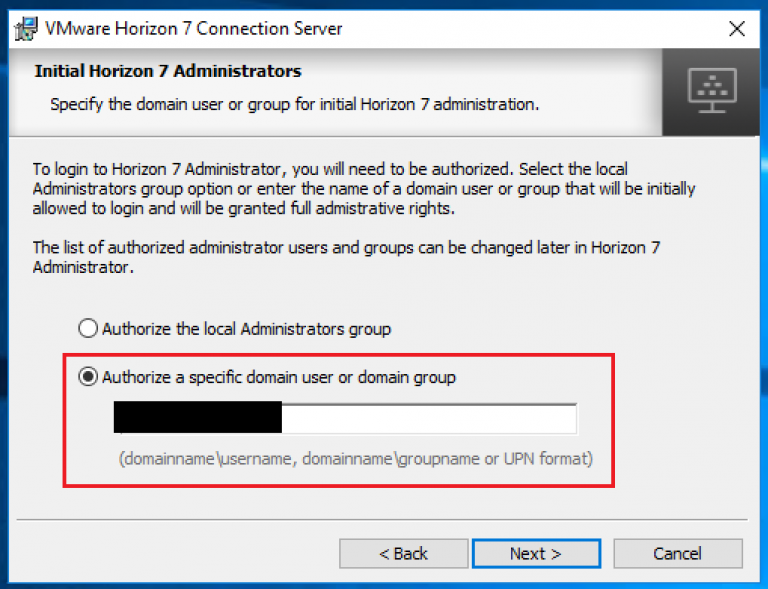
  14. Select whether you’d like the local Administrators Group to have Admin rights to view. This can be changed later but I generally prefer not to from the start. Click Next
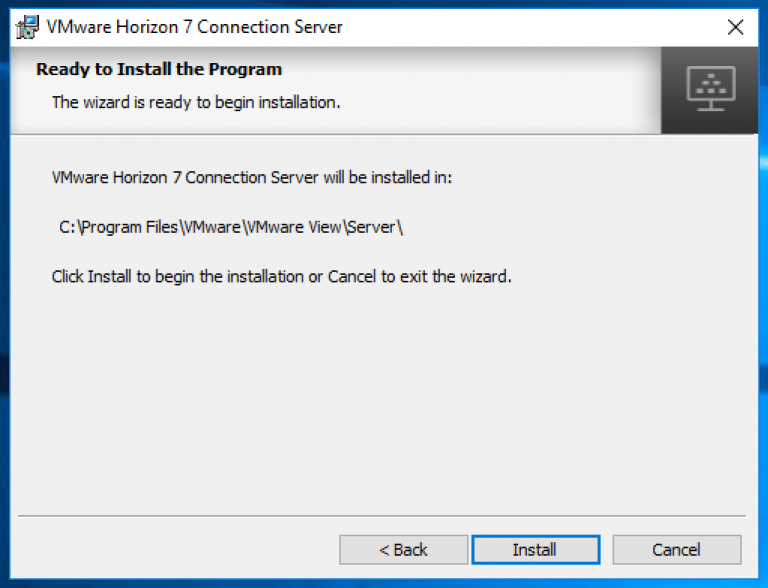
  15. Click Install.
    At this point the installer will go off and install all the same bit and pieces that is needed for the connection server and then goes through a process of setting up synchronisation  between the two servers. Hat off to VMware here, this process is really well done.
  16. Click Finish
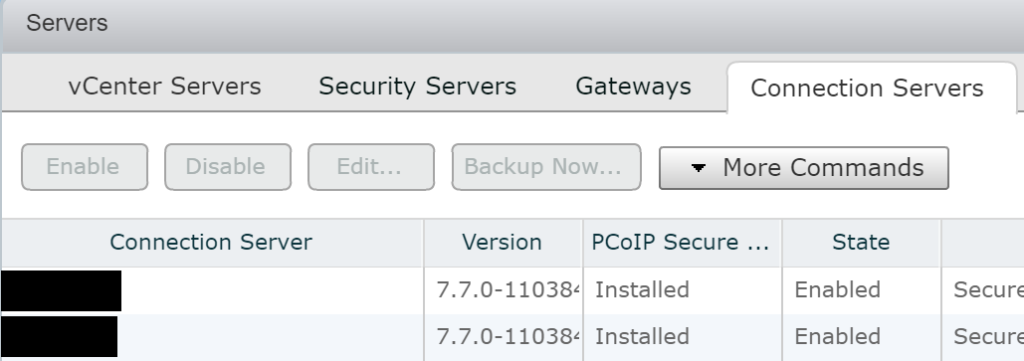
  17. If you log into your Connection servers and take a look under View Configuration you’ll see both Connection servers.

Now that we have the two connection servers, we can move on to the next topic and we’ll setup two App Volume servers and the post after that we’ll put together some apps.

Horizon View – Design and Considerations

During the last few posts we put together a SQL server, Connection Server, Linux desktop, setup certificates, and created a working Manual working desktop pool.. A Basic working deployment of Horizon View that’s good for kicking the tires but very labour intensive to maintain in production.

In a production environment there is much more to consider than just what we’ve thrown together. Availability, security, logging, monitoring, alerting, desktop pool. Desktop OS, budget, to name a few.

Before jumping in and creating an awesome design you’ll always want to find out exactly what the requirements are. “Because” is not an answer. For example, you should be asking questions along the lines of:

  • What do the different stake holders think they are getting?
  • What does your network look like?
  • What kind of security do you have between your networks and/or VLANs
  • Is redundancy and resilience a factor to consider, and yes, they can be different things.
  • Do you have approved Windows or Linux builds?
  • Patching schedule?
  • Do you have a standard user base, or is this intended for users with differing requirements? e.g. dev, eng, admin?
  • Does this service need to be available externally, or is it an internal service only?
  • Have you met with security?
  • Apart from the requirements, have you evaluated the risks and constraints?
  • In the absence of concrete answers have you made your clients/manager aware of any assumptions you’ve made? e.g. “The project plan assumes that the current in server disk controllers will be replaced with HPE P416ie controllers for VSAN compliance.”

When working out the Requirements, constraints, risks, and assumptions be specific. Ambiguous or open ended answers will lead to scope creep and make your job more difficult.

However for the next set of posts we’ll be going through and fleshing out the environment with these (very) high level requirements

  • n+1 redundancy of the VDI deployment.
  • External Access
  • Load balanced (If possible)
  • Two different types of users. Dev and technical admins
  • Two different desktop OS’s available.
  • Profile to persist between sessions.
  • Security – no copy and paste, 2FA, logging, only applicable ports open between VLAN’s
  • Monitoring

This is more that enough to get us going back and asking many, many questions but for now we’ll pretend that most of them have been answered.

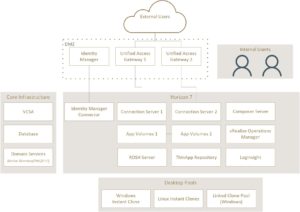
So that we don’t go off piste too much I’ll be mostly sticking to a stripped down version of VMware’s reference Architecture for the mobility suite that can be found here but slightly modified. The diagram below is partially from the linked page and modified to fit into my lab (hopefully). I’ll also make sure I reference any other blogs that i pull info from.

P.S. For the ESXi servers, I’ll be using William Lam’s most excellent ESXi servers that can be deployed via OVA onto either ESXi or Workstation/Fusion

UK VMUG USERCON – 13 December 2018

If you haven’t been to a VMUG before I would highly recommend them. I can’t speak for other countries but the VMUG events in the UK are usually very good and the best of them is the Annual UK VMUG. Every year it seems to get bigger and better.

It’s more or less like a mini VMworld. There’s a space for the sponsors (tiny solutions exchange), lots of swag, food and of course various sessions, discussing a wide range of topics from vendor specific, to VMware cloud on AWS, to Automating VDI. Best of all the whole experience is free.

This year saw the event move from the National Motorcycle Museum to the National Space Centre in Leicester, which was an interesting choice. I did take a bit of time out to explore the center. Also this year, since I had decided not to go up the day before, I missed out on the vCurry.

Joe Baguley gave the opening keynote which went into a bit of detail about where technology has been, how its evolved, the IoT (Internet of Things) and also covered topics like the difference between machine learning and AI. Duncan Epping gave the closing session, looking at where VMware are heading, their focus, and how they intend to achieve it. Both very informative and funny to see them take friendly jabs at each other.

My three favourite sessions (in brief):

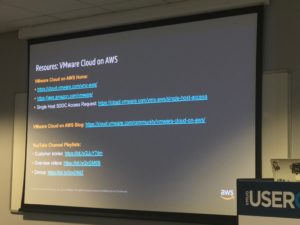
The first two sessions I attended were about VMware Cloud on AWS, the first was presented by VMware and the second by AWS. Both sessions were an introduction to the server but from different angles. It was actually quite interesting.</p?

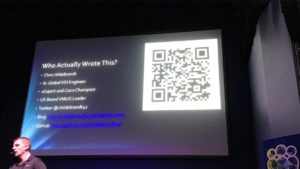
After Lunch I went along to Automating VDI tasks by Michael McDonnell who was presenting work he had done with Chris Hildebrandt on automating key parts of a massive VDI farm. Of all the sessions I attended that day, this one was the most interesting. Chris has a GitHub repository where he publishes his code in addition to his blog.

I came away with quite a lot and not just the swag raid. It’s always good to connect with the community see some familiar faces and some new.

If you have the time and your work will let you go, VMUG’s are absolutely worth a visit.

VCP-DTM 2018 Exam and My Studies 2V0-51.18

One of the reasons I’ve been a bit lax posing new content is that I’ve busy spending my free time (what little of it there is) studying for the VCP-DTM exam, the 2V0-51.18 to be exact. VCP-DTM is the certification. I’ve been involved in a View deployment at work and  since I’ve been working with the tech a fair bit over the last few months I though “why not?”.

There are three exams currently offered for Horizon View:

  • 2VO 51.18 – VCP-DTM 2018
  • 2V0-751 – VCP7-DTM
  • 2V0-651 – VCP6-DTM

The 2VO 51.18 is the latest and fits into VMware’s new Certification naming. There is a bit of a write up about it here.

The main notable difference between the 751 and 51.18 exams is that the requirement for Mirage is missing from the latter and the exam preparation guide clearly states that it is focused on Horizon View 7.5 and related products. So get the preparation guide and use that as your base to get going.

Studying – The Lab:

So first and foremost was my trusty lab. I am fortunate enough to have a fairly beefy workstation with 64GB RAM, running ESXi. This allowed me to run quite a few infrastructure VM’s and 4 or 5 desktops. While a machine of this spec isn’t strictly necessary, you will need a lab of some kind.

When you start looking at whats needed it can look like a lot of infra is needed but it doesn’t all need to be running at the same time. You can get away with only one running desktop as you test the different deployment types. The Composer server is more than happy to run on the same VM as the SQL Express install and once the VCSA is deployed you can shave off some of the RAM. vROPS, Identity Manager, App Volumes and User Manager don’t need to be up and running all the time or even together. If this is internal, turn off the UAG as soon as you’re done with it.

Much of this can be run in VMware workstation but you will need an ESXi server at some stage to deploy desktops onto.

Study – The Hands on Labs.

This resource from VMware is amazing. Its also free. Some of the Horizon Requirements I wasn’t familiar with at all, so this helped. I went in and did a search for Horizon 7.1 and did them inline with the Official Study guide. “HOL-1951-01-VWS – VMware Workspace ONE – Getting Started” isn’t strictly needed (but still worth doing) but I would strongly recommend the first two modules of “HOL-1951-03-VWS – VMware Workspace ONE – Advanced Topics” as it covers “Identity Manager”.

Studying – The Videos:

The most popular videos are the ones Greg Shields has created on Plural sight called VMware Horizon 7 Desktop and Mobility (VCP7-DTM). These are well presented and you can follow along in your Lab and have been collected into a learning path.

There are also a bunch on the official VMware YouTube channel which are worth watching.

While attending a class is a great experience, I do often prefer video study. I can work at my own pace, jump back and forwards as it suits me.

Studying – Reading Material:

To be honest I didn’t find any really up-to-date books on 7.5, which was a bit disappointing.

It was mostly going through the official material and blogs. The release notes and Architecture Planning Docs I found good, and I bounced quite a lot from these into the other official documentation

This blog post on the network ports is quite interesting too.

A very notable blog (much better than is one) is by Carl Stalhood over at www.carlstalhood.com. Its really well formatted and kept current.

The Exam Experience:

The exam itself is 59 questions over 105 minutes. Its not easy, I give it that.

I arrived just in time and after the usual round of stuffing my stuff into lockers, form signing, photos, and checking of pockets, was rushed through into the exam room. 59 questions later (several of those flagged) and I got the popup stating that I’d passed. I don’t particularly enjoy sitting for tests but I really enjoy that moment.

Exam tips:

Arrive about 15 minutes early and bring photo ID. First and foremost, nobody is out to trick you, but you are being tested to a high standard. Always make sure you read the questions carefully and in full. The questions are usually always clear and concise, and even if you don’t know the answer you can sometimes work out what what answer is not. It’s easy to get rattled during any kind of test, if you are not sure of your answer mark it for review and come back to it once you’ve gotten to the end.

If you decide to go for this exam, good luck!

Preparing for Horizon View – If using SQLExpress

Quick Post

As a database SQL Express is pretty good. It has size restrictions built in but it is a full working MSSQL database engine and works quite well with Horizon View, although not supported at all.

To be able to connect to it from another server, one running the Horizon View connection server for example, you’ll need to enable TCP connections.

  1. Start the SQL Server Configuration Manager.
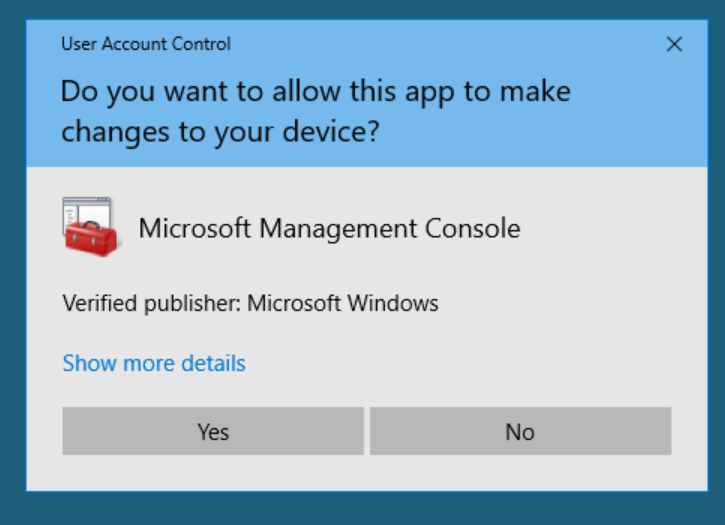
  2. Click yes
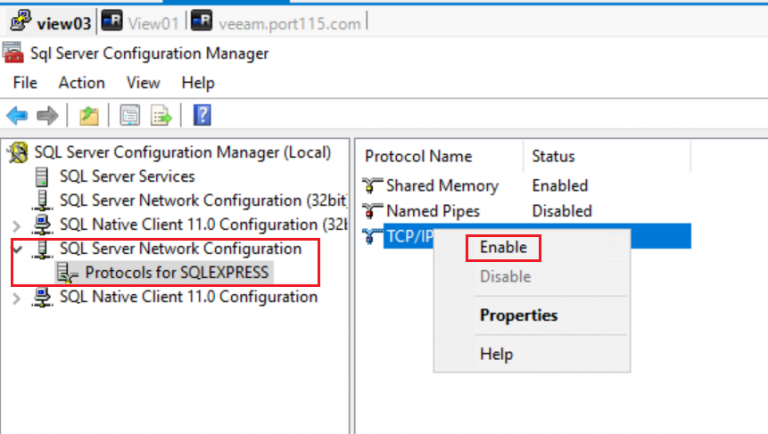
  3. Expand SQL Server Network Configuration, Select Protocals for SQLEXPRESS, Right click Enable. Once the status reads enabled, right click again and select Properties.
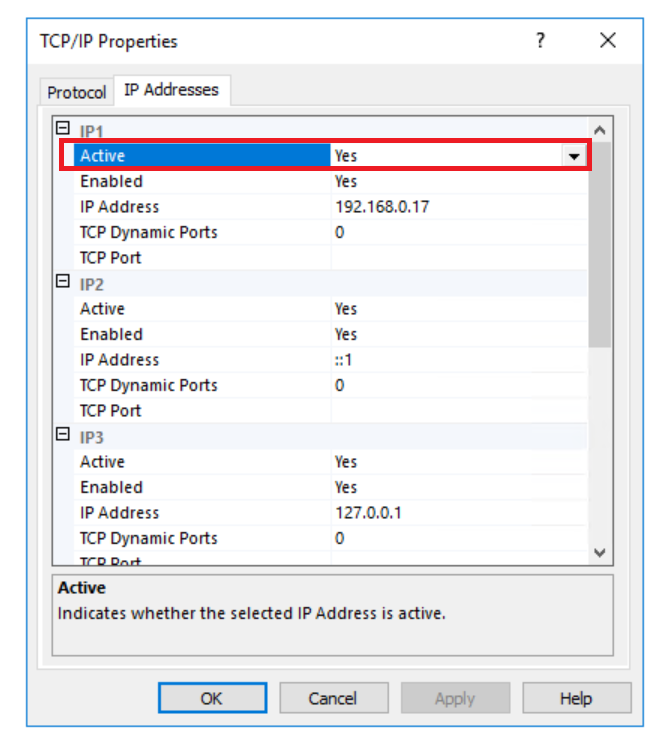
  4. In the entry for the IP address of the server switch Active to Yes.
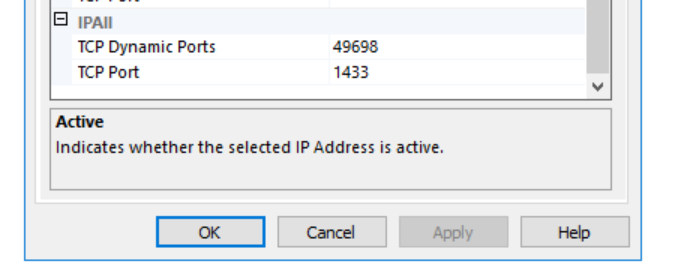
  5. Scroll down to the bottom of the window and under IPALL set the TCP Port to 1433.
  6. Restart the Server

This and allowing incoming connections through the firewall got me connected and using the events logging in the Horizon View Connection Server.

Preparing for Horizon View – Setting up the Database – 2 of 2

Part of this Horizon view deployment will be to have the connection server logging its events and a configured view composer server. For this we’ll need two databases.

While I am working with the Express version of MSSQL, the following steps will also apply to other versions of MSSQL (excluding the Linux version). In a production environment you definitively will want to run either standard or enterprise. There is also the developer edition, which is a full featured version for testing and development only.

One quick change before we begin:

  1. Start the Microsoft SQL Server Management Studio.
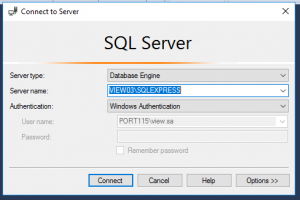
  2. Select Connect to login.
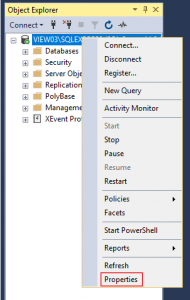
  3. Right click the server name and select Properties.
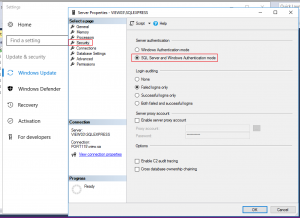
  4. Select Security and change the Authentication mode to SQL Server and Windows Authentication Mode and click OK.
  5. Click OK. While you can restart the service to get the new security changes to apply, I usually just reboot the server.


Setting up the Horizon View Events Database and creating the user.

  1. Start the Microsoft SQL Server Management Studio.
  2. Select Connect to login.
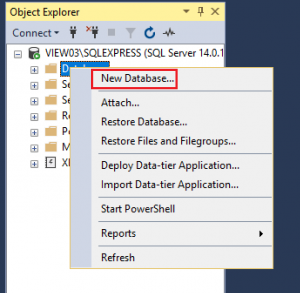
  3. Expand the instance, right click on Database and select New Database…
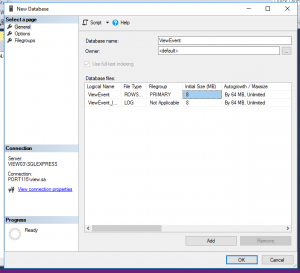
  4. Give the database a name. I chose ViewEvent.
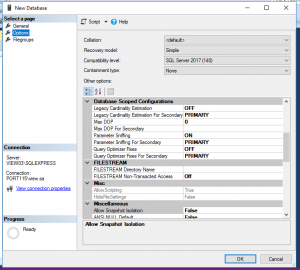
  5. Select Options and make sure the options match the attachment below and click OK.
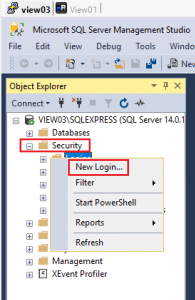
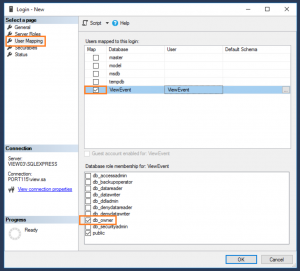
  6. Expend Security, right click Logins, and select New Login…
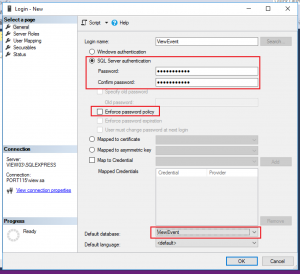
  7. Type in  a name for your user (I used ViewEvent). Select SQL Server authentication and type in a password. Unselect Enforce password policy. Change the Default database to ViewEvent or whatever you named you database in step 4.
  8. Select User Mapping. Select the database you created above and in the bottom pane select db_owner.
  9. Click OK and we’ve successfully created the Events database and user. Now onto the composer DB.


Setting up the Horizon View Composer Database and creating the user.

  1. Start the Microsoft SQL Server Management Studio.
  2. Select Connect to login.
  3. Expand the instance, right click on Database and select New Database…
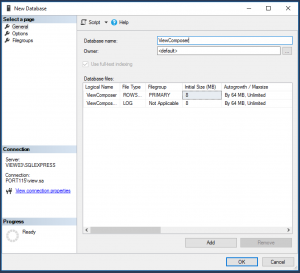
  4. Give the database a name. I chose ViewComposer.
  5. Select Options and make sure the options match the attachment below and click OK.
  6. Expend Security, right click Logins, and select New Login…
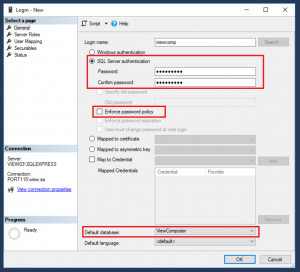
  7. Type in  a name for your user (I used viewcomp). Select SQL Server authentication and type in a password. Unselect Enforce password policy. Change the Default database to ViewComp or whatever you named you database in step 4.
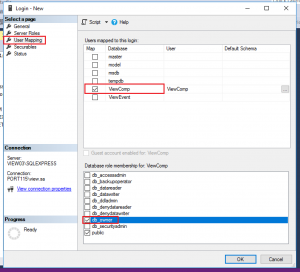
  8. Select User Mapping. Select the database you created above and in the bottom pane select db_owner.
  9. Click OK and we’ve successfully created the Composer database and user.

In this part we’ve created the two main DB’s we’ll need for view. So just something to note. In this setup I have used SQL accounts for the databases however in most prod environments that would most likely be heavily discouraged. If you do choose to go down the domain account route then you don’t need to change the authentication mode.

Working VMware’s VDI Solution.

Over the last couple of months (with another work colleague) I’ve been looking into Horizon view 7.4. (edit: and now 7.5)

So far I really like what I see. It looks like VMware has put  fair amount of effort in the the product lately. From instant clones (windows and Ubuntu) to automated full fat clones for Linux, the product is really starting to look slick.

The next series of blog posts will be covering the installation and configuration of Horizon view, setting up various different solutions (Linux desktops, View security server and as an alternative the Unified Access Gateway, etc) and will take a look at the various “additionals” available, this includes the paks for vRealise Operations Manager and Log Insight.

So what will we need and be setting up to get the basics going?

  1. Lab (I’ve covered how to build this a while back, its a bit old but should still get you started).
  2. Certificate Authority for our domain.
  3. SQL server 2016 Express and SQL server 2016 management tools. Note: While the express version of SQL sever isn’t on the interoperability matrix it does work.
  4. A minimum of 3 Windows servers which will run:
    1. View Connection server
    2. View Composer Server, which will also run our instance of SQL express.
    3. View Security Server
  5. Horizon View Software (Download the lot)
  6. Windows 10 Enterprise
  7. 2 Popular Linux Disto’s.
    1. Centos
    2. Ubuntu

While there can seem to be quite a lot of moving parts, I would expect most prod environments to have access to either SQL standard as a minimum or Oracle (12C standard release 1 and 2 are supported) as well as a CA (certificate Authority).

Our three windows servers, which will form the base of our deployment,  will be configured as follows:

  • Windows 1 – Connection server
  • Windows 2 – Security Server
  • Windows 3 – Composer and SQL Express server

Before we run through the View install’s I’ll first go through setting up and configuring the CA, getting the cert onto the windows connection server, and configuring SQL for the two DB’s we’ll need.