Nested Home Lab – Part 12 – Distributed Virtual Switch

As we discussed in Part 2, for our basic lab, we wanted to separate out the networking  in to three parts:

Use Example IP Range
VM and Management 192.168.0.0
VSAN (vlan 30) 192.168.100.0
vMotion (vlan 40) 192.168.110.0

We have already set-up our physical host’s network in preparation to create our distributed switch.

So what we are looking to do here is create our distributed switch, create the port groups (tag them), and add our VMkernel interfaces. Easy Right?

Creating a Distributed Switch

  1. Log in using an account that has permission to configure the environment.Lic-1
  2. Select Home and Hosts and Clusters.AH-1
  3. Click on networking icon, right click on your Datacenter, Select Distributed Switch, Click New Distributed Switch.
    DS-2
  4. Enter in a name for your new switch. Click Next.DS-3
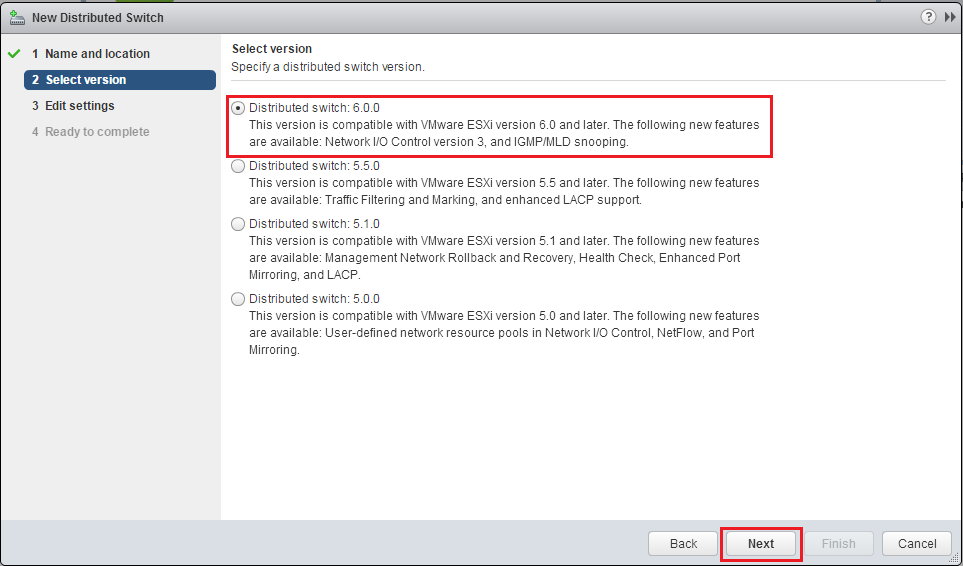
  5. Select Distributed Switch: 6.0.0.  Click Next.
    DS-4
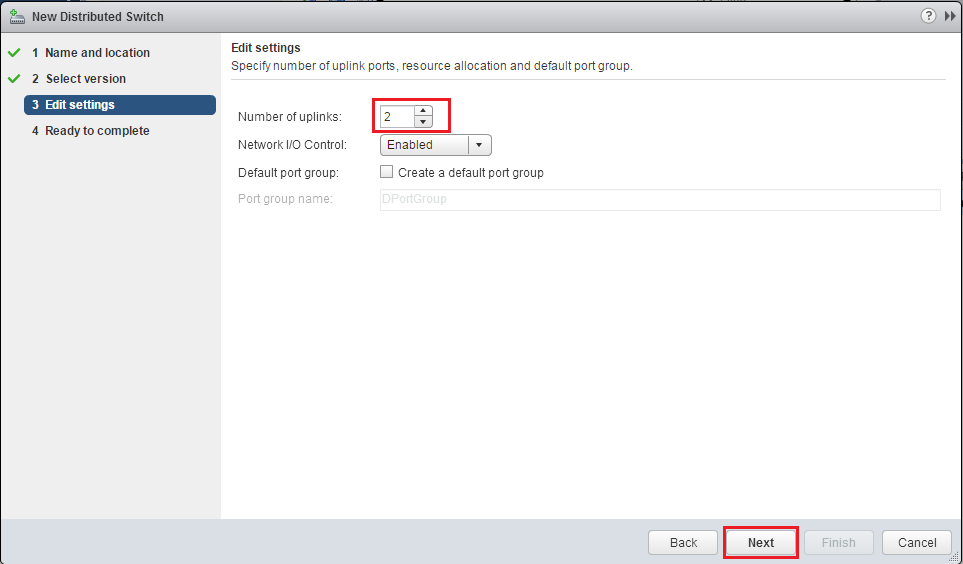
  6. Set the number of uplinks to 2 and un-tick create a default port group. Select Next.DS-5
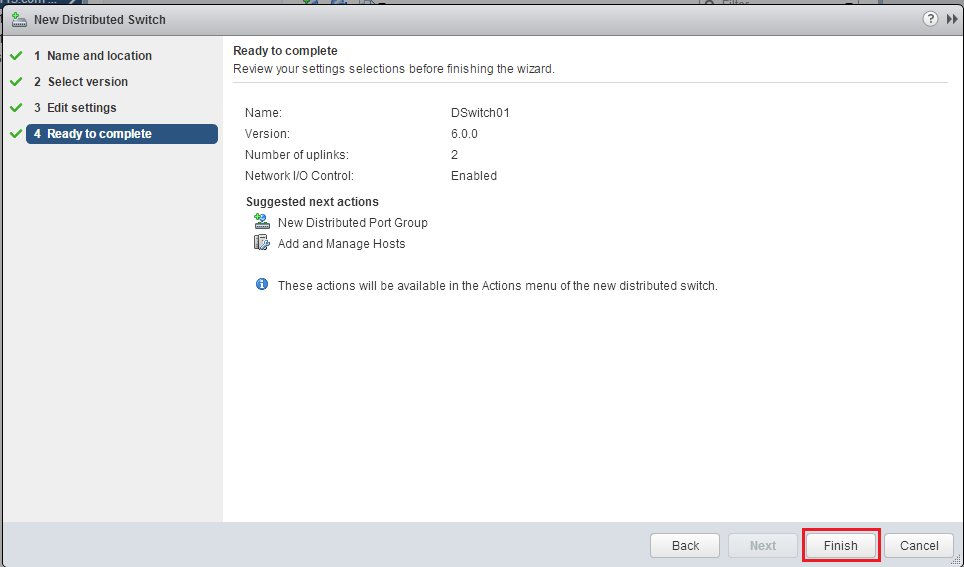
  7. Check that our setting are correct and select FinishDS-6

And thats the switch created.

Adding your port groups

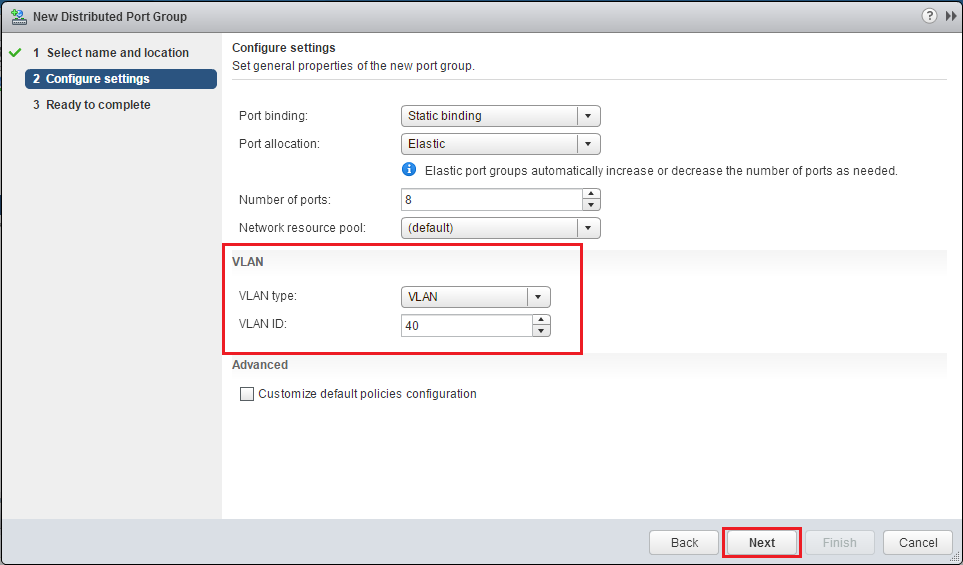
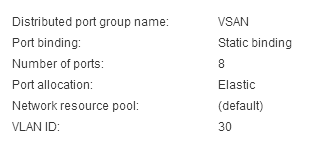
We’re going to be creating two port groups, vMotion with a VLAN tag of 40, and VSAN with a VLAN tag of 30.

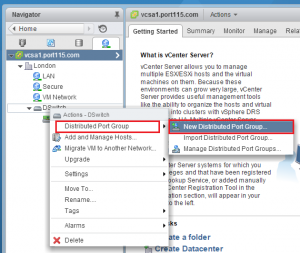
  1. Right click on the Distributed Switch. Select Distributed Port Group. Select New Distributed Group…
    DS-7
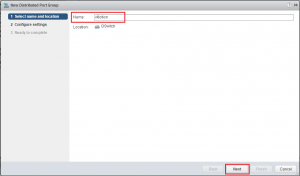
  2. Give the port group a name. In this case vMotion. Select Next.DS-8
  3. Set VLAN type to VLAN and the VLAN ID to 40. Leave all the other options as defaults.
    DS-9
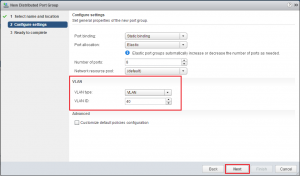
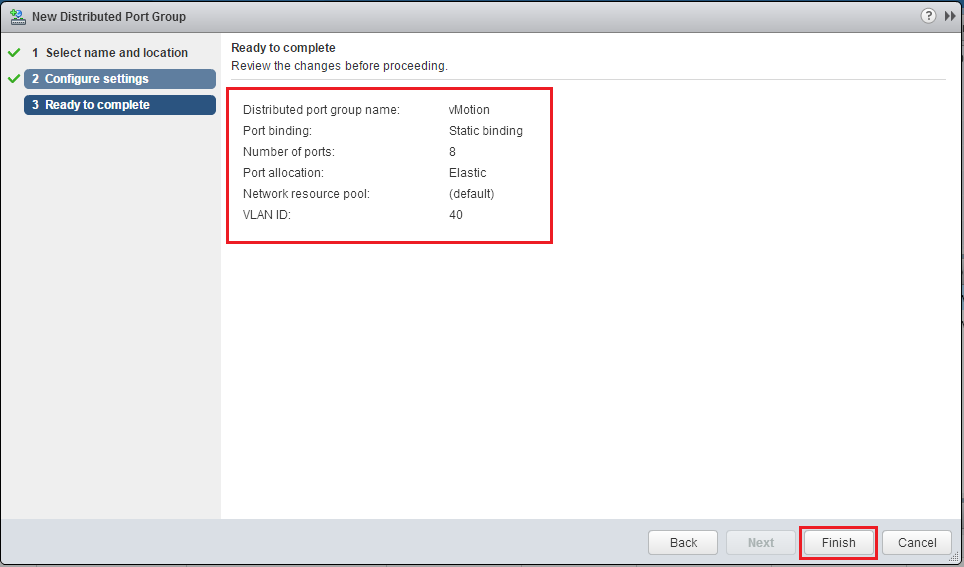
  4. Double check the settings you specified are correct and click Next.DS-10
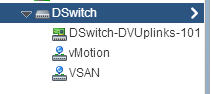
  5. Go back and create a Virtual SAN VLAN, but with a VLAN tag of 30.DS-11
  6. You should now have a vSwitch that looks like this:DS-12

For a basic lab, as we are creating, the networking is quite simple. However virtual networking has come a very long way and with the introduction of NSX it is now effecting the whole data centre. I would recommend you read Networking for VMware Administrators by Chris Wahl and Steven Pantol. While the book doesn’t cover NSX (understandable as its a whole discipline in itself) it is very good and I would highly recommend it. 

Home Labbing

Unless you’ve been living under a rock you will have heard two big announcements over the last couple of weeks.
1. vSphere 6 is official. 
2. VMUG advantage now comes with VMwares EVALexperience
While the vSphere 6 announcement was expected by the community the EVALexperience was a real surprise, to me anyway. 
What does this mean? Well, in addition to all the benefits that come with a VMUG advantage subscription you now get the ability to use a bunch of VMware’s software for the duration of your subscription. No rebuilds every couple of months which makes your home lab more “stable/persistent”and the list of available software looks quite good.
With each new release of vSphere or SRM or NSX or VSAN or … or … or … a lab becomes more important.

But what do you want out of a lab? Do you want to test new software, create disposable environments, run a permanent infrastructure? I guess its really up to and your budget. For me its important to test new software, do early investigation before I approach work and study. Do I need permanent running infrastructure? Not really. I prefer nested a ESX solution. It suits me and my budget. However there are many instances when you would want a “physical” lab, Consultants for a start.

Anyway, I have only three bits of kit that are really important to creating my home lab.

  • One second hand laptop (Main work horse).
  • One small netgear switch (TP-LINK TL-SG108E)
  • One Lenovo S20 (ESXi – Booted from USB)
Laptop –> Switch –> S20
Right, so the S20 I tricked out a bit. It has a full compliment of Ram (24GB), one 500GB SSD and one 1TB SSD. It’s connectivity to the world is through the 1GB interface and it boots from an 8 GB SSD.

The whole lab runs several Nested VM’s. Usually three ESX servers, VSAN, one VCSA and a DC. However it has run four ESX Servers, two windows servers with vCenter and SRM, and two Netapp simulators.

In the next post I’ll step through setting up a nested virtual lab.

Failed vMotion, host busy, White Spaces and Directory Names.

So recently I came across and issue where a “space” at the end of a VM’s directory causes it to fail to vMotion.

The error is typically cryptic stating that the host is too busy.
If you try to browse the directory using the vsphere client it looks empty. You also can’t rename the directory using the vsphere.

For us the problem came about when we were creating VM’s. We typically created quite long machine names in vsphere. “machine name – OS – description.
Ask you can see we tend to add Tue description of the vm to the name. Now what vSphere does is take the first 32 characters and use that as the directory name. If the 32nd character is a “space”….. well you get the picture.

I solved the issue by using the vMA (this can also be done using the ESX console). I use the vMA a fair amount and have all of our nfs shares mounted in /mnt. I would recommend this as it just good to have that kind of access to the virtual machine files.

Anyway the fix:
1. Shutdown and remove the VM from inventory.( Don’t delete from disk!!!).
2. Using the vMA browse to the location of the folder. Rename through folder using the mv command. mv “folder with space ” “folder with space”.
3. Renregister Tue vm with sphere or the ESX server.

If anybody else has had this problem and solved it drop me a line.