vExpert 2020!

vExpert 2020! What a great way to wake up.

Its been just over 5 years that I’ve had the honour to be a part of this amazing program. To those of you thinking about applying, go for it!

A big Congratulations to all the vExperts both new and current.

Just before I sign off, a thank you to my current employer and work colleagues for keeping me challenged and learning.


How to setup 2 factor authentication in Horizon View using Google Authenticator – Part 2

Adding the Radius Server to the Connection Broker.

I’ll always recommend using the Unified Access Gateway, even for internal only deployments and adding the first Challenge of the 2FA there. However we can add it the the connection broker if needed. The following is done via the HTML interface, it’s where the admin console is heading so you might as well get started now. Next post will be how to add it to the Unified Access Gateway.

  1.  Log into to your connection broker on https://<connection>/newadmin/
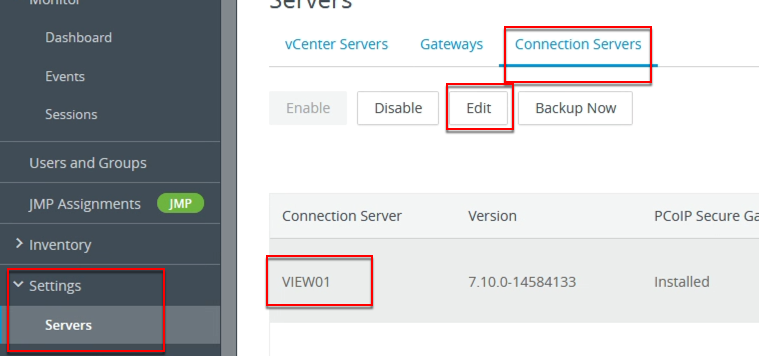
  2. Expand Settings and Click on Servers and Connection Servers.

  3. Select the connection server and click Edit.
  4. Select Authentication and scroll down to Advanced Authentication.
  5. Under Advanced Authentication:
    1. For 2-factor authentication select RADIUS.
    2. Tick Enforce 2-factor and windows user name matching.
    3. Under Authenticator, select Create New Authenticator.

  6. Fill in blank and required details. no real need to change the defaults:
    1. Label – Give it a name like Centos 2FA.
    2. Hostname/Address – hostname of the 2FA server we built in Part 1.
    3. Share Secret – We defined this in Part 1 as the secret in the client.conf file.
  7. Click Next.
  8. Add in the details of a second server (if created)
  9. Click Finish.
  10. Select the Authenticator you just created.
  11. and select OK.

Next time a user tries to log into the connection broker to get a desktop they’ll be prompted for their 2FA key.


How to configure Dynamic Environment Manager – Folder Redirection

[Edit – 31/10/19 – Updated for Dynamic Environment Manager]

Setting up folder redirection saves a significant amount of time when logging in when compare to roaming profiles. Rather than copying the the contents of the folder to the local machine, we’ll just repoint the users folders to their share on the network. This also assumes that you have the share setup and configured on the. This share would have the same permissions as a roaming profile share.

Easy Start.

  1. Open the DEM Management Console.
  2. Select the User Environment Tab, select the Folder Redirection, and click  Create.
  3. This will open the Folder Redirection window.
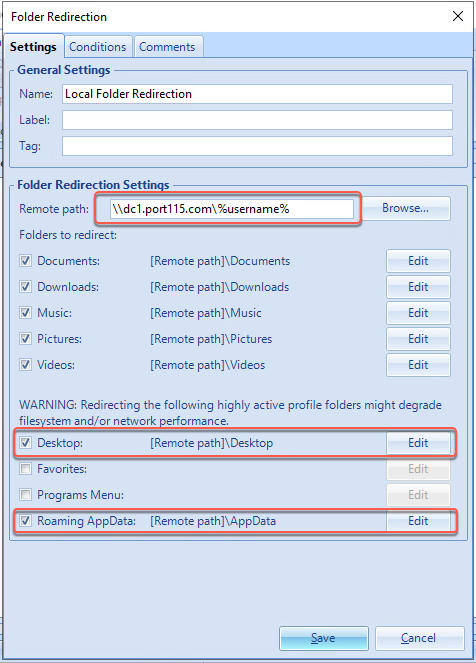
    1. Give the setting a name
    2. Fill in the Remote Path. Since this is in my lab I don’t have DFS setup but in a production Environment I would strongly recommend DFS. I also use the system variable %username% as this will take the system variable of the user name.
    3. It’s up to you which folders you’d like to repoint. Generally speaking you’d want Documents and Downloads as a minimum. Initially I also prefer to redirect the Desktop folder as people sometime save there (no matter how much you tell them not to) and the AppData folder (but this is optional, DEM can be setup to save most app customisations)
  4. Click on the conditions tab and add any that are appropriate..
  5. Click Save.

Done.

How to configure Dynamic Environment Manager – Basic Navigation and Creation.

[Edit – 31/10/19 – Updated for Dynamic Environment Manager]

Before I begin the next bunch of posts where we’ll look at specific customisations we’ll quickly look at some useful extra’s when you go about creating your customisations.

We’ll look at the dummy reg key thats been created as an example

  1. Open the DEM Management Console.
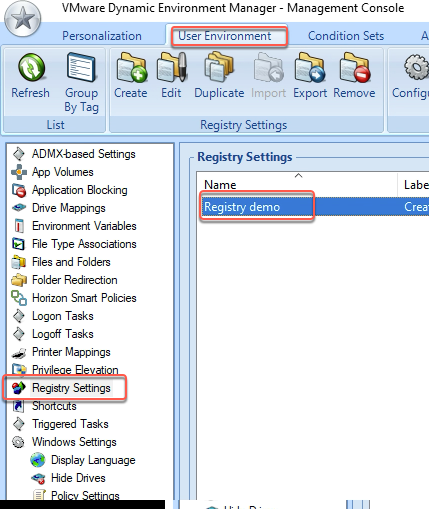
  2. Navigate to User Environment -> Registry Settings and double click on Registry Demo
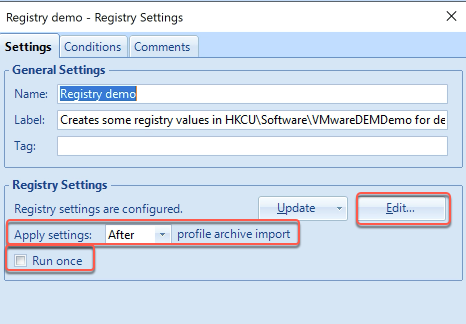
  3. In the Registry Settings Window.
    1. Click Edit to open the registry. This will open in NotePad
    2. You can select when to apply the registry setting (Before or After Profile import)
    3. As a run once variable.
    4. And the usual variables, like Name, Label(description), an give it a Tag.
  4. Click on Conditions and Add. Here is where you can set how the various environmental settings, such as by domain group, OS or even day of the week, get applied. 
  5. The next tab across is the comments tab. I encourage everybody to use the comments tab to track changes and add a bit more detail into what is being applied.

Always remember to save your changes.

How to setup Dynamic Environment Manager – Easy Start

[Edit – 31/10/19 – Updated for Dynamic Environment Manager]

We’ve reached the point where we’ve setup the config share, installed the management console, and installed the agent (in NoAD mode) onto our parent desktop, so now what?

The next few posts we’ll go through a few configuration examples but first let get some of those configurations pushed to the config share.

Easy Start is great because it’ll save you a whole bunch of time digging around for the various settings, particularly now that we are not using roaming profiles and users get a bit grumpy when their settings don’t persist.

Easy Start.

  1. Open the DEM Management Console.
  2. Select the Personalisation tab and click Easy Start.
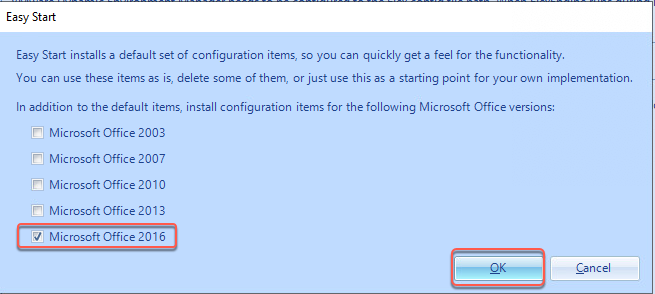
  3. If you are planning on deploying MS Office, select the version and click OK.
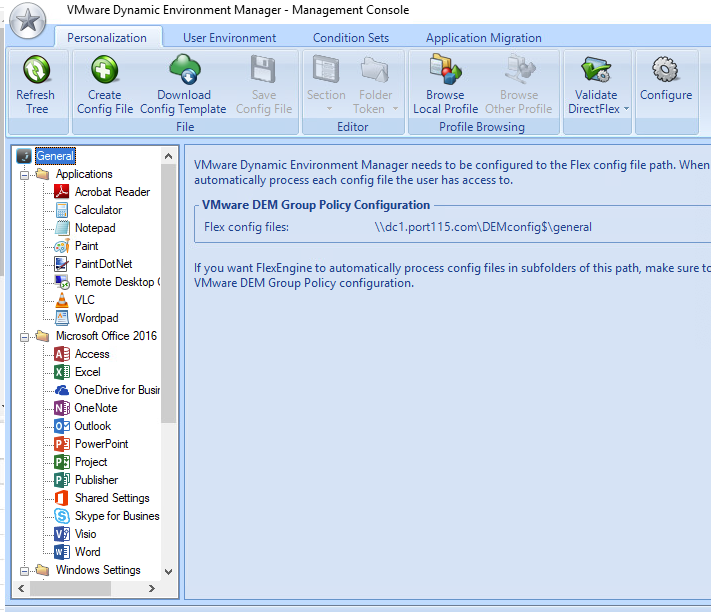
  4. The DEM Console will go off and put a whole bunch of config settings into your General folder.

There we go, a bunch of configs for us to look into in the next post.

How to setup ThinApp and package an application.

I like ThinApps, I really do. They’re efficient, easy to create, portable and they just work (most of the time). They can be streamed, deployed locally, and are a great way to run older, legacy apps on later OS’s (although the last bit might not technically be supported).

We’re got to go through the process of installing ThinApp and then creating our own ThinApp. It’ll be a basic app but will still work.

Before we start you’ll need the following:

  • A clean install of windows, in this case I’m using Widows 10.
    • Fully patched
    • My preference is to have no AV installed. It doesn’t really matter as we’ll be rolling the VM back to a clean snapshot at the end.
  • The Thinapp Installer which can be downloaded from VMware’s website
  • An app to install and package. Make sure its from a trusted site. I’ve used Notepad++ for this particular post.

Deploying ThinApp Enterprise.

  1. On your “clean” VM, run the ThinApp installer
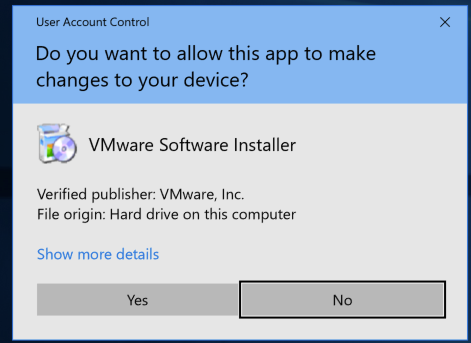
  2. Accept the security warning. Click Yes.
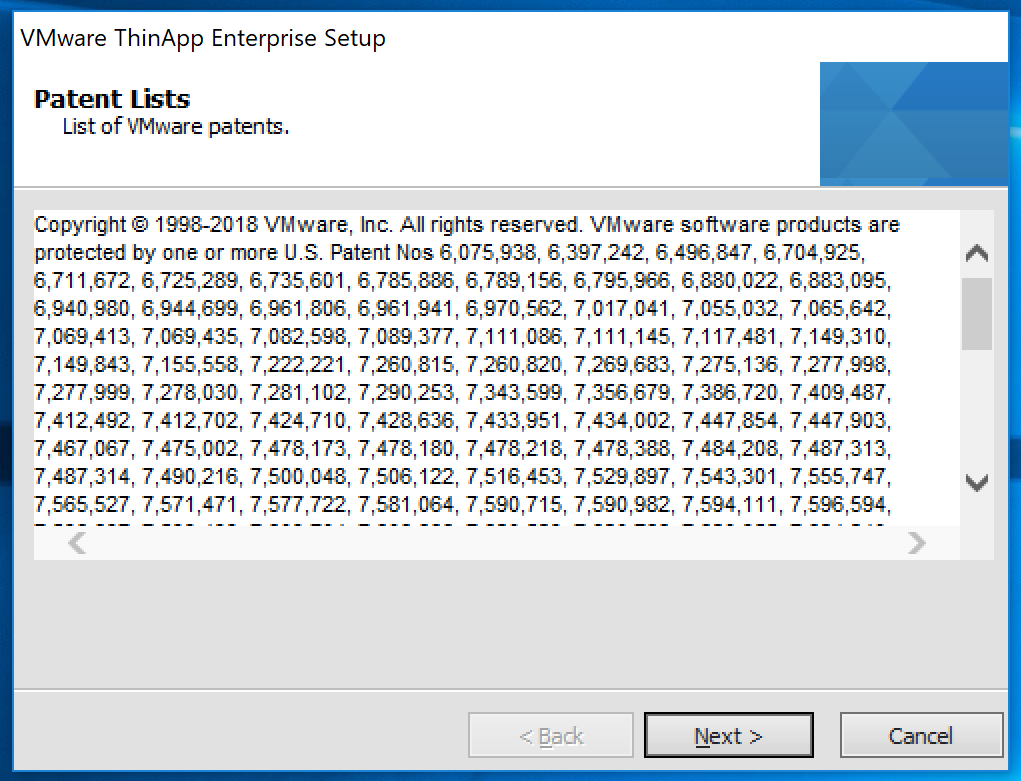
  3. You’ll be presented with a patent wall. Click Next.
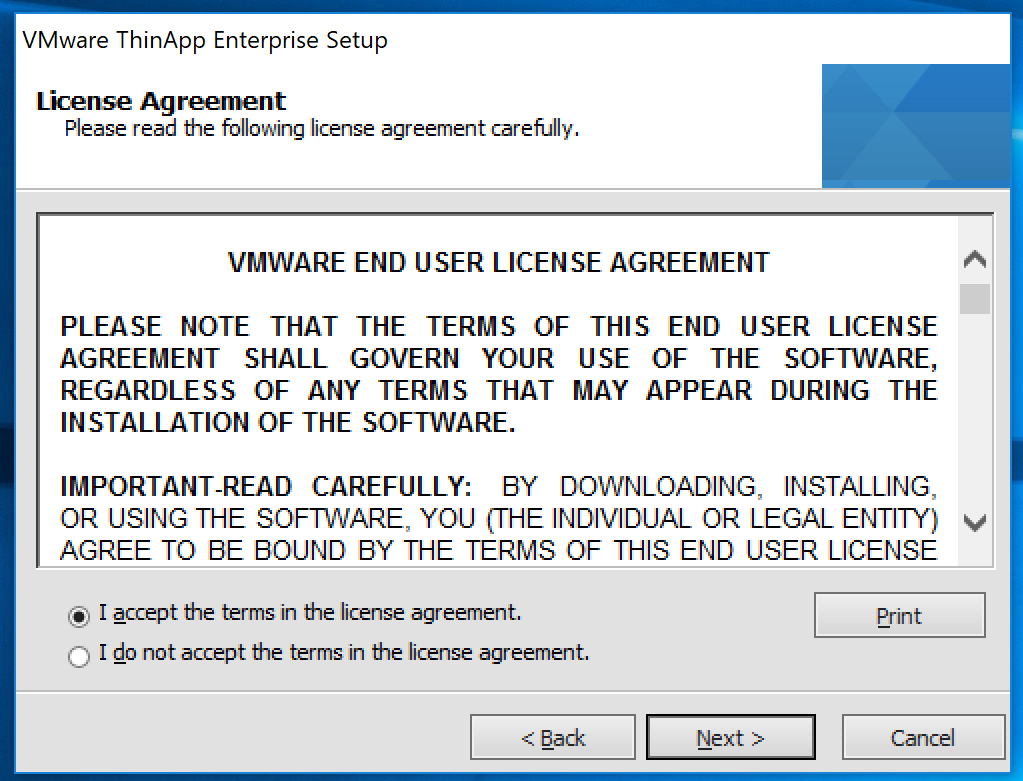
  4. Like everybody does, read the License agreement and Select “I accept the the terms of the license agreement.” and click Next.
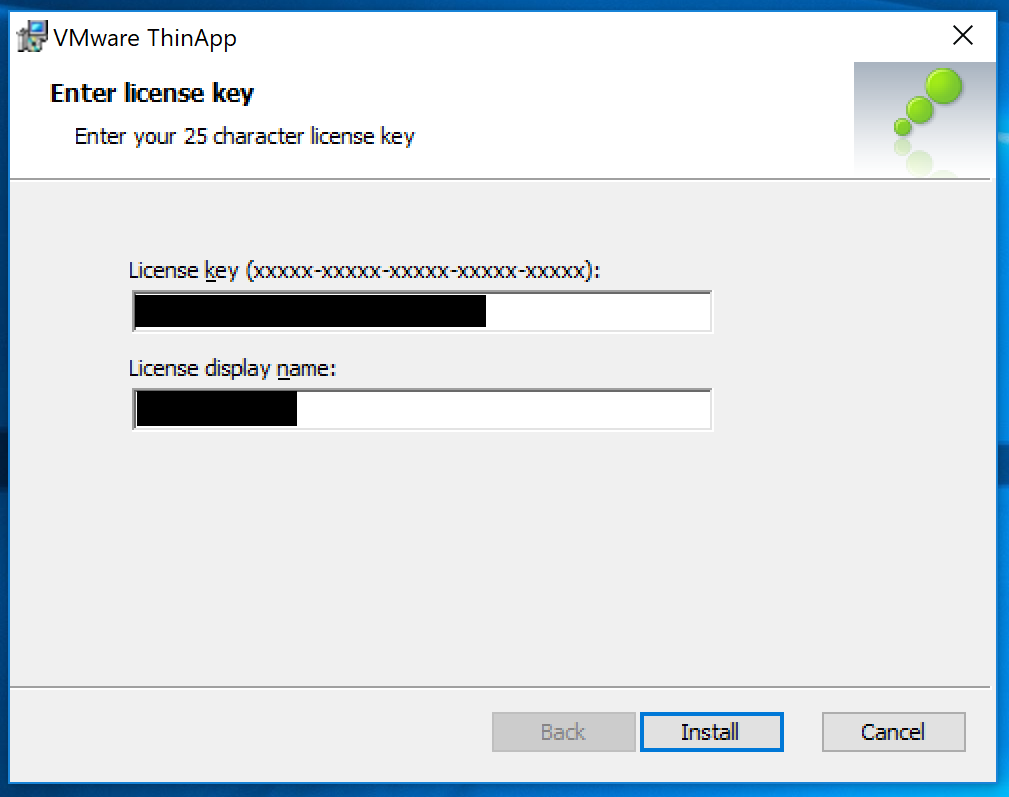
  5. Here you’ll need to enter in your Horizon View License and give it a name. Click Install.
  6. Once the installer is done Click Finish.
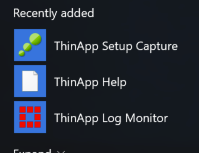
  7. You’ll now see three new icons in your Start Menu.
  8. Now that we have ThinApp installed, Shut down your VM and take a snapshot. You’ll want to have a clean state every time you go to package a new app.

Packaging an App.

Our first App is going to be Notepad++. Its a great little app and, in my opinion, should be part of any VDI deployment.

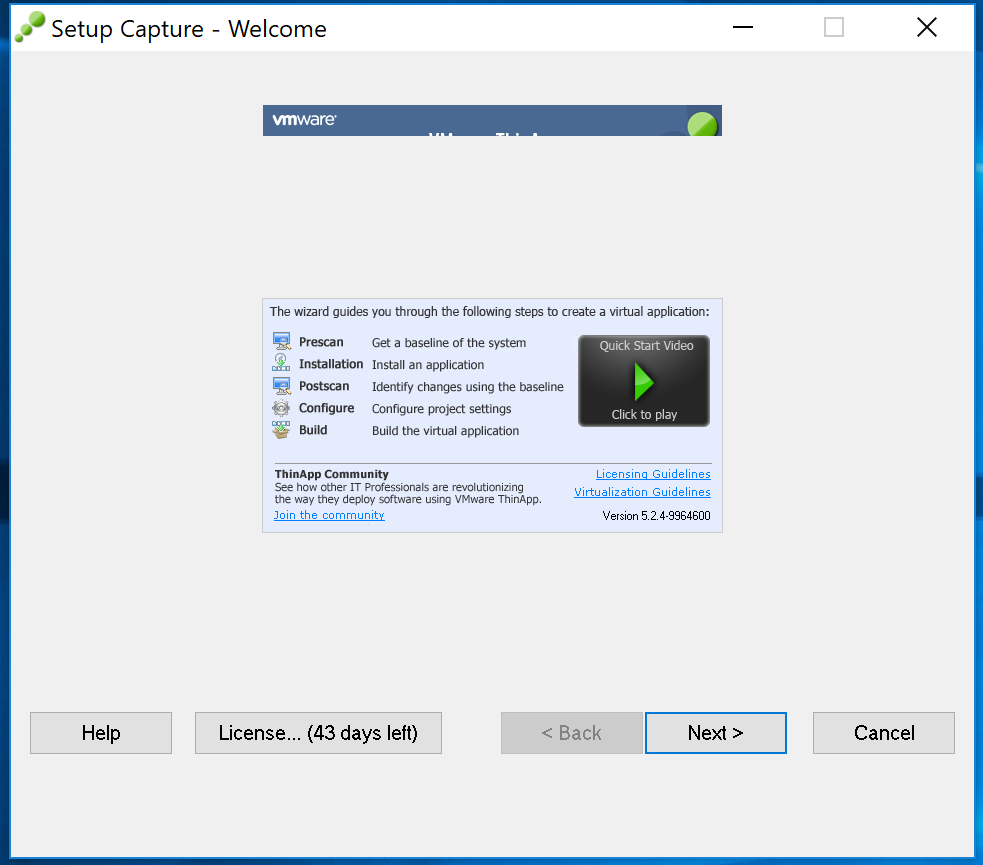
  1. Start ThinApp Setup Capture.
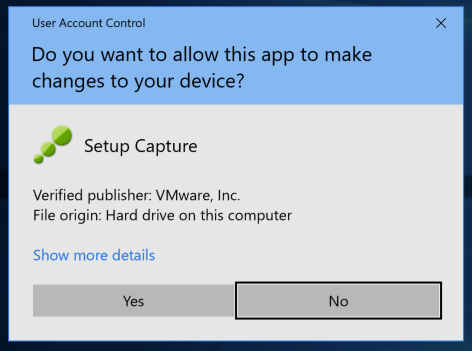
  2. At the User Account Control, Click Yes.
  3. Click Next.
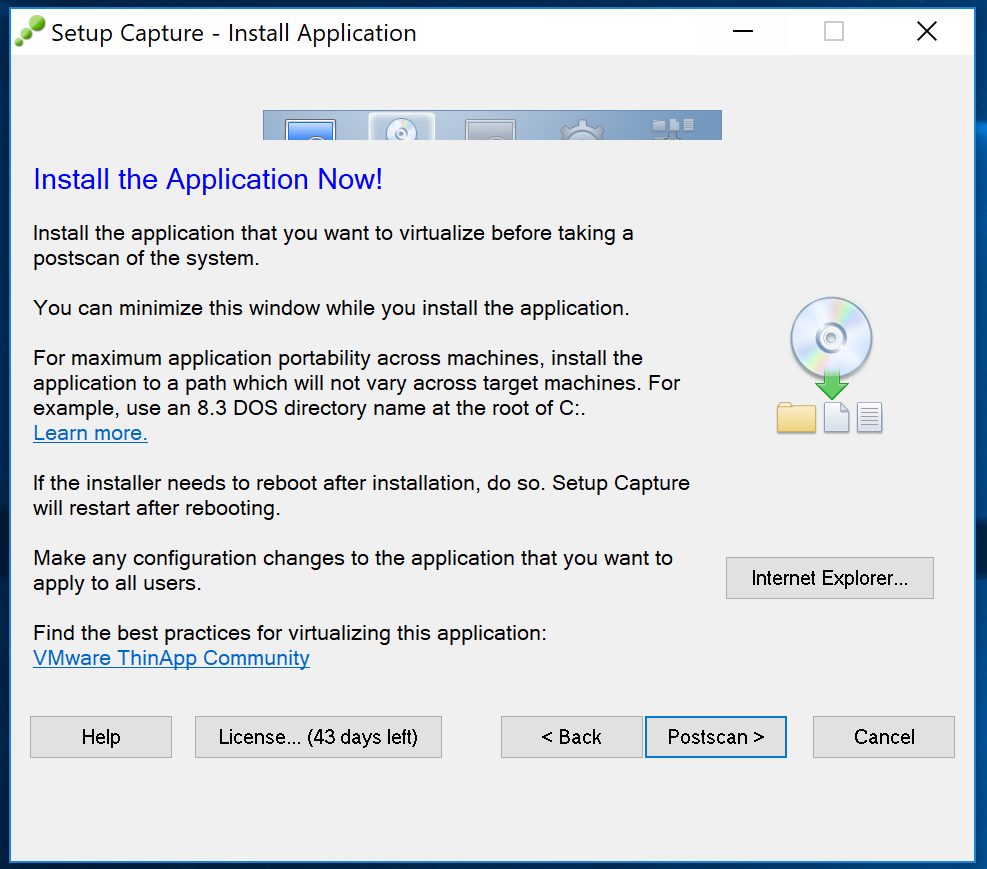
  4.  Here we’ll trigger the prescan. This is where ThinApp goes off and profiles the current system state, hence the need for a clean system. Click Prescan.
  5. Go ahead and install you app. I would strongly recommend that you start it at least once, to finish any post install config, before clicking Postscan, which will trigger a second profiling of your system to see what has changed.
  6. Just to confirm what I said above. Click OK.
  7. Select the Executable file. I’m installing NotePad++ here so it makes sense to select the notepad++.exe executable. As its a ThinApp I’ll not be needing any of the other executable. Click Next.
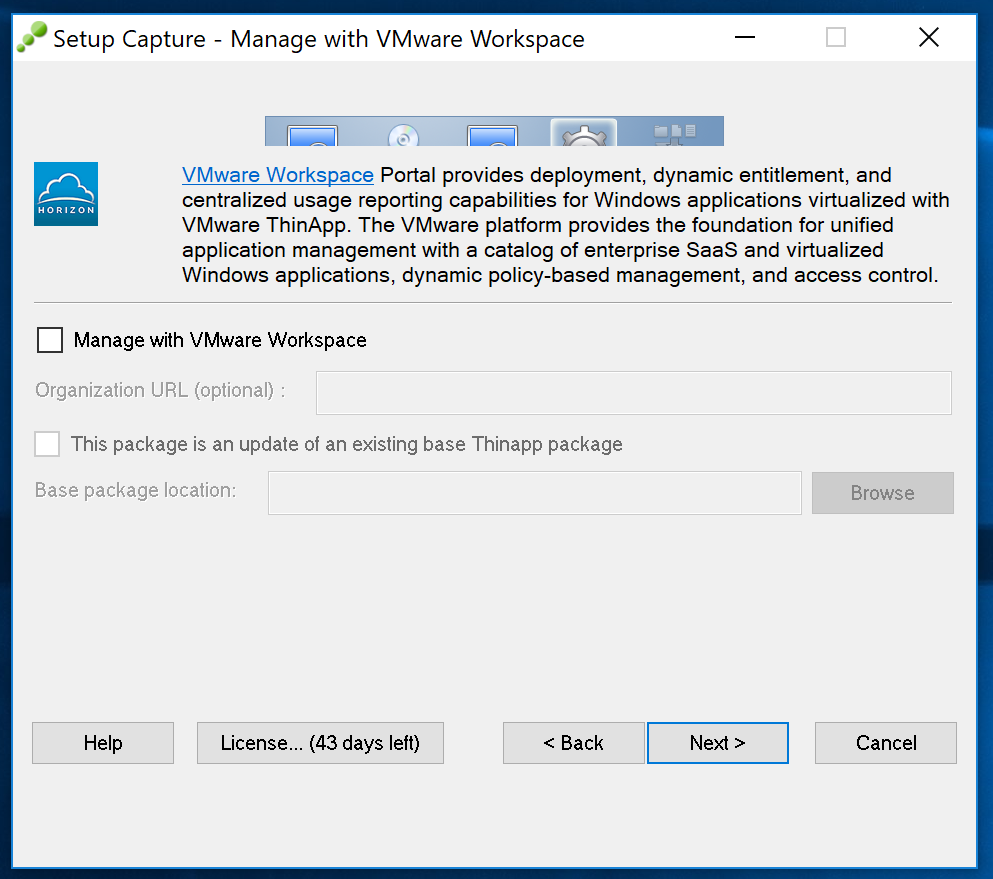
  8. We’ll be importing this into our connection server later so won’t be managing this with VMware Workspace.
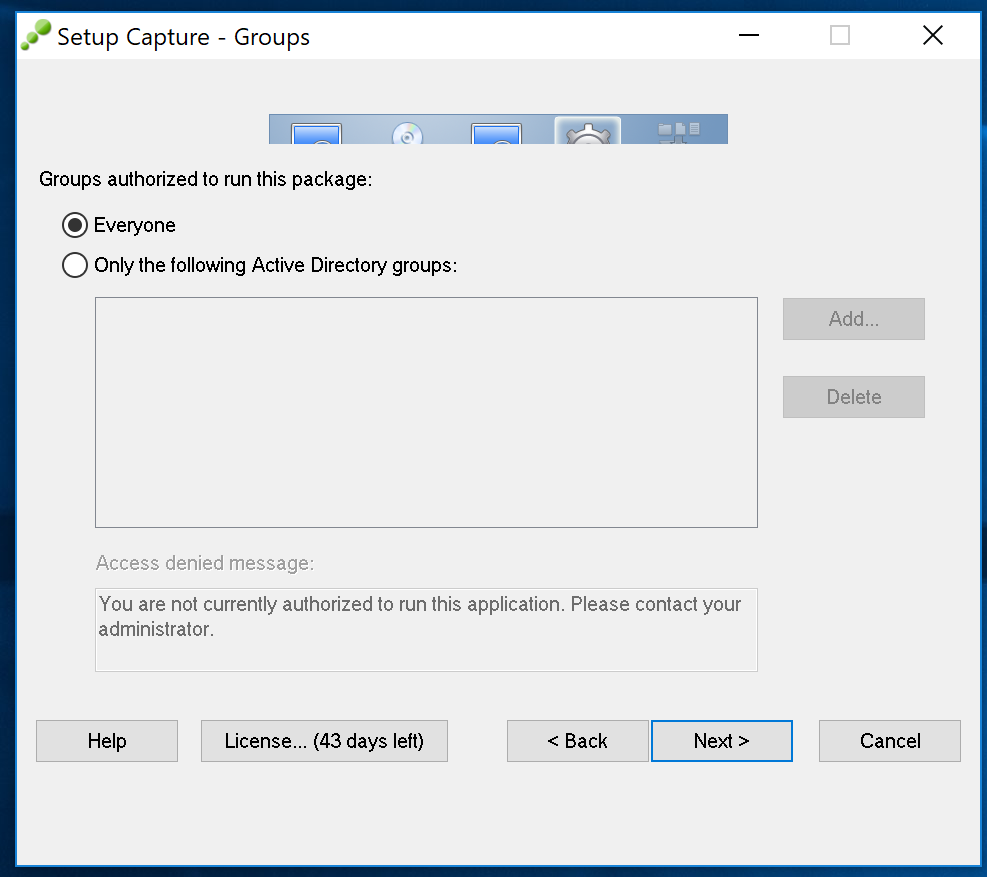
  9. I want everybody to be able to run this but you might want to restrict it to certain groups. Click Next.
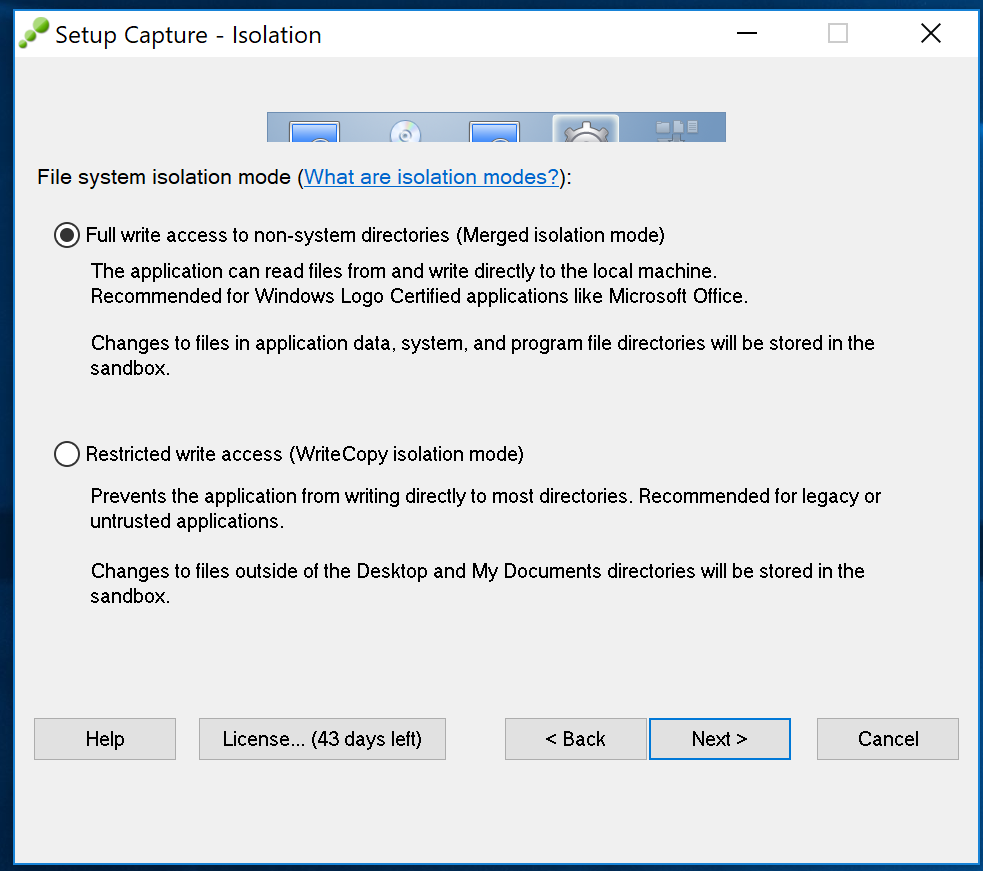
  10. I’m installing an editor so it makes sense to me to have it be able to access as much as possible. Click Next.
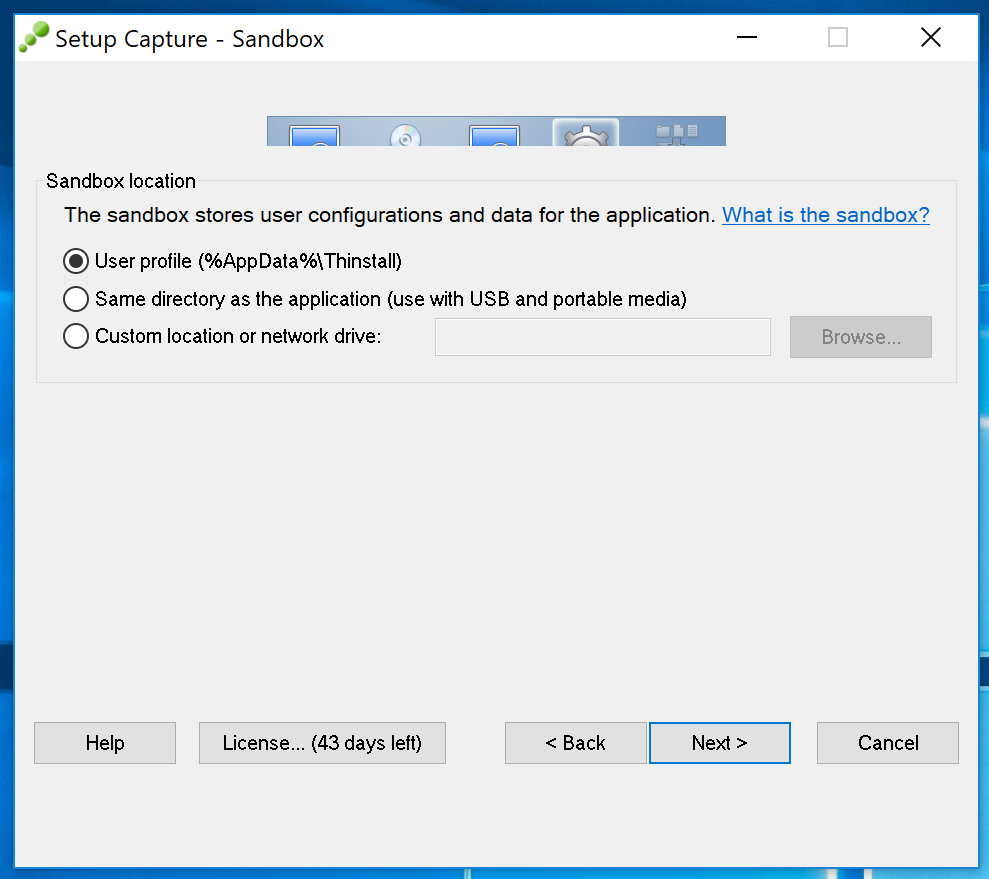
  11. We’re running this app through Horizon View and want the setting and hostpry to persist so I’ll leave the default here. Click Next.
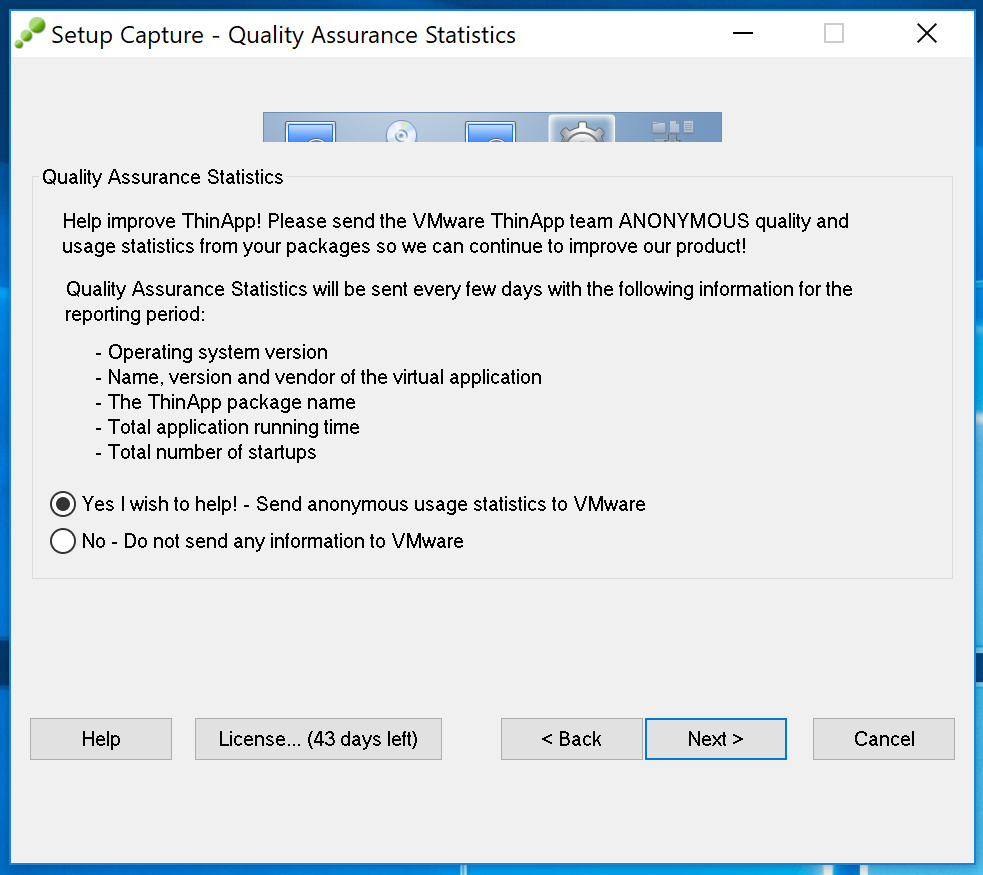
  12. So this step depends on your companies security policy. Most I would imagine don’t want any information sent out. I’m using this in a lab so I don’t mind to send the usage info out. Make your selection and Click Next.
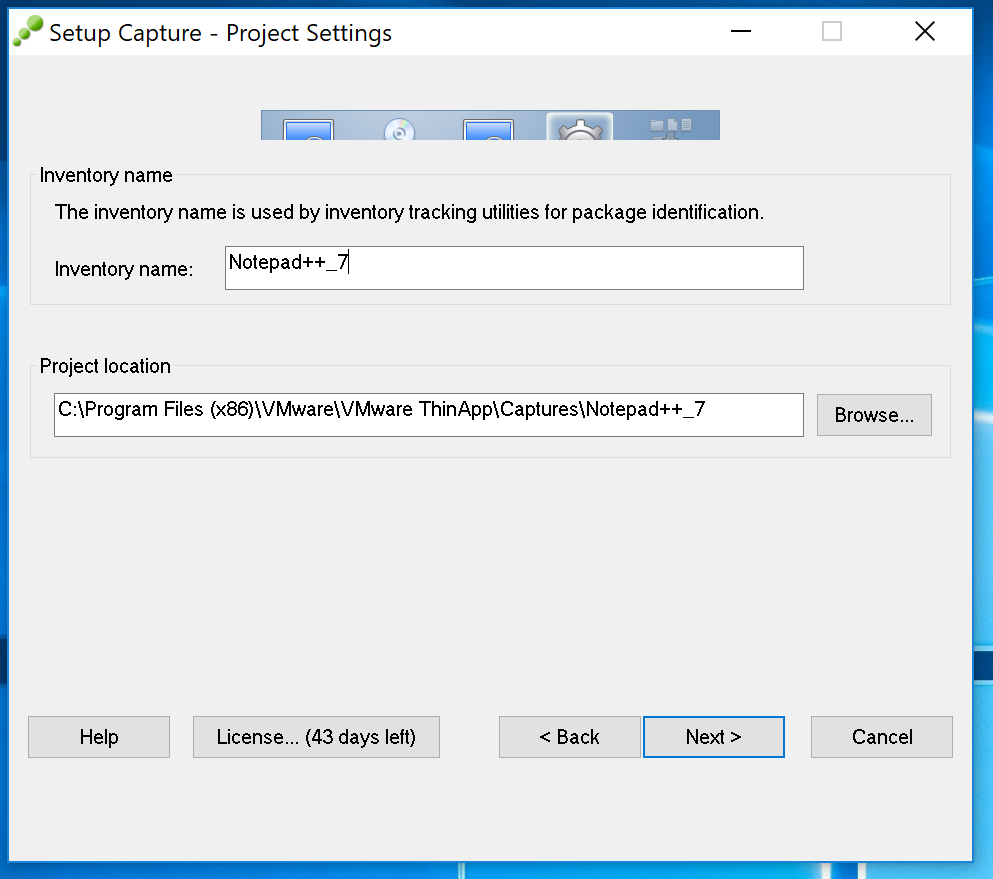
  13. Name your App. I’ve kept the default but added the version number. If you have a central location for your apps, you can also set it here. Click Next.

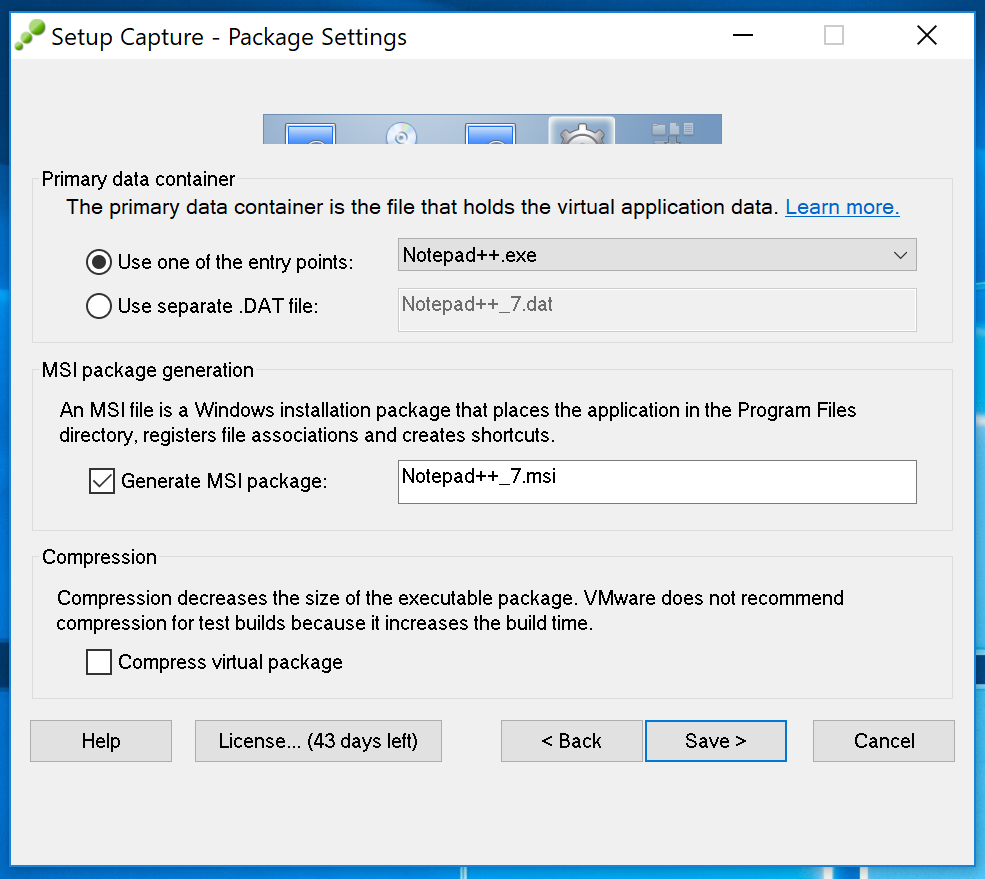
  14. IThe package settings are usually fine as they are. I did however select Generate a MSI Package. In the next post we’re going to look at the two ways to deploy a ThinApp though Horizon View. Click Save.
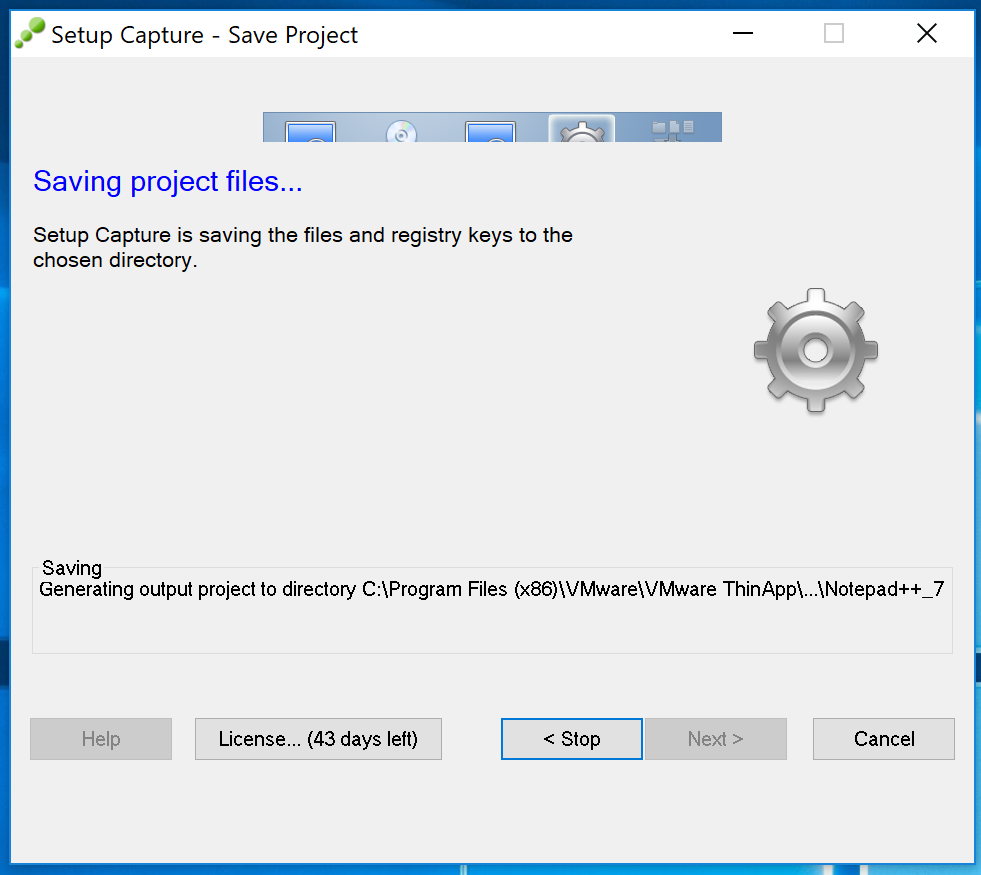
  15. All the various changes that were made during the App install, such as file creation, reg keys, etc. Will be put into a build folder. This can take a while depending on the size of the App.
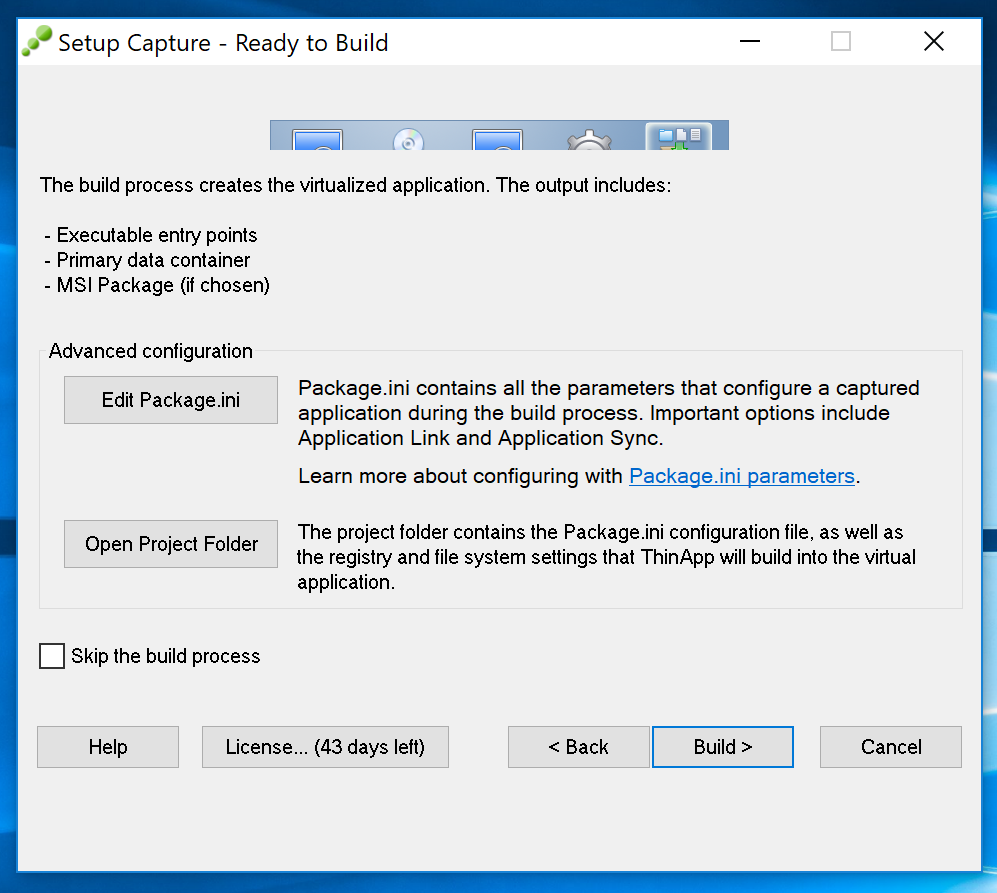
  16. And now we get to trigger the build, you have the option of editing the ini file to change some of the more advanced options that were not available during the profiling.. This can take a bit of time. Click Build, and go get yourself a coffee.
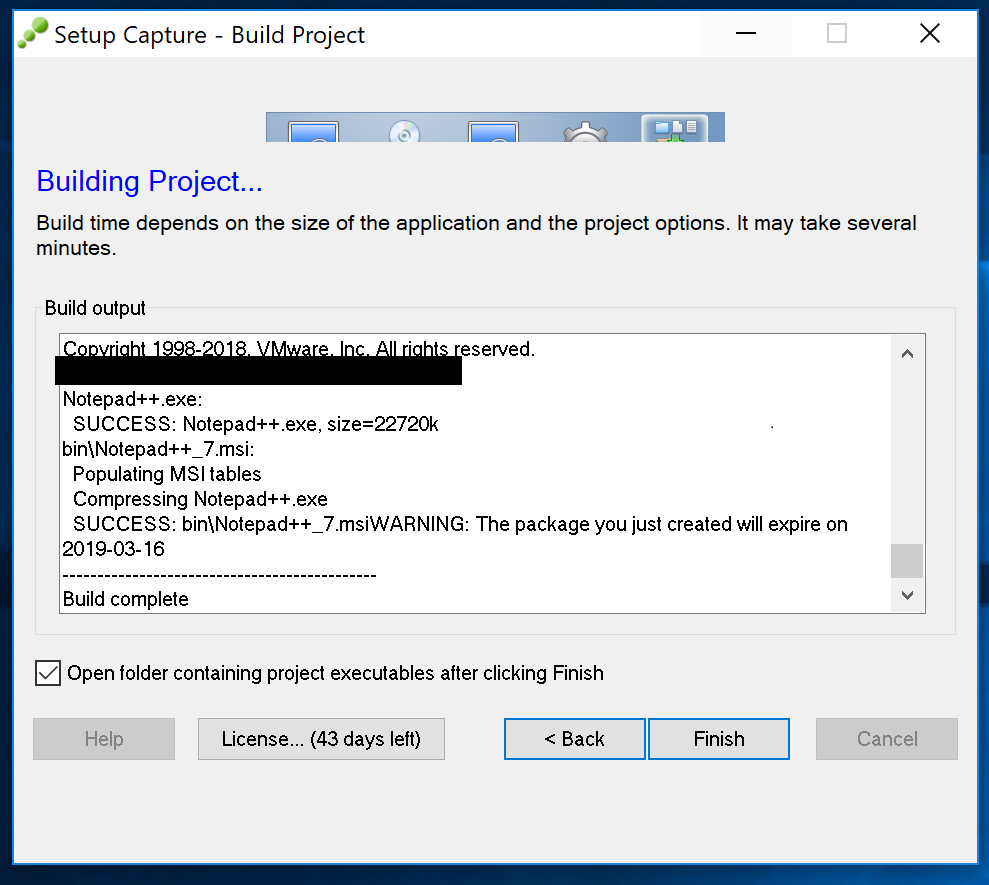
  17. If successful you’ll see an output similar to the below.
  18. Your app is built, packaged, and put into the specified folder. As you can see I have two files; one the exe that I chose as the entry point, and the other is the MSI, which we”ll use in the next post.
  19. Once you’re done, copy the files out of the VM and roll back the snapshot. Unless you are putting together a bunch of apps (which I wouldn’t recommend with ThinApp)  its always best to start in a clean state.

Packaging an App can take awhile but for some deployments it make perfect sense.

Horizon View – How to install the Linux Desktop agent.

In the previous post we looked at joining the Linux desktop to an Active Directory domain. While its not necessary for Linux desktop to be domain members I feel it should be done if a domain is available.

As before we’ll be focusing on two business ready distro’s; Centos 7.X (RHEL) and Ubuntu 18.04 (LTS). We’ll get the correct dependencies setup, and the agents installed.

To begin I have deployed CentOS 7, with a GUI (Gnome) and Ubuntu 18.04 LTS. VM’s. Both VM’s are fully patched and running the latest available official kernels as of 16/11/18. A local user has been created during install time called viewuser01. The VM’s are called centosdt-01 and ubuntudt-01 respectively. Static IP’s have been assigned. Ubuntu is running the GNOME desktop and CentOS is running KDE.

In addition I would recommend you go and take a look at this page System Requirements For Horizon 7 for Linux.

[EDIT 26/01/19]: Depending how your VM is installed you might get an error when trying to install the agent stating that the hostname is resolvable.  This is common if you are setting up a template to be referenced by an automated desktop pool and the hostname of the desktop pool isn’t in DNS. The fix is to add the hostname to the /etc/hosts file next to the entry 127.0.0.1.

Ubuntu:

Only certain desktop environments are supported in Ubuntu and unity is not one of them. VMware have written a kb detailing how to change the desktop in Ubuntu:  KB2151294.  Since I’m using 18.04 LTS its not an issue as the default desktop is Gnome.

  1. Open a terminal and run the following to update and install dependencies. Note that you’ll be asked to choose a display manager, choose lightdm:
  2.  sudo apt-get update
    sudo apt-get -y upgrade
    sudo apt-get -y install open-vm-tools python python-dbus python-gobject lightdm 
  3. Reboot (might not be strictly necessary but if there is a kernel update its a good idea)
  4. Download or copy across the VMware Linux agent. (Currently VMware-horizonagent-linux-x86_64-7.6.0-9857537.tar.gz)
  5. Open a terminal and locate the downloaded agent. Usually in /home/<user>/Downloads/
  6. Unpack the file.
  7.  tar zxvf VMware-horizonagent-linux-x86_64-7.6.0-9857537.tar.gz 
  8. Change into the unpacked directory
  9.  cd VMware-horizonagent-linux-x86_64-7.6.0-9857537 
  10. Run the installer, type y to accept the EULA
  11.  sudo sh ./install_viewagent.sh 
  12. Reboot your VM
  13.  sudo reboot 

Ubuntu is configured and ready to go.

CentOS:

It’s usually easier to get dependancies resolved in CentOS and CentOS is “aware” its running as a VM and will usually have the open VMtools installed.

  1. Open a terminal, switch to root and run the following to update and install dependencies, and fix the networking.
     yum -y update&amp;amp;amp;amp;lt;/li&amp;amp;amp;amp;gt;&amp;amp;amp;amp;lt;li&amp;amp;amp;amp;gt;&amp;amp;amp;amp;lt;pre&amp;amp;amp;amp;gt;yum -y install glibc
    virsh net-destroy default
    virsh net-undefine default
    service libvirtd restart
    
  2. Reboot (might not be strictly necessary but if there is a kernel update its a good idea),
  3. Download or copy across the VMware Linux agent. (Currently VMware-horizonagent-linux-x86_64-7.6.0-9857537.tar.gz)
  4. Open a terminal and locate the downloaded agent. Usually in /home/<user>/Downloads/.
  5. Unpack the file.
     tar zxvf VMware-horizonagent-linux-x86_64-7.6.0-9857537.tar.gz 
  6. Change into the unpacked directory
     cd VMware-horizonagent-linux-x86_64-7.6.0-9857537 
  7. Run the installer, type y to accept the EULA
     sh ./install_viewagent.sh 
  8. Add a Firewall rule so that the agent can talk to the Connection server
     firewall-cmd --add-port=4001/tcp --permanent
  9. Reboot your VM
  10. reboot 

CentOS is configured and ready to go.

Horizon View Connection Server – Install and basic setup 1/2.

Apologies to the three people who read this blog regularly,  The last month has been very busy.

So far we have configured a Root CA, and imported a certificate into what will become our first connection server, and a setup a SQL database. Now we are ready to install and do a basic setup our first connection server.

Installing the Horizon View Connection server.

  1. Connect to the server you will be using as your connection server.
  2. Copy across the installer and double click to run.
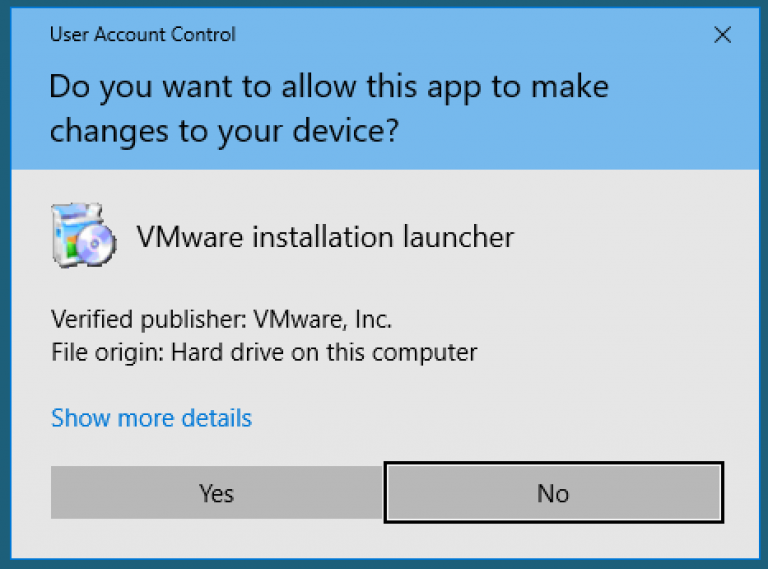
  3. Click Yes. To accept the UAC warning.
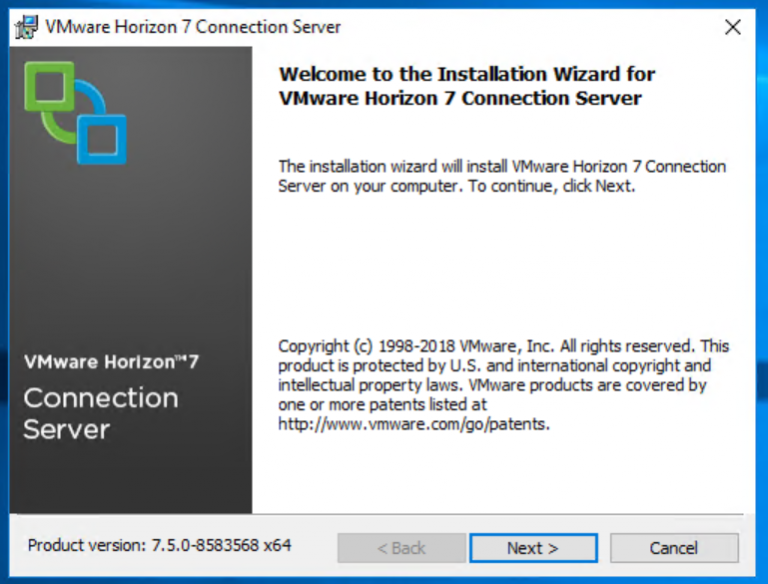
  4. Click Next.
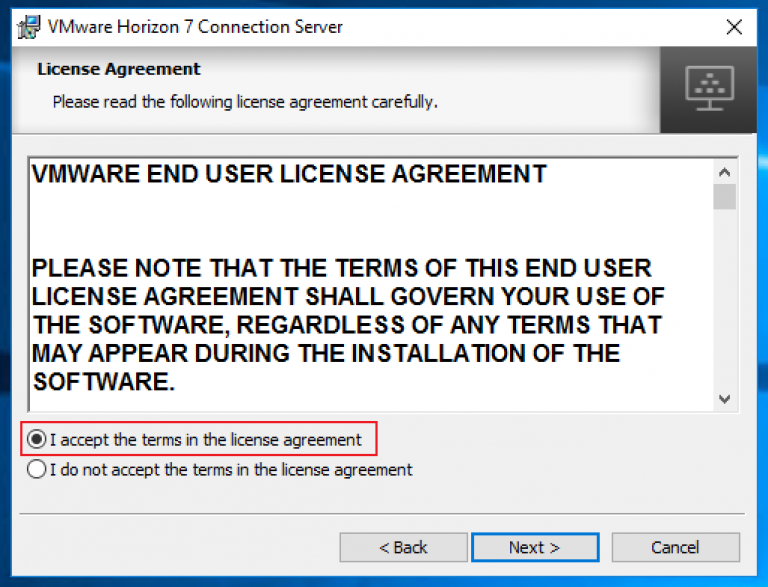
  5. Select “I accept the terms in the license agreement” and click Next.
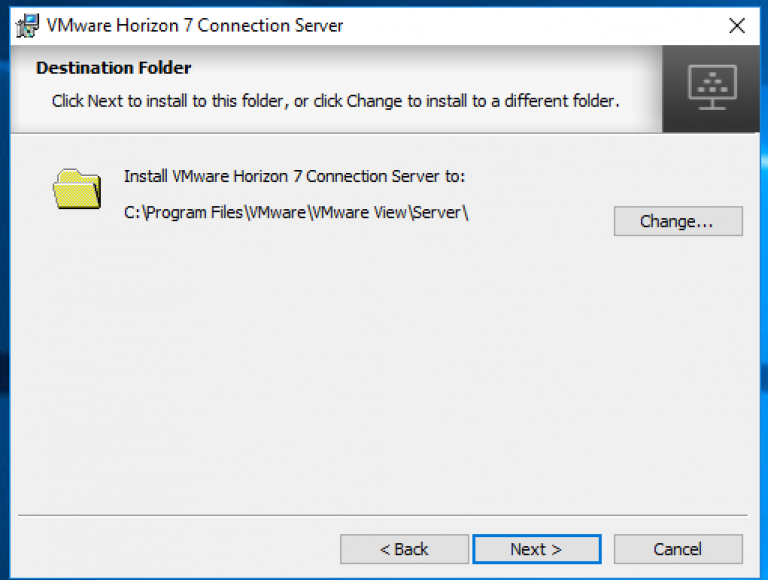
  6. Here you can change the installation location if you prefer. Click Next.
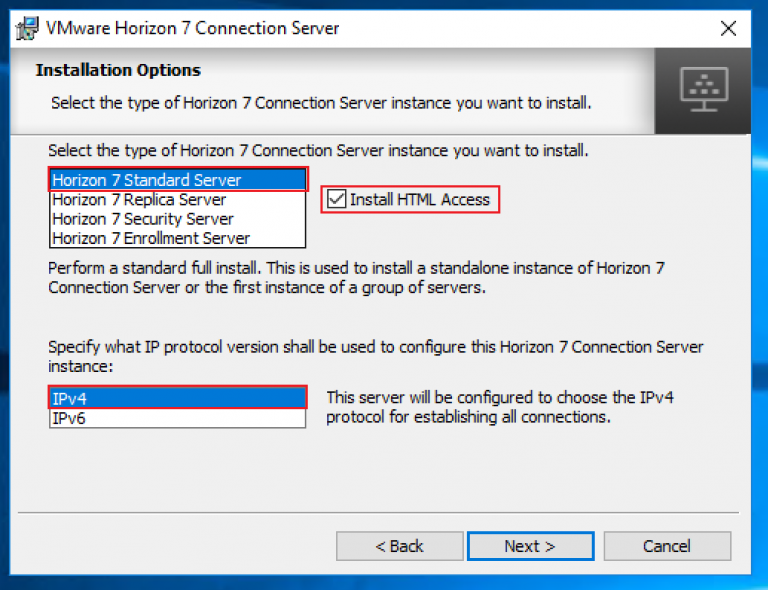
  7. On the Installation Options window:
    1. Select Horizon 7 Standard Server as the install.
    2. Select  “Install HTML Access”, this is technically not necessary but I would recommend it.
    3. Select the IP protocol you use. IPv4 would be the most common I expect
    4. Click Next.
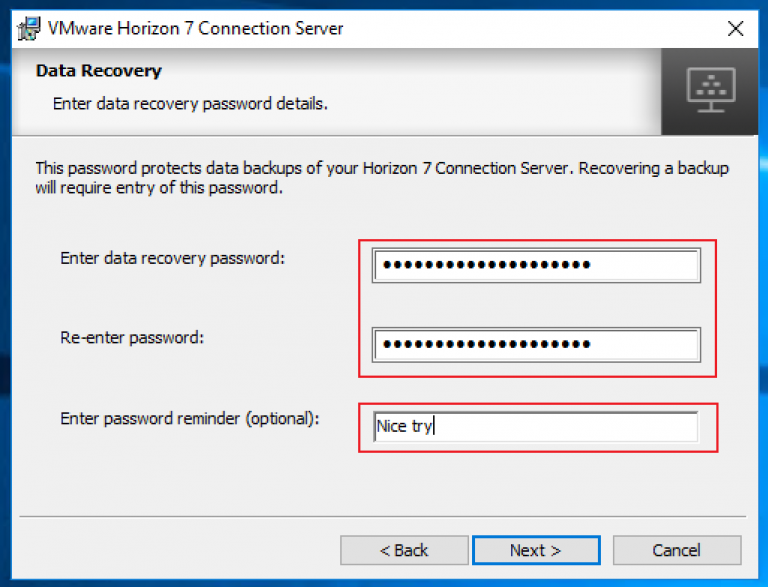
  8. Enter in a password for Data Recovery and a hint if you prefer. Click Next.
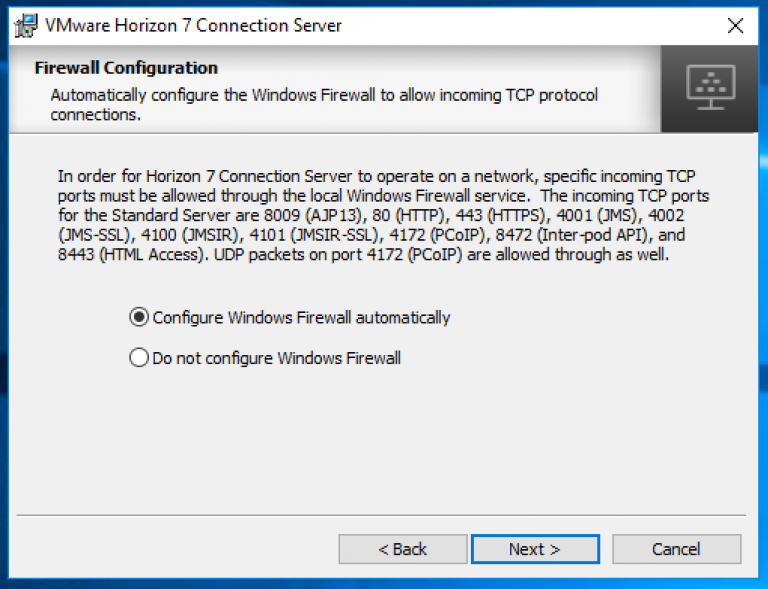
  9. Select whichever is appropriate for your environment, bearing in mind that most companies will have the servers firewall controlled via GPO. So check with your Windows and Security guys. In this case I want the firewall of this server to be configured automatically. Click Next.
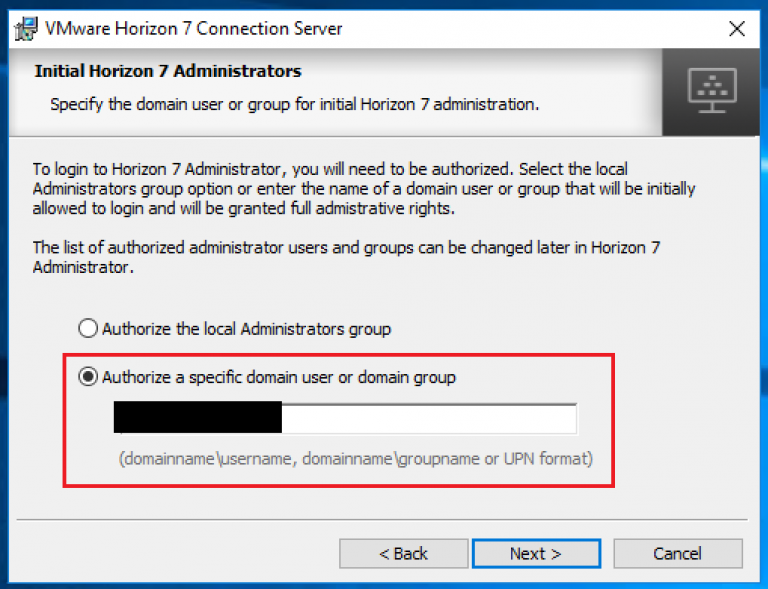
  10. Select whether you’d like the local Administrators Group to have Admin rights to view. This can be changed later but I generally prefer not to from the start. Click Next
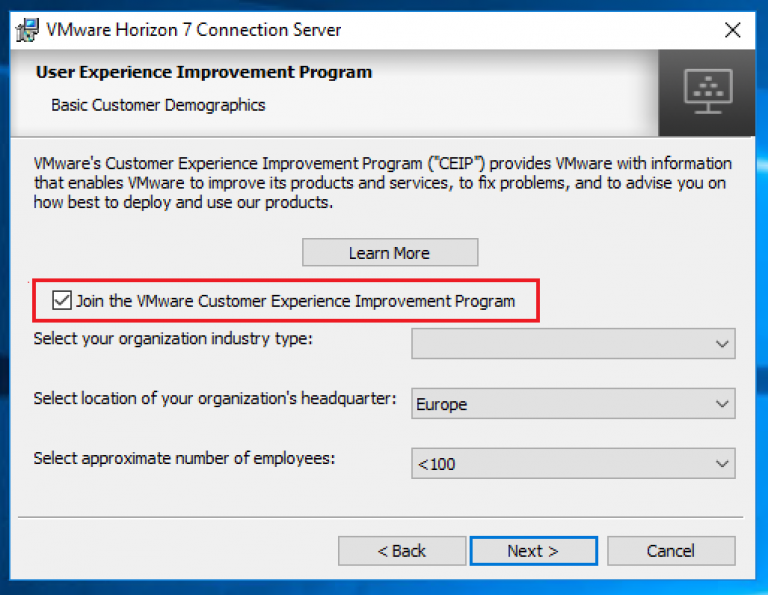
  11. Choose whether you want to join the VMware Customer Experience Program or not. If your company policy allows it I would recommend you do. Click Next.
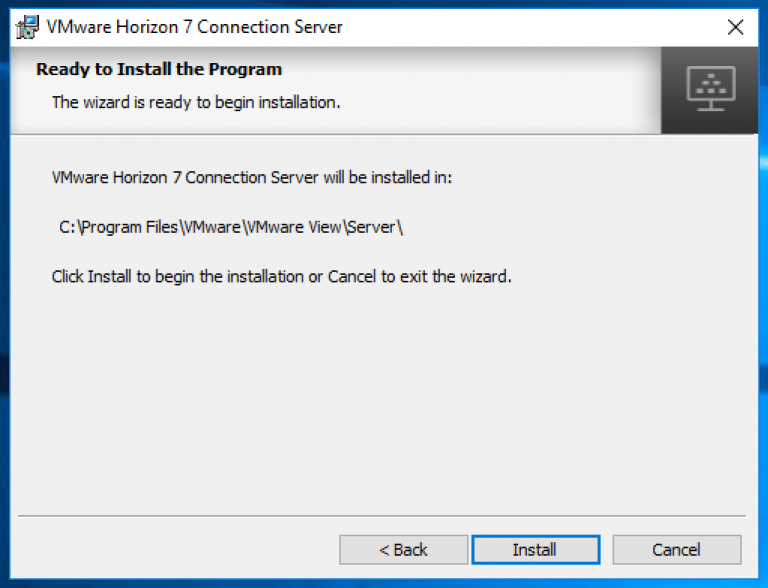
  12. Click Install.
  13. Once the installer is done, click Finish.

Now we have the Horizon View Connection Server installed which can be verified by going to http://<your_full_server_address>/admin.

In part 2 we’ll get the basic config done. Adding a vCenter server, connecting to the events DB and licensing your install.


Preparing for Horizon View – Setting up the Database – 1 of 2

Part 1 of 2

In the first part of this post I’ll go though installing SQL express and the SQL Management Studio.

You can download SQL express here and the SQL Management Studio here.

Installing SQL Express 2017

  1. Copy the SQL Express and Management Studio Files across to the Windows server you’ll be using as your DB server. I’m my case the Composer server is going to double as the DB server.
  2. Connect to the windows server with a user that has been granted local administrator rights.
  3. Locate and run the SQL Express installer.
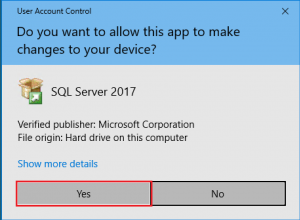
  4. Accept the security challenge. Click Yes.
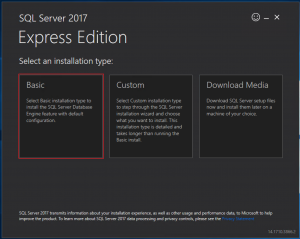
  5. Click Basic.
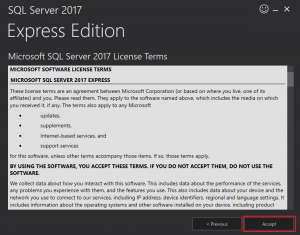
  6. You can read the license terms if you like. Click Accept.
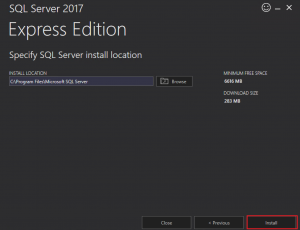
  7. Click Install.
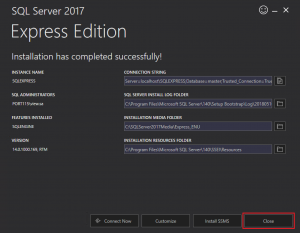
  8. Click Close. You can click Install SSMS. It won’t actually install SSMS, It’ll just take you to the page where you can download the installer

Installing SSMS 2017

  1. Locate and run the SSMS Installer.
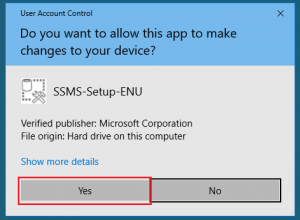
  2. Accept the security challenge. Click Yes.

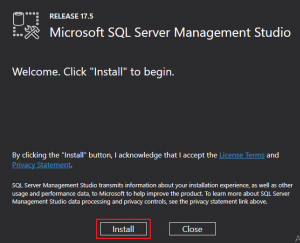
  3. Click Install.
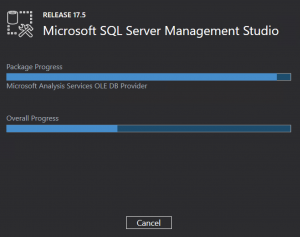
  4. The install will take a good few minutes.
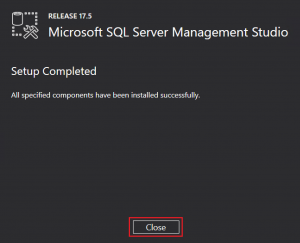
  5. Click Close.

Nice and easy.

Next post. Creating and setting up the databases.

Preparing for Horizon View – Setting up a root CA.

While Horizon View does come with self signed certificates but it is always best, in a production environment, to your own SSL certificates.

I connect to my lab remotely using, either my laptop, or other mobile device and like to know that my connection is secure.

If you don’t want to setup your own cert server Lets Encrypt is a public CA and does offer certificates (wild card certs too) for free. If you do choose to use them please consider donating. They are an opensource and free setup and could use your help.
Installing a root CA.
I used a windows 2016 server for this deployment.

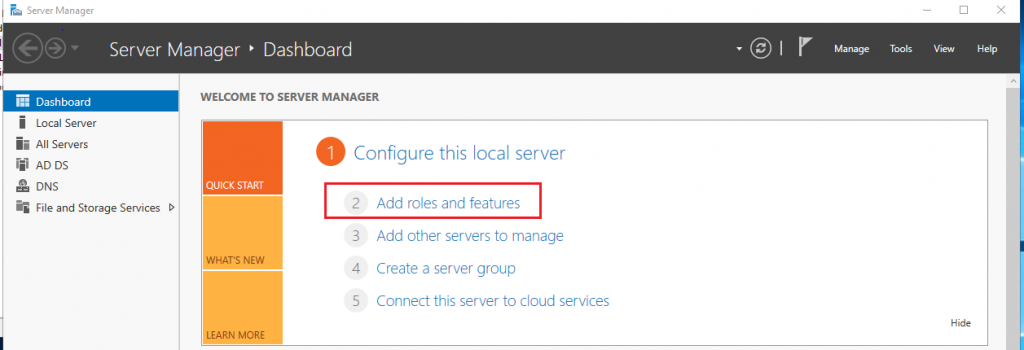
  1. In the Server Manager window click on Add roles and features.
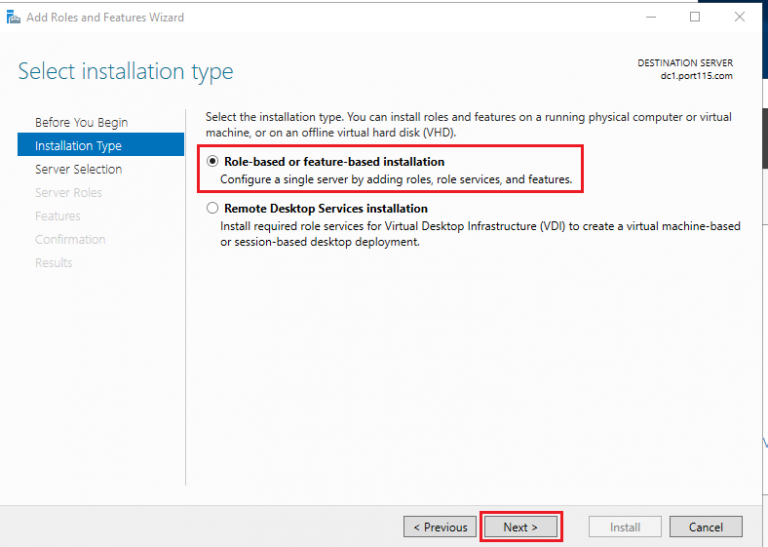
  2. Select Role-Based or feature-base installation and click Next.
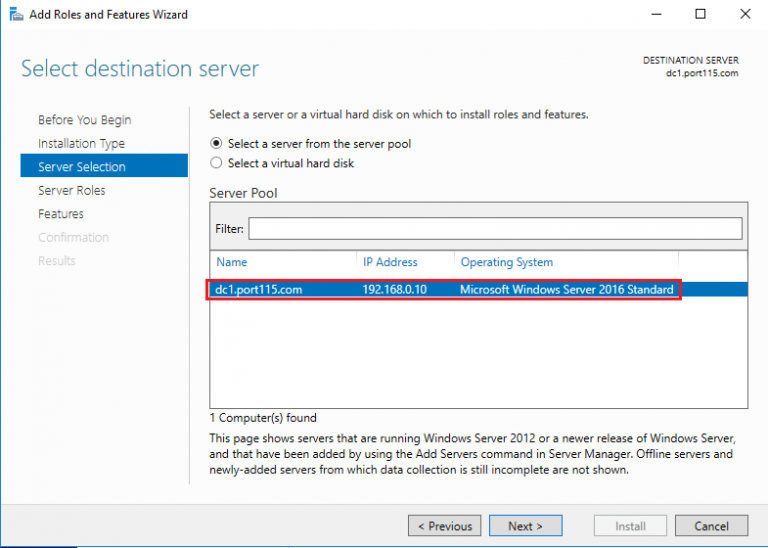
  3. Select the local server and click Next.
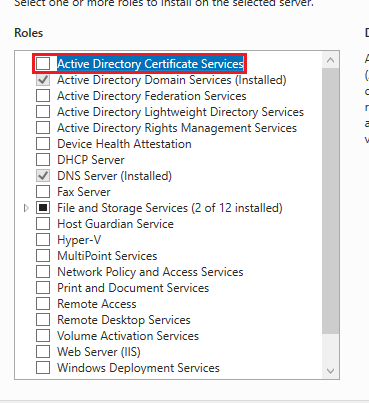
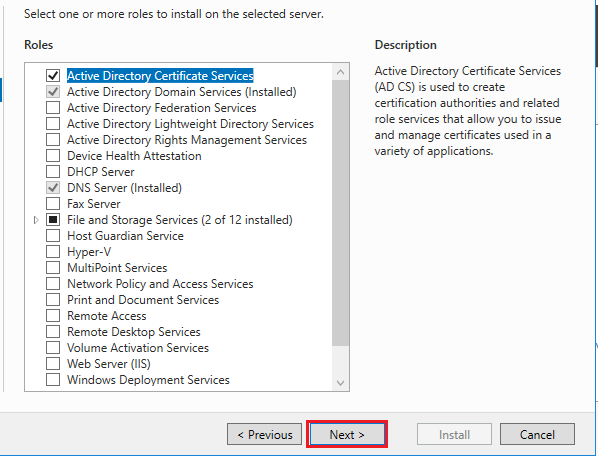
  4. Select Active Directory Certificate Services, and click Next.
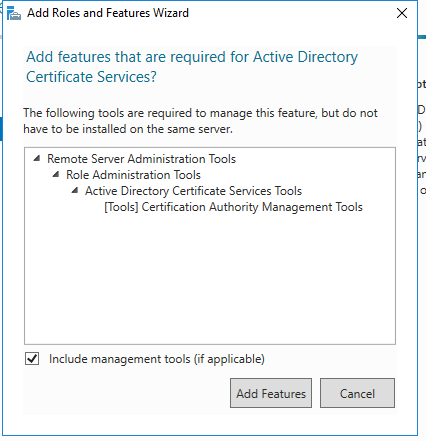
  5. Check Include management tools (if applicable). Click Add Features.
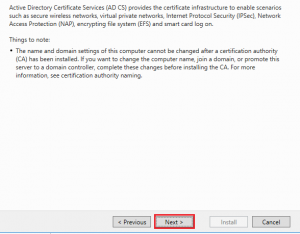
  6. Click Next.
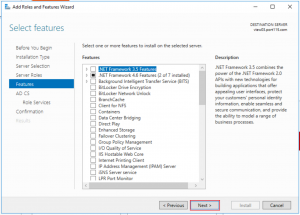
  7. Click Next.
  8. Click Next.
  9. Click Next.
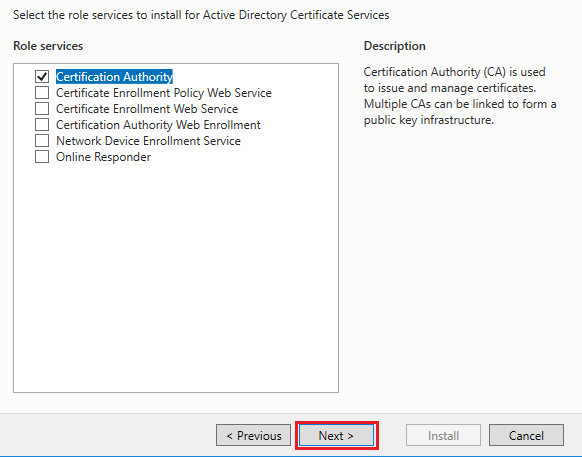
  10. Select Certificate Authority. Click Next.
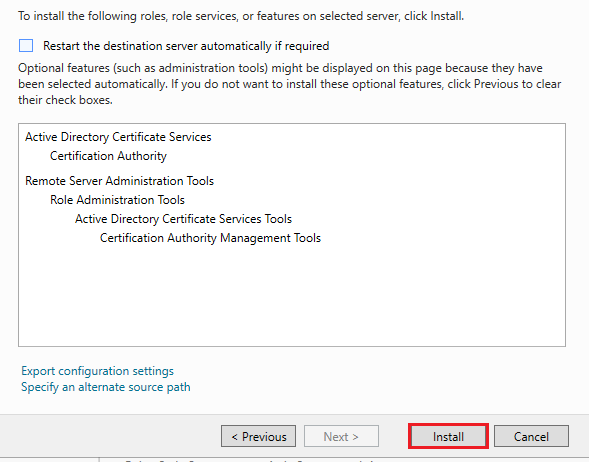
  11. Click Install.
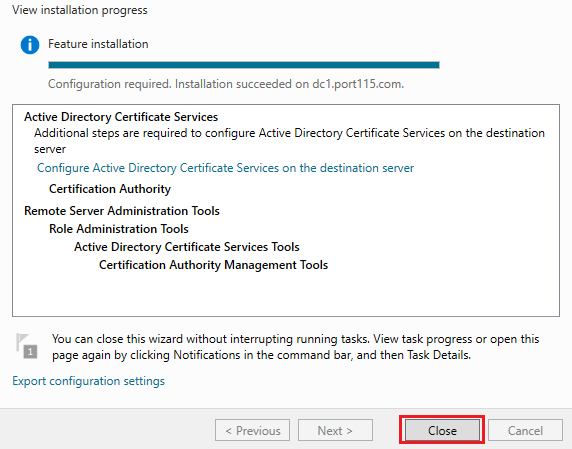
  12. Once the install is complete Click Close.
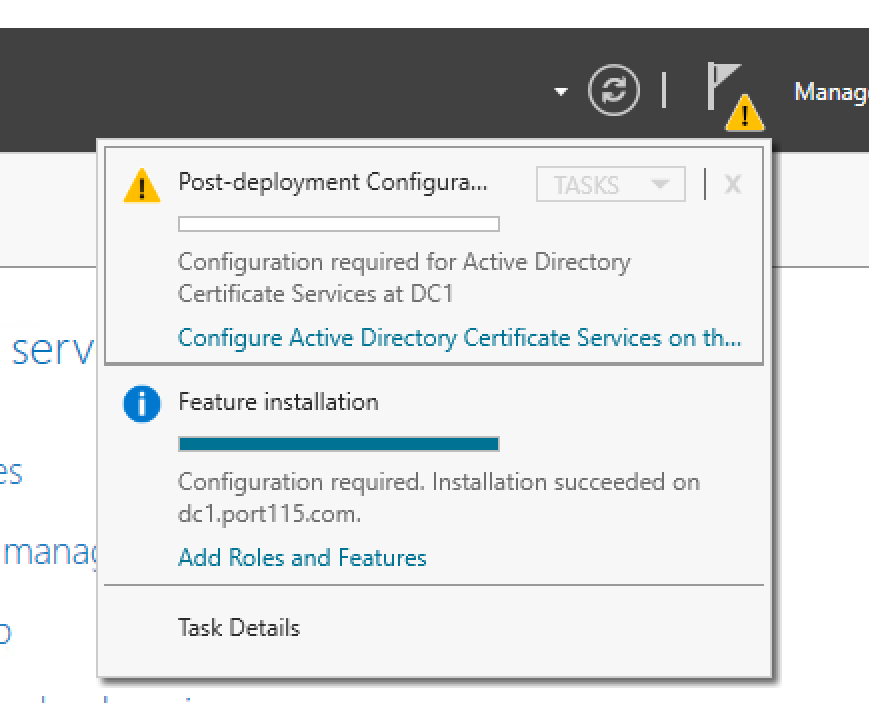
  13. Once the Install is finished we need to complete the post install tasks. Navigate to Server Manager and click on the alert icon. Click on the post deployment task that needs to be completed.
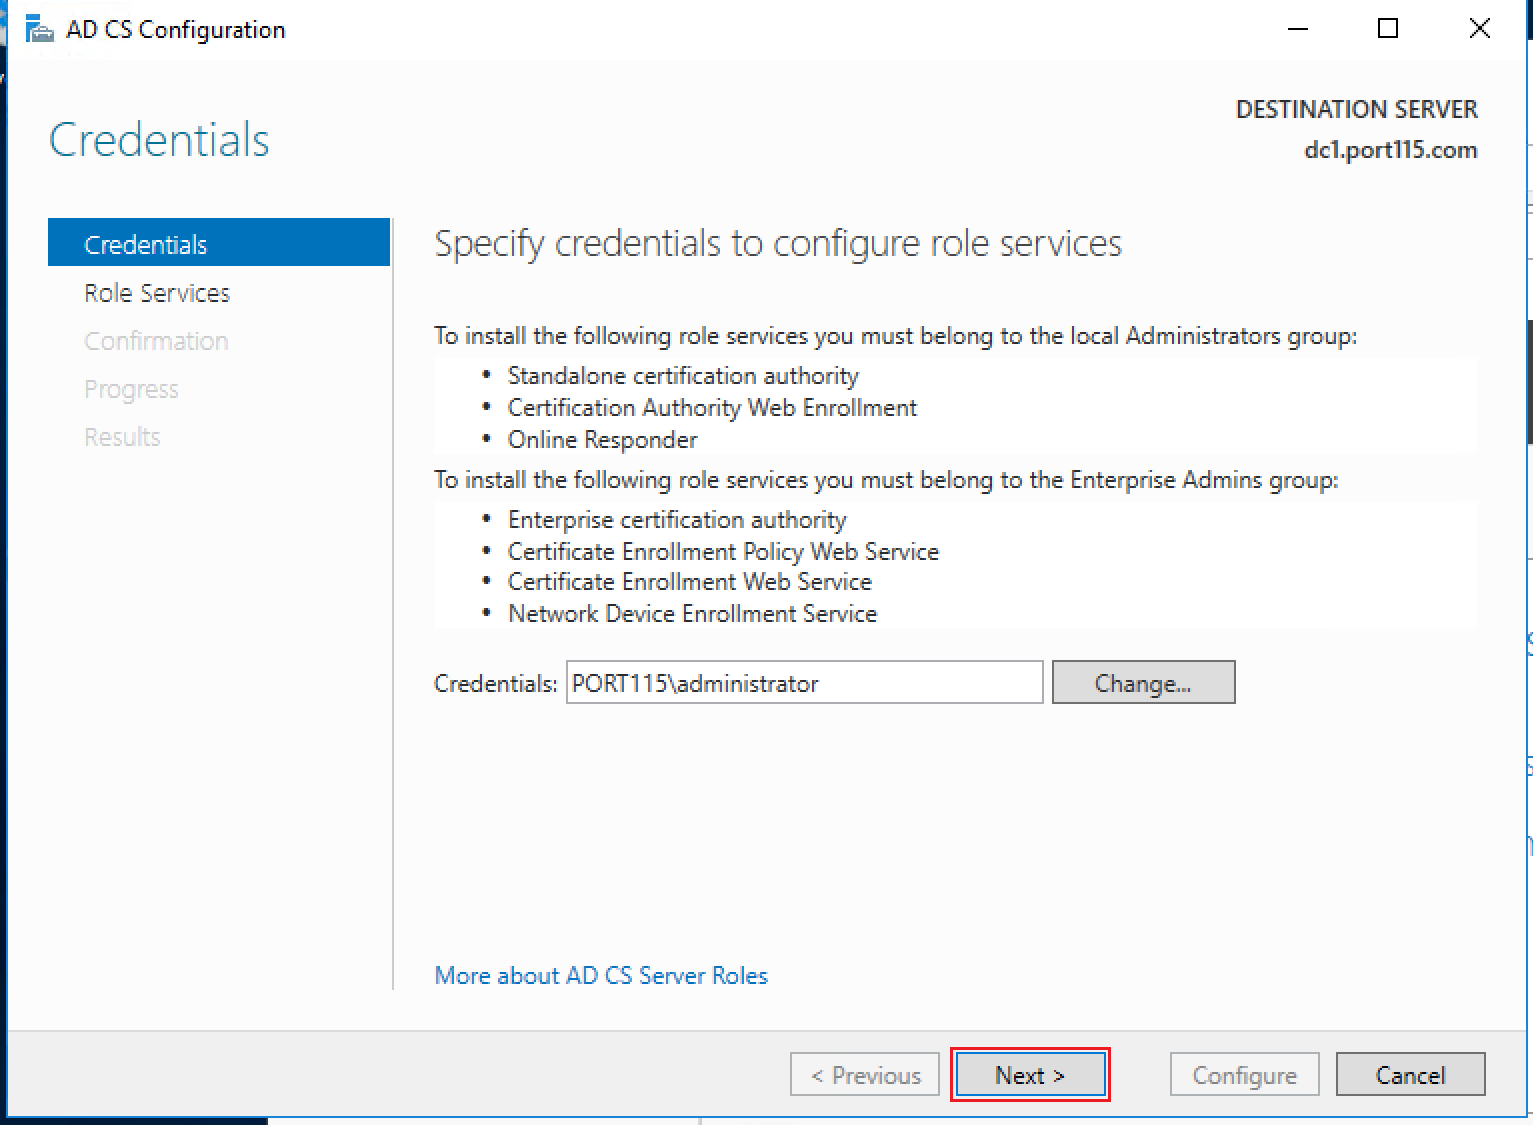
  14. If you need to change the credentials do so here. I just used the creds I was logged in with. Click Next.
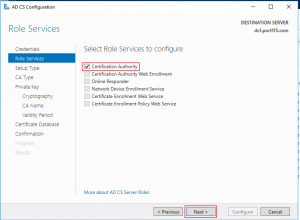
  15. Select Certification Authority and click Next.
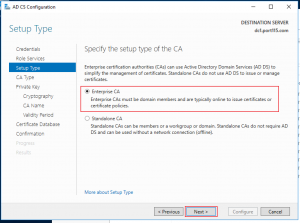
  16. Select Enterprise CA and click Next. You can select Standalone CA if that’s what you need. The options might be slightly different.
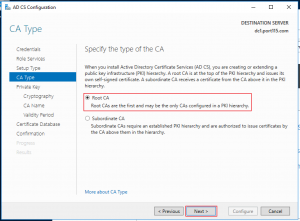
  17. Select Root CA and click Next.
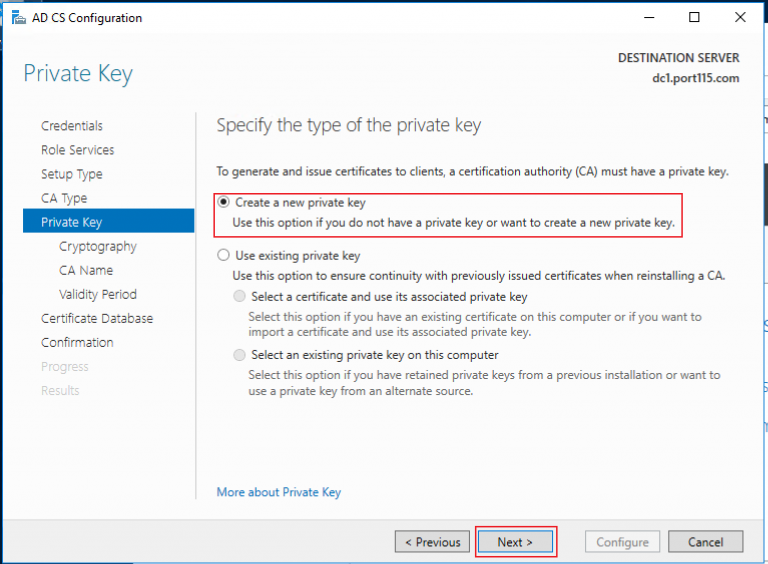
  18. Select Create a new private key and click Next.
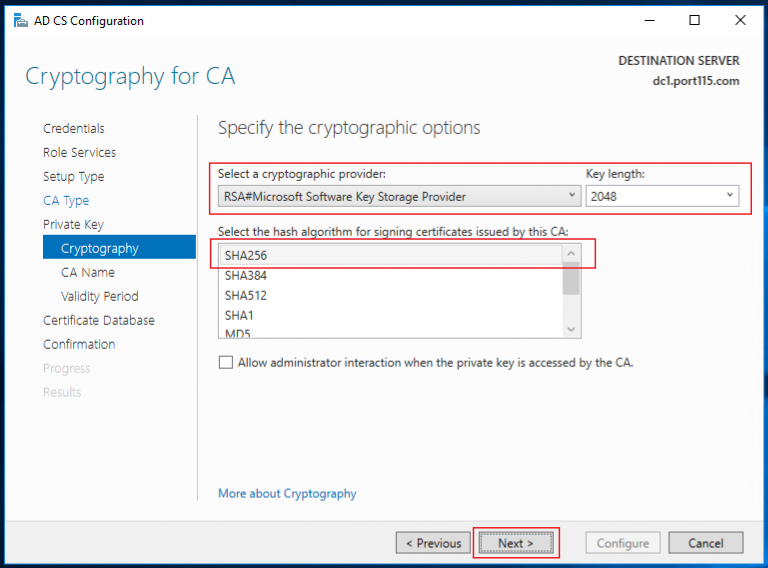
  19. Select the following:
    1. Cryptographic provider – RSA#Microsoft Software Key Provider
    2. Key length – 2048
    3. Algorithm – SHA256
    4. Click – Next.
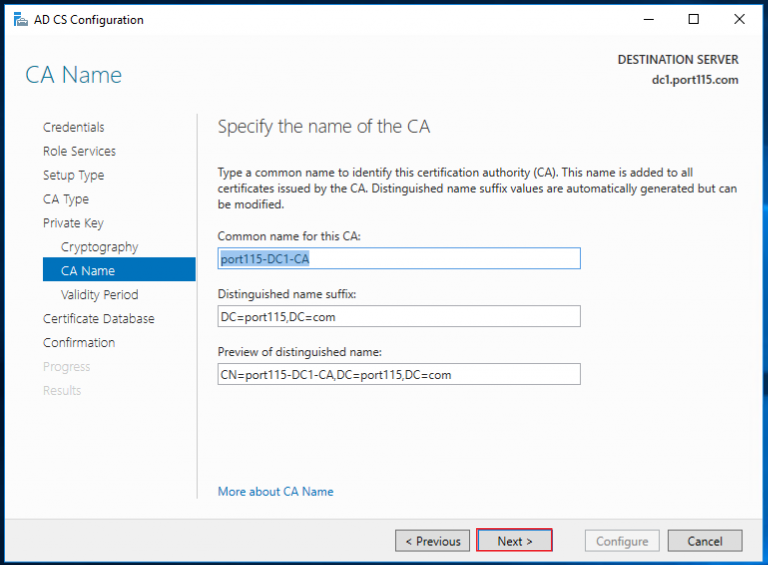
  20. Leave the defaults and click Next.
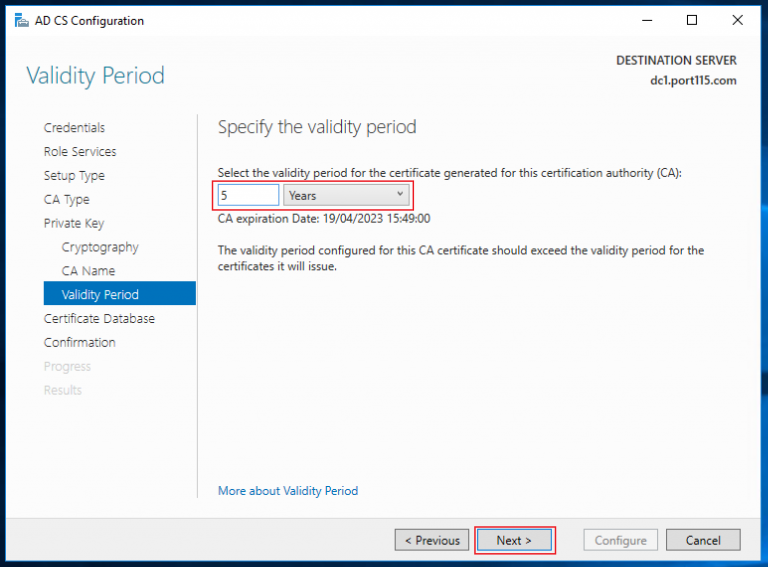
  21. Select the validity period of your certificate. (I chose to leave it at 5 years. In a prod environment you might want that to be less). Click Next.
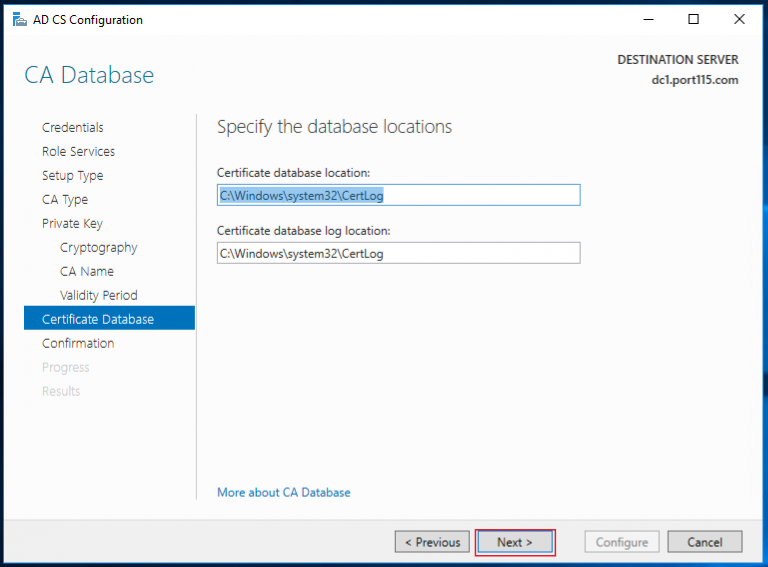
  22. Leave the defaults and click Next.
  23. In the final window check your settings and click Install.

And that’s it, we now have a working root CA!