As a follow up to my previous post, I’ll go through deploying and configuring the Graylog OVA. It’s really, really easy. if face the whole process should only take about 20 minutes before you have a set-up ready to receive logs.
A typical Graylog appliance (OVA) deployment can be broken down into three parts, 1) OVA Deployment, 2) OS network configuration, 3) Configuring an Input.
1 – OVA Deployment.
- Log in the vSphere web client using an account that has permission to configure the environment.

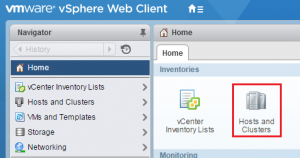
- Select Home and Hosts and Clusters.
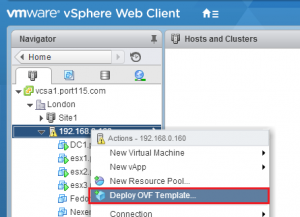
- Right click the cliuster you want to deploy Graylog into and select Deploy OVF template.
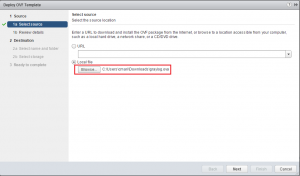
- Select Browse and select the Graylog OVA.
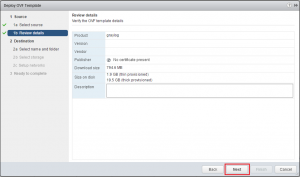
- Select Next.
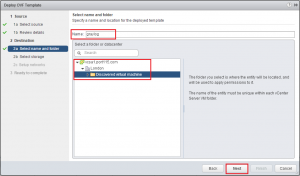
- Give you Graylog OVA a name and select a folder for it to go into. Select Next.
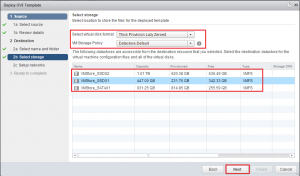
- Select a Virtual Disk Format. Choose a Storage Policy and a datastore to deploy the OVA into and click Next. NOTE: If this is going into production and you anticipate a large amount of logs to come in then you should set your disk format to be Eager Zero Thick.
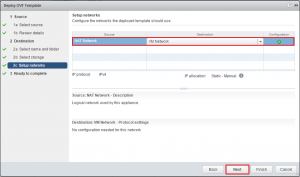
- Choose a network.
- Review your setting and click Finish.
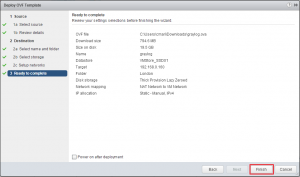
vSphere will go off and deploy your OVA. The above process will take about 5 minutes.
2 – OS network configuration.
The Graylog OVA is based around Ubuntu and is configured with DHCP straight out of the box. If that doesn’t bother you skip this step.
- Open a console to the Graylog VM. Login using the username ubuntu and the password is ubuntu.

- Edit the interfaces file. (sudo vi /etc/network/interfaces). Hit enter.

- Delete iface eth inet dhcp and replace with the following (but customising to your network requirements). exit when done (:wq!)
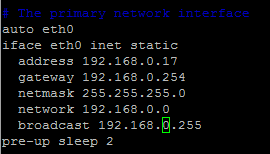
- Next we’ll tidy up the hosts file. (sudo vi /etc/hosts).

- I’ve chosen to keep my hostname as Graylog so all I needed to do was change 127.0.1.1 to 127.0.0.1.

- You’ll need to edit resolv.conf.

- Set the nameserver entries to match the DNS servers in your environment. One for each DNS server you want to use. In addition set domain and search to match your domain.

- Once you’ve done all of that run sudo graylog-ctl reconfigure. This will catch any change you have made that Graylog might rely on.
Its imporant to note here that the graylog-ctl script is quite versatile and allows you to make chages to Graylog, such as change your timezone and admin password, which should be done if you want to push this into a production environment,. Note: If you do make any changes make sure you run sudo graylog-ctl reconfigure.
OK so to be fair the above took me about 10 minutes to do, however if you are not familiar with Linux it’ll take longer but the Ubuntu community is very active and can help.
3 – Input Configuration.
So now we have our Graylog server ready to go, well almost. The amount of inputs that Graylog can receive is quite vast. In addition to the preconfigured inputs you can make your own. We’ll look at configuring the most common. the syslog input for both UDP and TCP.
- Browse to your Graylog server and, if it’s running you’ll be greeted with the login prompt.
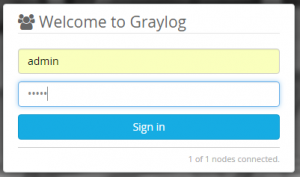
- In the menu bar across the top select System and Inputs.
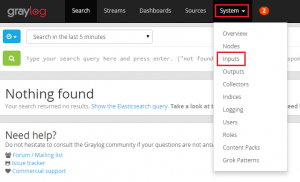
- From the drop down menu under Inputs in Cluster select Syslog TCP and click Launch new input. In the setting box all you need to do is give your new input a name (e.g. Syslog_TCP).

- Setup the same for Syslog UDP.

That’s really as difficult as it gets. Now you have the basic features set-up and configured all you need to do is point the infrastructure you want to log at it.
So the previous two posts only really scratch the surface of what is a really powerful tool. Being an opensource project,the code is readily available for anybody to look at. API;s are exposed and documented, dashboards and alerts can be configured, and custom inputs can be setup, to name a few.
Once more, Good work guys.
Quite old thread, but need to ask did u go into two-node cluster setup with the ova template? First one having the is_master true, the other one false and have the embedded mongo replicated and elasticsearch in cluster?
could you share the password for login page? admin/***